Altec MLTL with Model 19 drivers

Hmm, that's a bit over stated, but coming from a hotrodding/racing background where folks live and die for tiny fractions of improvement in performance, I take the view that while adhering to some theoretical improvement may not be audible or even worth the effort, but if enough of them are adhered to they may sum to something worthwhile.

In the scheme of things, these boil down to potentially reducing the amount of damping required which in turn equates to increased electro-mechanical-acoustical efficiency, ergo potentially less power required, lower distortion.

This doesn't mean much when cabs are small for the BW since you only need it to be rigid/massive, but as panels get large enough to require bracing/damping, one needs to think in terms of high pressure air duct construction for max performance same as a horn or large air handling system.

GM
As the Master speaks, the student listens.....
I perhaps came across as a bit impetuous with "calamity" and such, forgive the phrasing, please.

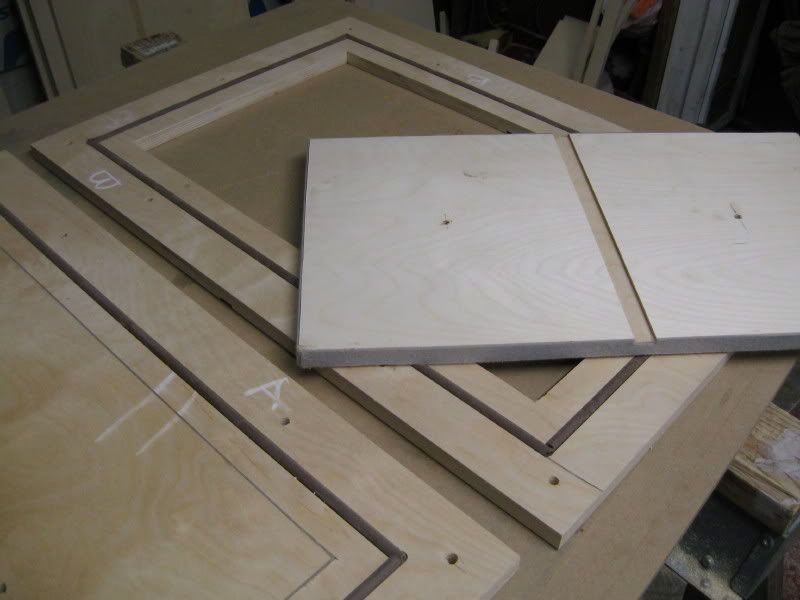
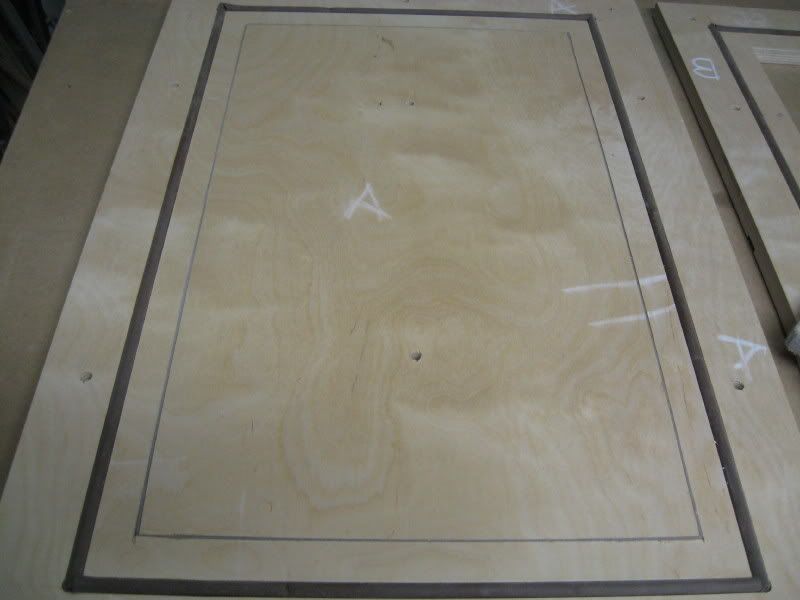
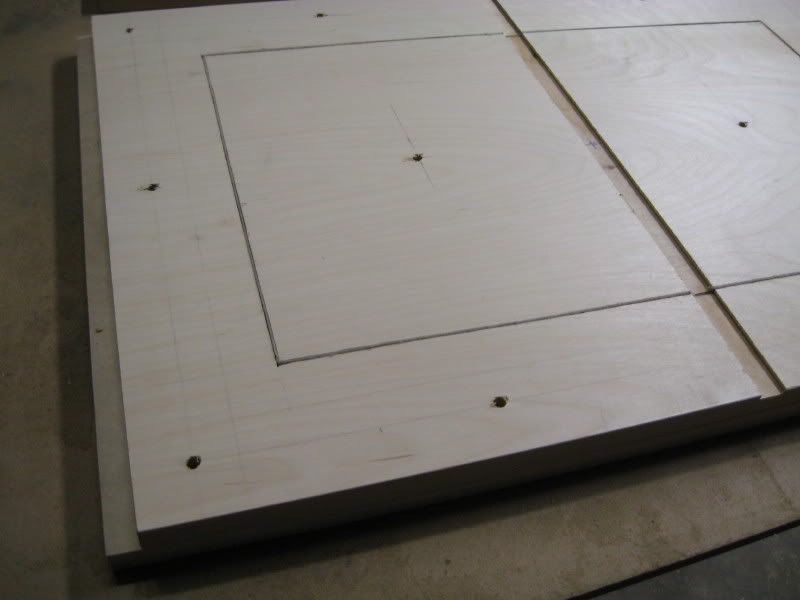
I am all onboard with reduction to achieve the best result. I've given up on installing the side to side plywood window pane style of brace, choosing to dado in two, 2" pieces, horizontally to join with the vertical side panel brace (attached pictures) and the centered window pane brace. These cross braces should hold the side panels into tension and the vertical window pane should do the same for the front and back. The tops and bottoms are doubled and tied to the center brace so that should tie those together.

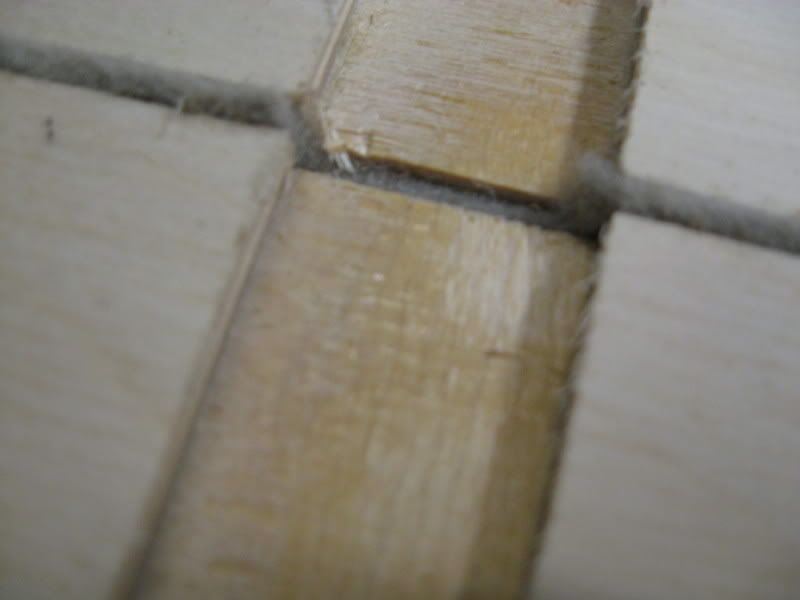
I am about to router the edges on the vertical side panel braces and the cross braces to further a better laminar flow. From the little research I was able to do about flow and turbulence, it seems that if you can provide for less obstruction and provide a greater laminar flow , turbulence is greatly decreased and overall efficiency gains.

BTW, GM, welcome to AK, good to see you posting over here. There are many here that will appreciate your contributions.
 

Attachments

  • IMG_0001_1.JPG
    IMG_0001_1.JPG
    93.3 KB · Views: 84
Last edited:
Just a thought... I've been using my 511's on top of my 19's for the last couple of days without the 811's in the model 19's and reading your progress here and elsewhere. You may want to think about the 511 instead of the 811. They sound quite a bit smoother and even with a 1200Hz crossover point the mids seem more relaxed. The highs are similar but the bass integrates better. The width of the 511 is closer to your cabinet width as well. Looks better, sounds better, may be worth a shot.
Kyle.
It could definitely be worth a shot. I'm not against trying other horns, was thinking about maybe doing a couple of DIY wood horns after I get all of this together. What I have planned for the 811 is a sled mounting with wooden front baffle. The sled will have an adjustment arm so the horn firing angle can be adjusted. I'll also be designing some kind of attachment for the AMT's that ride above the horn but that is going to be toward the end and might be quite simple.

I just discovered that I am really in the grips of aging, I forgot to cut two center baffles. This will mean purchase of another sheet of BB but I would have had to do that to build the horn sleds so nothing terribly lost, at this point. I am seeing that small light at the end of the tunnel, though.:yes:
 
BTW, GM, welcome to AK, good to see you posting over here. There are many here that will appreciate your contributions.

I perhaps came across as a bit impetuous with "calamity" and such, forgive the phrasing, please.

Thanks and not to diss you or the folks here, but can only devote an increasingly limited amount of time to browsing/contributing to the various forums nowadays, so had you not split your thread up............ I mean if folks are interested, they can browse other forums and/or Google to find threads and/or authors of interest in other forums and/or post a link pointing to one's thread on another forum same as me, so splitting up a build thread across forums doesn't make any sense to me.

No biggie, it rapidly became obvious shortly after I joined the on-line audio community in '96 that my main goal needed to be one of snake oil 'slayer' and 'lift the veil of ignorance' as Tom Danley likes to say when/where ever I could while protecting mine or someone else's intellectual property. When I respond to something then, with rare exception I try to give either the most technically accurate answer I can or at least what worked well IME and leave it to the 'gentle reader' to decide how much, if any, they want to incorporate in their design, so it's good for me to periodically explain the whys/wherefores of attention to detail and when it might make enough of a difference to matter.

GM
 
You may want to think about the 511 instead of the 811.

Hear, hear, the 811 was designed as a cost cutting project for an app long since rendered moot and no doubt why the 511 was developed soon after, so for me it was a 'no-brainer' to choose the 511/802/500 Hz XO when I built my first Altec system in '64.

FYI, the lower in frequency one goes with horn loading the better, so many folks opt for large mid horns that require either a tweeter or at least a super-tweeter horn system. Been there, done that and swapped the big horns for another pair of 511/802 to perch on top of the existing ones which allows a ~350 Hz XO to get the fuller mids of the large format horn/drivers (two 802s actually have slightly more radiating area (Sd) than a 288), yet with better vertical polar response of a similar size multi-cell while having the smaller driver's better HF response and much closer coupled acoustic centers to the woofer.

Factor in the typical total cost differences and this tweak is typically quite a bit cheaper to boot!

GM
 
Yeah, GM, I should have linked to the thread at the Altec forum for those wishing to follow both: http://www.hostboard.com/forums/showthread.php?t=197522 There is some information in both threads that is not duplicated. GM also has other designs on the Altec Forum, some dealing with Model 19 variants, 604's and a host of other designs including a dual woofer design being built by member Altec Best.

Thanks for your continued interest in this, GM. I am producing copious amounts of sawdust, I hope it is all worthy of your design.
 
More router work...

I have nearly all of the dados cut on the panels, only the ones in the center brace need to be done and I am tackling that piece last.

Attached pictures show the 1/8" dado to accept bracing. I also did the cut out for the woofer, using my DIY acrylic circle jig. You can see from the pictures how I drill a hole in the jig for the radius of the circle and attach the jig onto the work. I set the plunge base in the same manner as I posted about before and use the stepped turret, 1/8" at a time, until I have cut through the plywood. Since I nail the center pivot into the sacrificial table below the work, the center cut out piece doesn't move at all when the bit has completly sliced the hole. The bigger part of the plywood is also clamped to the table. Test fit showed a perfect fit!:yes:
 

Attachments

  • IMG_0002.JPG
    IMG_0002.JPG
    76 KB · Views: 77
  • IMG_0004.JPG
    IMG_0004.JPG
    88.1 KB · Views: 83
  • IMG_0007.JPG
    IMG_0007.JPG
    89.1 KB · Views: 75
  • IMG_0008.JPG
    IMG_0008.JPG
    77.6 KB · Views: 77
  • IMG_0010.JPG
    IMG_0010.JPG
    101.6 KB · Views: 79
Can't wait to hear these. Keep the tips coming Lance, love the DIY circle jig.

GM has done some p,and for 604's you say. I better get over there and do a little digging.
 
Yeah, GM, I should have linked to the thread at the Altec forum for those wishing to follow both: http://www.hostboard.com/forums/showthread.php?t=197522 There is some information in both threads that is not duplicated. GM also has other designs on the Altec Forum, some dealing with Model 19 variants, 604's and a host of other designs including a dual woofer design being built by member Altec Best.

Thanks for your continued interest in this, GM. I am producing copious amounts of sawdust, I hope it is all worthy of your design.

We're certainly lucky to have individuals, like Greg, to help us through some of the more esoteric aspects of speaker design that just aren't very intuitive and can only be understood as a result of a great deal of experience and thought.

He has done a number of designs, based on his own experiments and hard gained knowledge which he has willingly shared, along with his excellent advice, with many, many others (including myself) over the years.

Best Regards,
TerryO
You got it, I am counting my lucky stars that GM is so giving of his design help and construction techniques.

Having a little more router fun. :zoom:

I was working on the bottom access hatches, this is a removable bottom that bolts to a permanent inner panel. The cut out from the inner panel will be clad on the edge with felt and bolted to the bottom. I routed a channel into the inner panel on the bottom side to fit a gasket that will insure there isn't any air leaks. The gasket is EPDM and is formed in a "D" shape. I tested the compression of the gasket and when the bottom panel is bolted into t-nuts, the gasket should compress into the channel and seal the two panels.

I cut the inner panels with a circular saw and then finished the cuts with this Katana saw. These Japanese pull saws are really cool, saved me in more than a few situations.

I've been saving the most complicated panel until last, the central brace. I will mount the woofer and get some accurate measurements in a bit. Does anyone have an opinion on sealing the surfaces of the plywood interior before assembly? I don't see it usually done.
 

Attachments

  • IMG_0004.JPG
    IMG_0004.JPG
    75.8 KB · Views: 56
  • IMG_0003.JPG
    IMG_0003.JPG
    95.3 KB · Views: 63
  • IMG_0002.JPG
    IMG_0002.JPG
    82.6 KB · Views: 58
  • IMG_0001.JPG
    IMG_0001.JPG
    83.3 KB · Views: 57
Shell-lac. Not the ordinary off-the-shelf stuff , but the actual flakes dissolved in alcohol. It will seal the wood, stiffen it just a bit, will make you happy that it looks so nice every time you crawl inside the cabinet and may even improve the sound a shade. You can then do the outside with a French Polish using the same stuff.

Just the same, it will definitely seal the wood and that's nearly always a good idea.

Best Regards,
TerryO
 
fascinating stuff Lance. I'm glad you have this thread on AK in addition to Altec. While I'll never attempt this build nor am I all that interested in the hairy details, the process and watching a capable craftsman at work is very interesting.
 
Subsurface hatch access (SHA, my addition to this project and soon to be sold only in the finest speaker emporiums :D) is done except for installing the T-nuts. I will be epoxying them in, later.

Hatch cut out with felt edge and bottom of panel with gasket:
IMG_0002-3.jpg


Bottom of inner panel with cut out reinstalled:
IMG_0001-2.jpg


Both doubled bottom pieces together:
IMG_0004-1.jpg


Felt detail in dado for center brace:
IMG_0006.jpg


Terry, I don't have any dry shellac but could I use a good sanding sealer? I also have some Waterlox but if I use a tung oil product I'll have some cure time.:sigh:
 
Eased bracing on the router table and cut the vents, I hope I have them in the right place, 2" from the bottom of the front panel edge which means 1 5/16" above the bottom of the interior. I thought I'd leave a little wiggle room in case I have to lengthen the vent. If I cut it down to the bottom of the cabinet, it might be harder to build out or lengthen the vent.
 

Attachments

  • IMG_0001 (9).JPG
    IMG_0001 (9).JPG
    133.7 KB · Views: 83
  • IMG_0002 (8).JPG
    IMG_0002 (8).JPG
    128.1 KB · Views: 69
  • IMG_0001.JPG
    IMG_0001.JPG
    74.1 KB · Views: 60
  • IMG_0002.JPG
    IMG_0002.JPG
    72.5 KB · Views: 66
Back
Top Bottom