

You are using an out of date browser. It may not display this or other websites correctly.
You should upgrade or use an alternative browser.
You should upgrade or use an alternative browser.
Altec MLTL with Model 19 drivers
- Thread starter westend
- Start date
Altec Best
Well-Known Member
Great, sure is cool to have a resource like Bill and GPA. It will be interesting to see what you get out of the dual-woofer design, I bet it will blow your socks off!:thmbsp:
That's the Plan ! :yes: Lance it looks like you are progressing rather quickly,you must be getting 8-10 hrs a day into those Bad Boys !

I was thinking about Binding Posts as well.But since my XO's are going to be external.I may just for go them all together.Hard wire the inside of the cabinets and drill a hole just big enough for the wire and then fill with adhesive sealing up the cabs.The best binding posts are "No Binding Posts" just one less connection to the drivers. Haven't decided yet. :scratch2:
All the Best ~ John
westend
Audiopile
AB, I'm pouring a lot of time into them, that's for sure. If I think of the amount of time I plan to be sitting in front of them, though, it's easy to rationalize the time spent. Hell, I just love this kind of stuff!That's the Plan ! :yes: Lance it looks like you are progressing rather quickly,you must be getting 8-10 hrs a day into those Bad Boys !
I was thinking about Binding Posts as well.But since my XO's are going to be external.I may just for go them all together.Hard wire the inside of the cabinets and drill a hole just big enough for the wire and then fill with adhesive sealing up the cabs.The best binding posts are "No Binding Posts" just one less connection to the drivers. Haven't decided yet. :scratch2:
All the Best ~ John
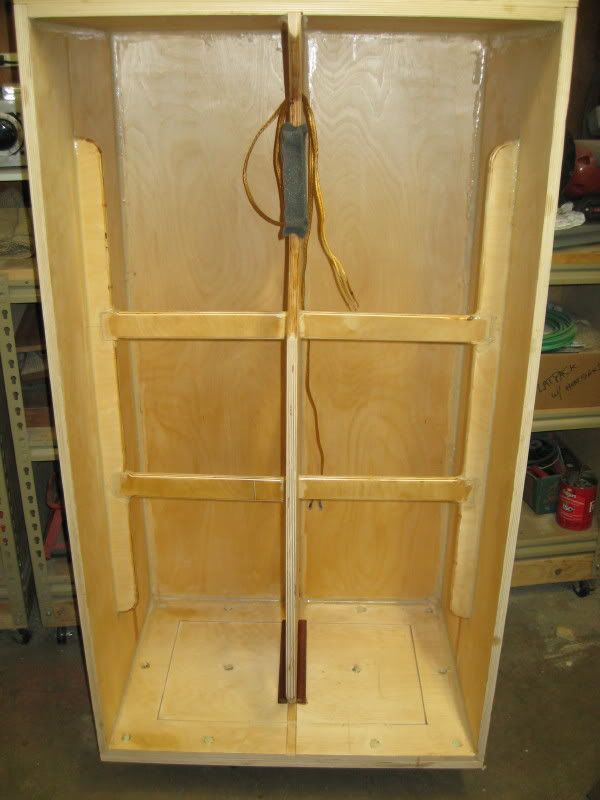
I thew in a pair of plastic long shaft binding posts I had hanging around. Of course, I had to use that vacuum cryo'd carbon silicone/silver wire drawn by Russian Cosmonauts, mfg. only on the Equinox under a full moon..............................not..... used 14 ga. copper.
I didn't have the heart to put the front on without somehow sealing up the interior surfaces so I broke out a gallon of sanding sealer I had and brushed on a coat. Papa don't want no warping around here!
Here ya go, DJ:

westend
Audiopile
Thanks, it's a lot of fun, really. If they don't sound good, I'll have a couple of big sub boxes, lol.Lovely. Looks great.
Me too!:yes:
Can't wait to hear these beasts Lance!
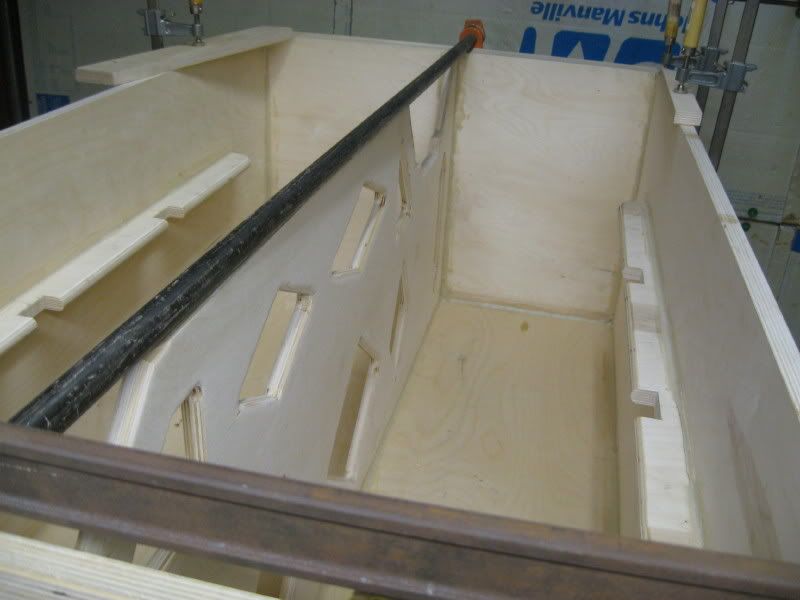
I'm sitting around waiting for glue to dry. The good news is that one more panel is out of the way. I have no idea if the amount or kind of stuffing in these is going to make the grade but it will be easy to replace, add, or remove, if necesary.
Shout out to the Range guys for showing me that weight is a clamp, too!
BTW, if anyone ever sees the bottom (the part with all the screws) of these again, it will be covered, I'm long on felt, this week.
Attachments


Last edited:
westend
Audiopile
yo yo bro. you'll be bustin' out those Justin Bieber albums soon nuff, so chill and take a pill Eh!
Looking fine lance, you must be bustin' out the saw cause them cabs is rollin' along real good.
Heh, Justin Bieber ain't got what I'm lookin' for...

Matter of fact, I'm listening right now to my test disc, Parlaiment, "Gloryhallastoopid or pin the tail on the funky"

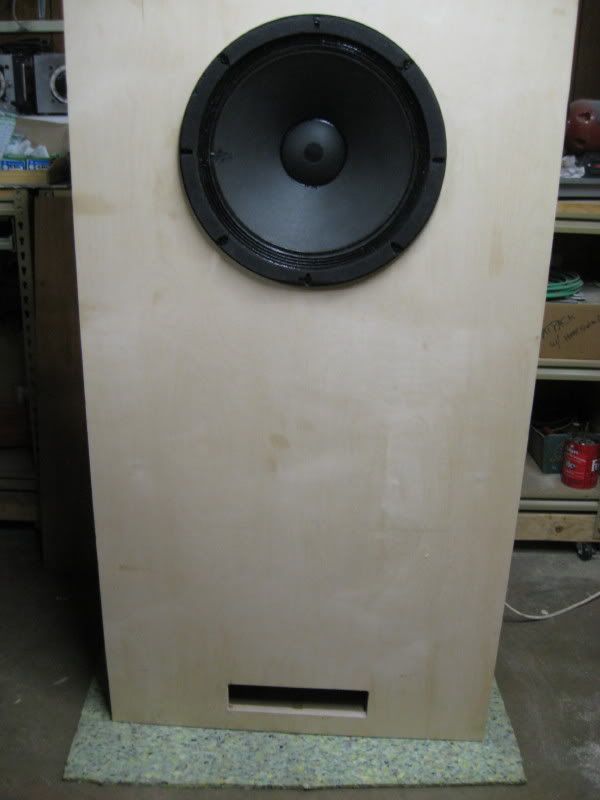
Not using a crossover, just pushing the 416 with the NAD shop receiver. I threw Parliament in because the prominent bass lines will give me an idea what's going on with the cabinet. I am pleased so far, the "West Coast" boom is gone and there is a much tamer rolloff. I'll reserve further comments for more critical listening. The shop is not that great a listening environment, also. I might whack together a simple crossover so I can push the woofer a little bit more.
Another little discrepancy to deal with when I mounted the woofer, the cradle was too tight on the top of the magnet mounting surface. Dozuki to the rescue, again. I took some time to add a couple of wood shims to the center brace cradle, reinstalled the foam on the cradle, and mounted the woofer. I got a very good fit and think the cradle is now loading the woofer to the cabinet well.
Parliament:"It's about big fun.."

Attachments

Russellc
Addicted Member
AB, I'm pouring a lot of time into them, that's for sure. If I think of the amount of time I plan to be sitting in front of them, though, it's easy to rationalize the time spent. Hell, I just love this kind of stuff!
I thew in a pair of plastic long shaft binding posts I had hanging around. Of course, I had to use that vacuum cryo'd carbon silicone/silver wire drawn by Russian Cosmonauts, mfg. only on the Equinox under a full moon..............................not..... used 14 ga. copper.
I didn't have the heart to put the front on without somehow sealing up the interior surfaces so I broke out a gallon of sanding sealer I had and brushed on a coat. Papa don't want no warping around here!
Here ya go, DJ:
Looks like you are starting to get close, very close. Excellent work, and boy, those things are larger than I thought you were talking about. They should be very, very nice.
Russellc
westend
Audiopile
Holy Macaroni that's a big freakin' cabinet! Can't believe your listening to music already, way to go Lance. Those wood clamps leave such a nice screw free surface it just looks real clean.
Yeah, Shawn, one of my criteria was to use no fasteners in the outside of the cabinet. I haven't found a filler that will work for even pin holes in Baltic Birch. I always end up with a lot of white dots.
Actually, their size seems to be diminishing as I look at them more. This was directly opposite to the impression of the Polish Princess. Her Highness tried to lay down a Royal Edict as to their placement but I have overcome that with some Court intrigue and a couple of promises to finish up on her other projects. Actually she tolerates my audio interests well.
Looks like you are starting to get close, very close. Excellent work, and boy, those things are larger than I thought you were talking about. They should be very, very nice.
Russellc
RusselC, one of the biggest improvements over the stock 19 design, IMO, is getting the woofer up to a better listening position. This shows up quite a bit when pushing the woofer full range like I'm doing now. In an 828 cabinet the woofer is also up from the Model 19 position.
A Model 19 user could build up the base or set the cabinet on stands but he would have to do some tweaking, electronically, to get the west coast hump down. These cabinets seem to have solved that entirely.
This is based on just initial impressions but I think we have a definite winner. I will wait until I have a pair of these playing and hooked up to the F5 with active crossovers and better source material, to definitely give them a rating. I like what I'm hearing!:yes:

westend
Audiopile
Dude!!! there is no moss under your feet. Great progress.
Thanks for the encouragement, DJ. I know myself too well and if I don't stay on a project, it sometimes never gets done. My Rek-O-Kut plinth, a year in the making, is an example. I'll get to it.
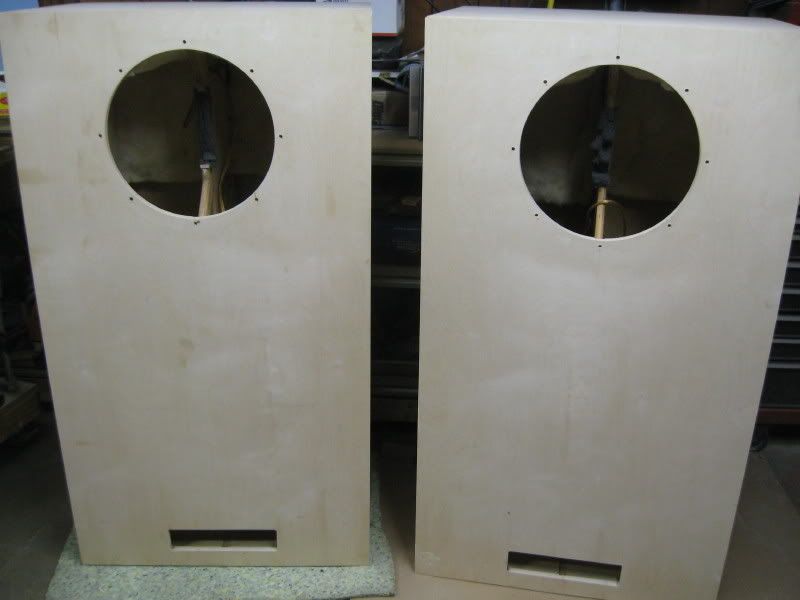
Well, the second cabinet is done to the point of finishing. I am doing the last bit of felting the bottom hatch and then this one will be lowered to the floor.
I should probably mention this if someone else is embarking on a cabinet build this large: planning out your construction moves is essential, if you're a one man crew. These are heavy cabinets and you just can't move them up and down off sawhorses, alone. Not if you wish to keep them in one piece, anyways. My son helped me in the final move getting them off the horses.
Next piece of the speaker puzzle will be making the horn sleds and that should prove to be less of a weight-training regimen. I'm thinking of a "shelf" that will be attached to the top of the horn front baffle. This will be for the Heil tweeter. I will try my hand at Sketchup, again, and see if I can draw the depiction of this. If anyone has an idea about the sled, please, pass it along. I want to incorporate a raising mechanism to the back section of the horn that will allow to put the horn on an acute downfiring angle.
BTW, I'm ashamed to show the burned cut on the center brace bottom, I trimmed it with a less than sharp circular saw blade.
Attachments


westend
Audiopile
Understood, all to well. It's like one of the many great tradesmen that have taught me, said," Putty and paint make a carpenter what he ain't".I'm just as proud to show a burn mark as I am to fill all the imperfections with bondo.
I have two cabs on the ground :yes:
I will be finishing these and working on the horn sleds as time allows. It is tax time and that means I will be sorting through a lot of papers in the next couple of days (the most onerous thing :gigglemad). I will need some sort of relaxation during the endeavor so won't leave this project undone.
westend
Audiopile
Yup, been there. What kind of finish are you using these days, Gary?
Wood filler is a mans best friend. Slap a little veneer or paint over the top and you are set. That's how I roll.