For the past month or so I've been spending a lot of my free time working on my C-1 2 channel preamp. I got the itch to refurbish it due to spending time at the Carver forum http://thecarversite.com/. For that I'm extremely thankful. There are a few members there that have answered questions I've had regarding upgrading this unit. I was especially encouraged when reading some of BillD's threads and seeing what he could do with this really decent preamp. RichP's test measurements of Bill's modded unit also gave me that extra nudge I needed to get serious about this project. And I do mean project.
First off, let me start with a little history:
I purchased my C-1 used on Ebay a few years ago (don't remember exactly when) and it was my primary preamp for a couple of years after that. I used it with an NAD 2200PE power amp. I've always liked this preamp because of it's flexibility and numerous inputs. I always thought it sounded good but knew it was capable of being better. I just couldn't see spending money on it because of its age and cheap selling prices on the auction site.
About 3 years ago I purchased an RSP-1 preamp because I had upgraditus and felt that I was missing something. I was right. The RSP-1 had a fuller midrange and just sounded smoother overall. Plus the remote control functionality was a nice bonus.
Anyway, back to the subject of this thread.
I recapped the C-1 a year or so ago. I used Panasonic FC caps throughout and replaced the IC7 with OPA2134's on a Brown Dog adapter. I didn't use bipolar caps in the signal path because at the time I didn't want to question the designer. After all, who knows better than the person that designed the equipment?
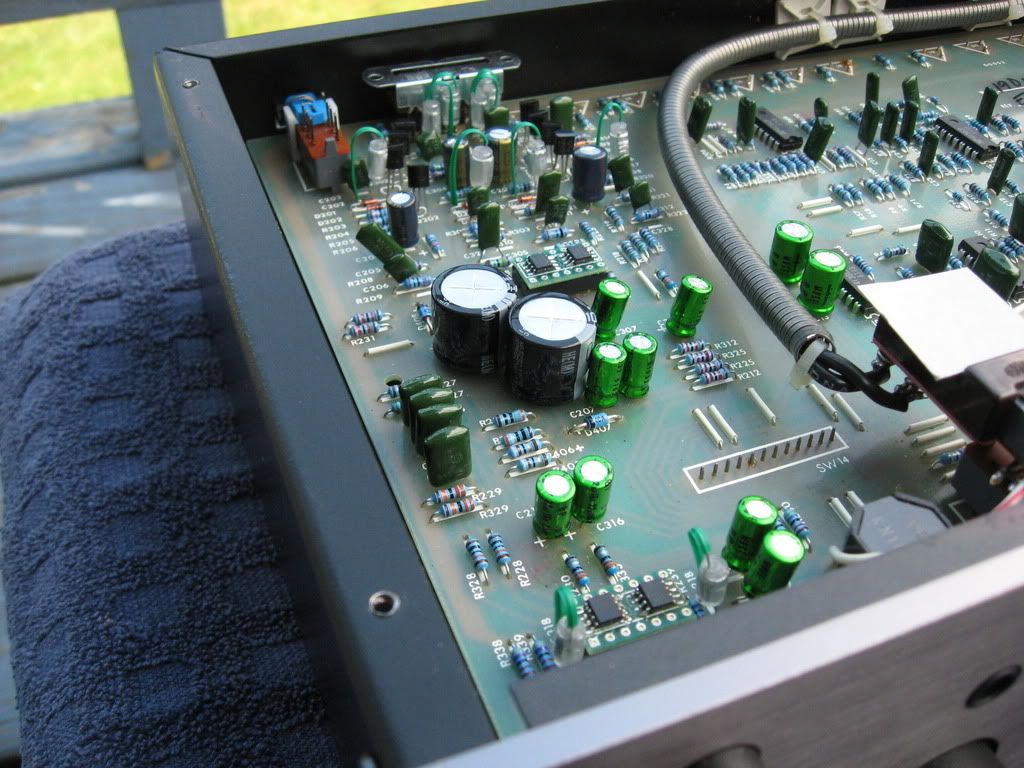
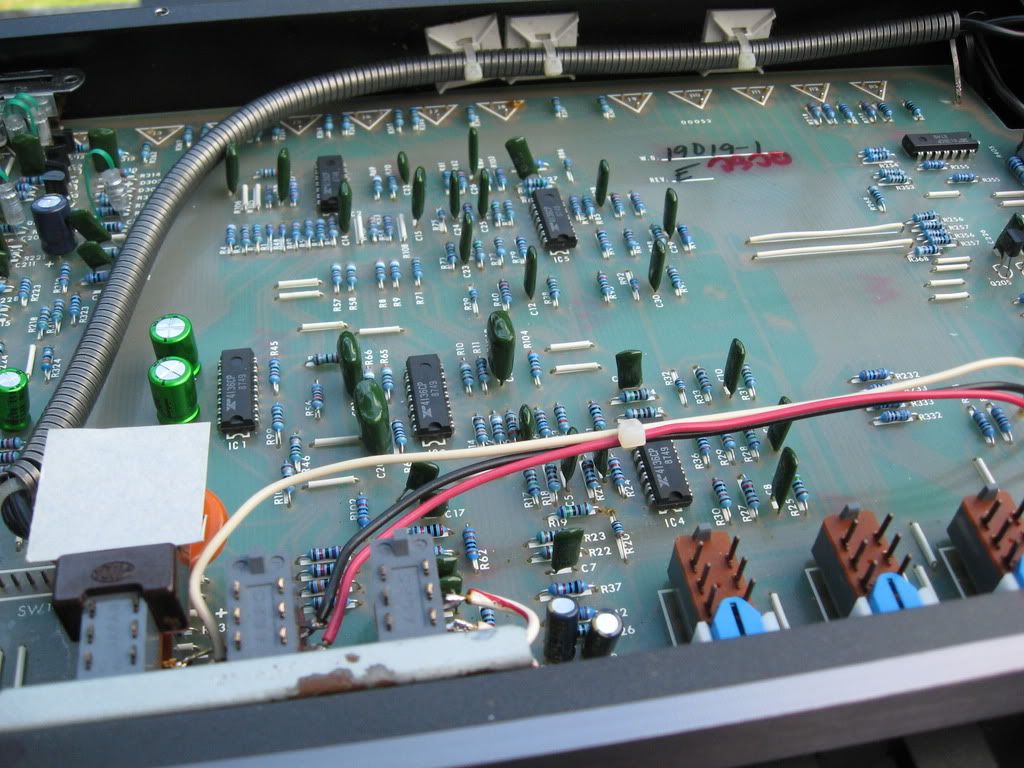
Well thanks to BillD I've replaced the caps in the power supply section with Nichicon HE caps and the signal path caps with Nichicon ES's. There was a noticeable improvement in clarity from replacing the polarized Panasonic FC's with the Nichicon ES bipolar's. Now I was hooked. I decided I was going to replace the resistors in the signal path as well. Bill recommended 1% metal film resistors. I replaced those and liked the results. At that point I was like a drug addict going through withdrawal. I had to do more. I made the commitment to replace most if not all the resistors in my C-1 with 1% metal film resistors hoping to reap the benefits of the low noise and tighter tolerance of metal film resistors.
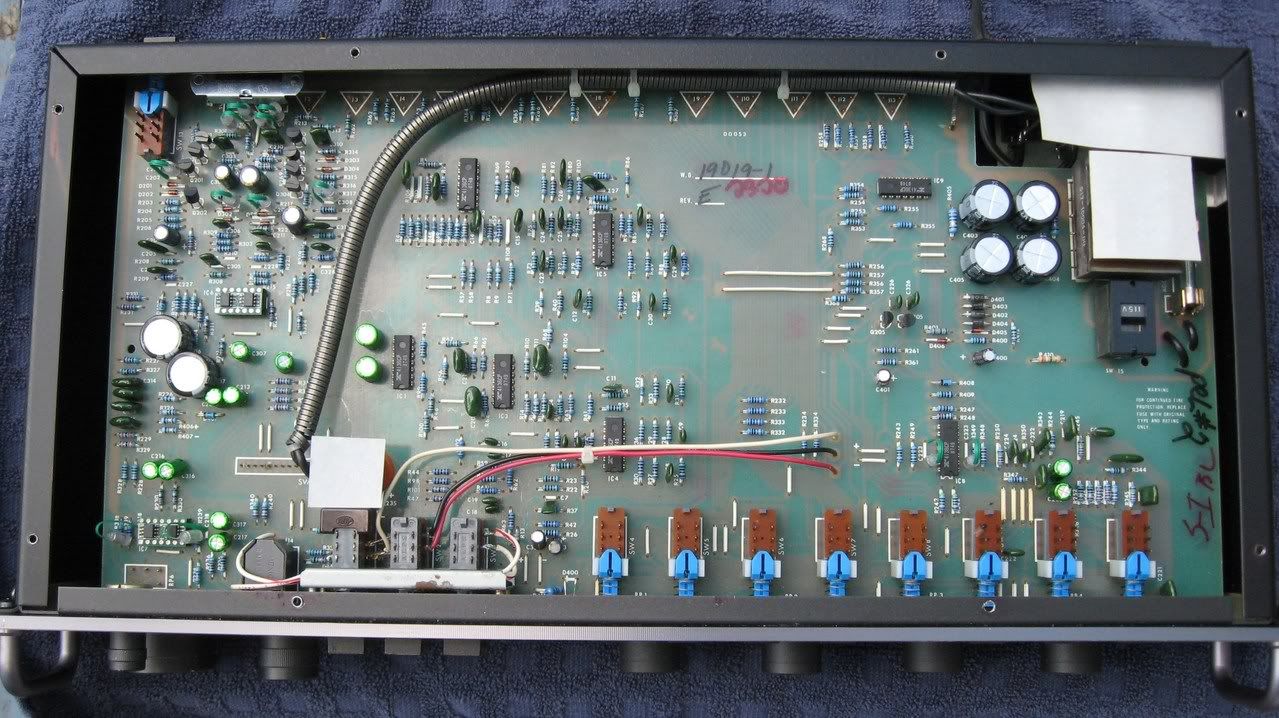
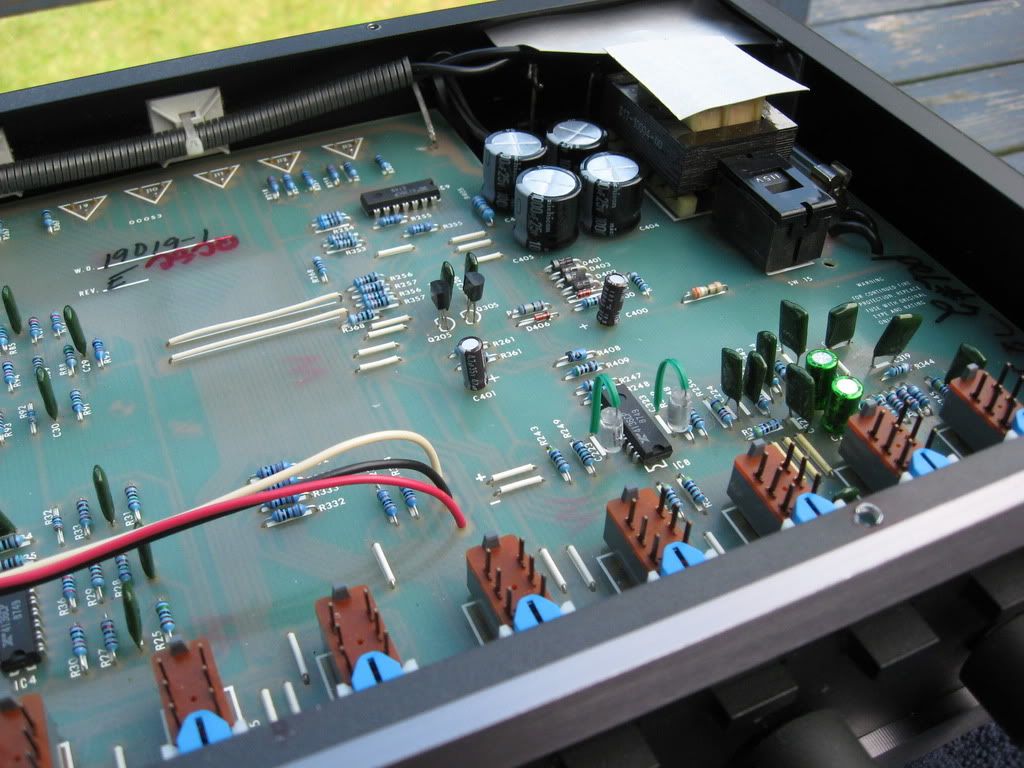
I'm finally to the point, after replacing over 230 resistors and the above mentioned capacitors, where I only have a few straggler resistors to replace, mostly due to my error in ordering parts. I also have a Brown Dog adapter on it's way with OPA2134's mounted on it for the phono stage (IC6), for which I've socketed for quick swap out when it does arrive.
Unfortunately I can't get accurate noise levels because the noise floor of my sound card does not go low enough. I can say though that my sound card displays a noise level of -105dB. So if I'm correct the noise level of the line level inputs must be at least that low. The MM phono input is measurable at -100dB. That's with the RC4136 op amp.
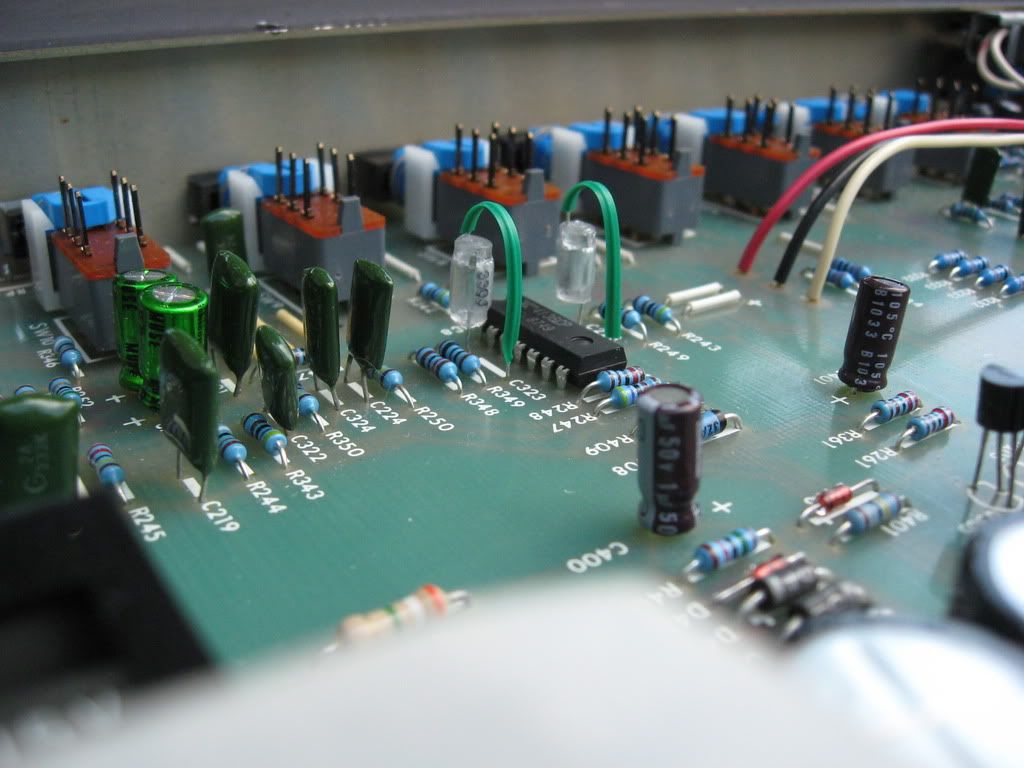
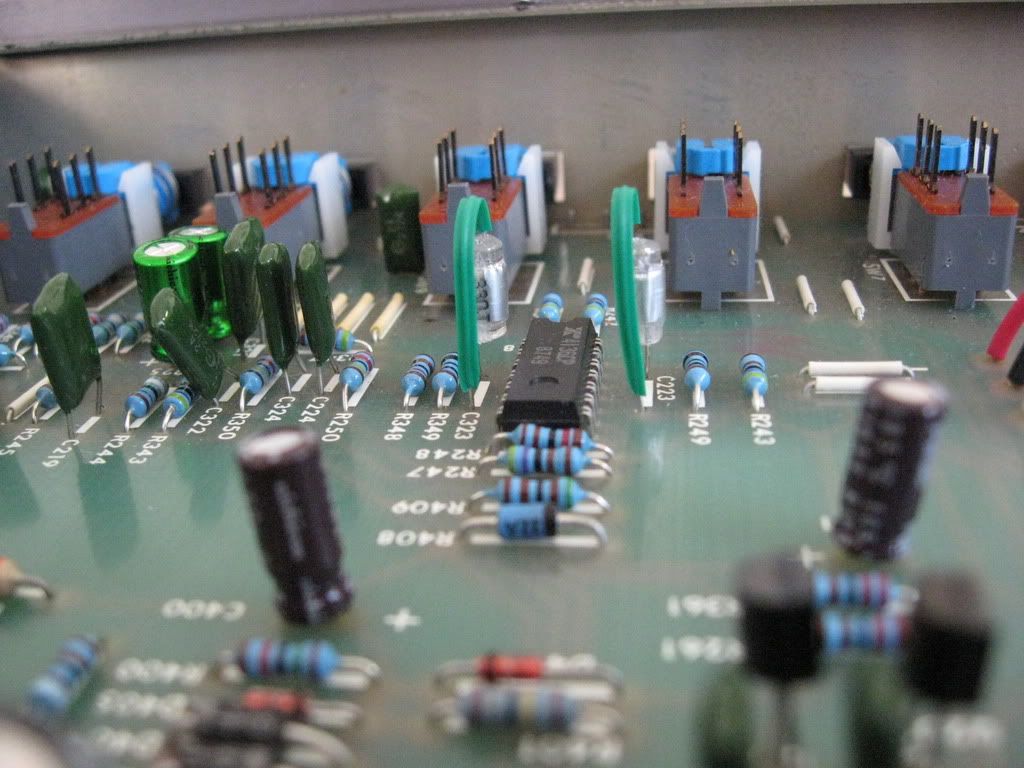
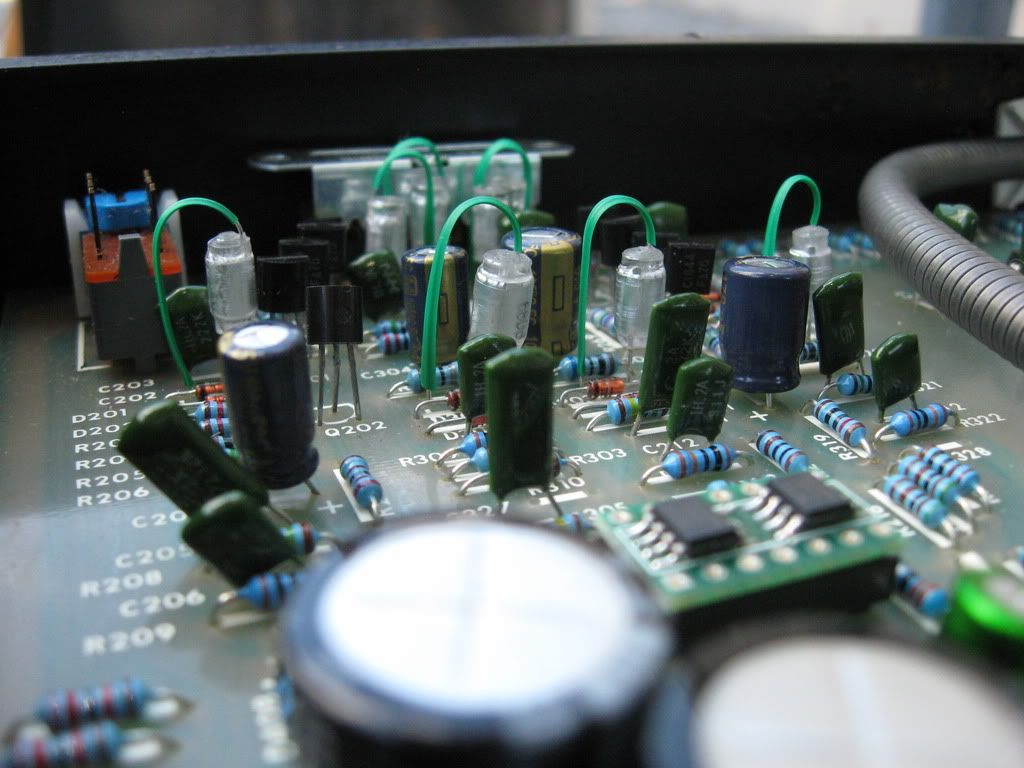
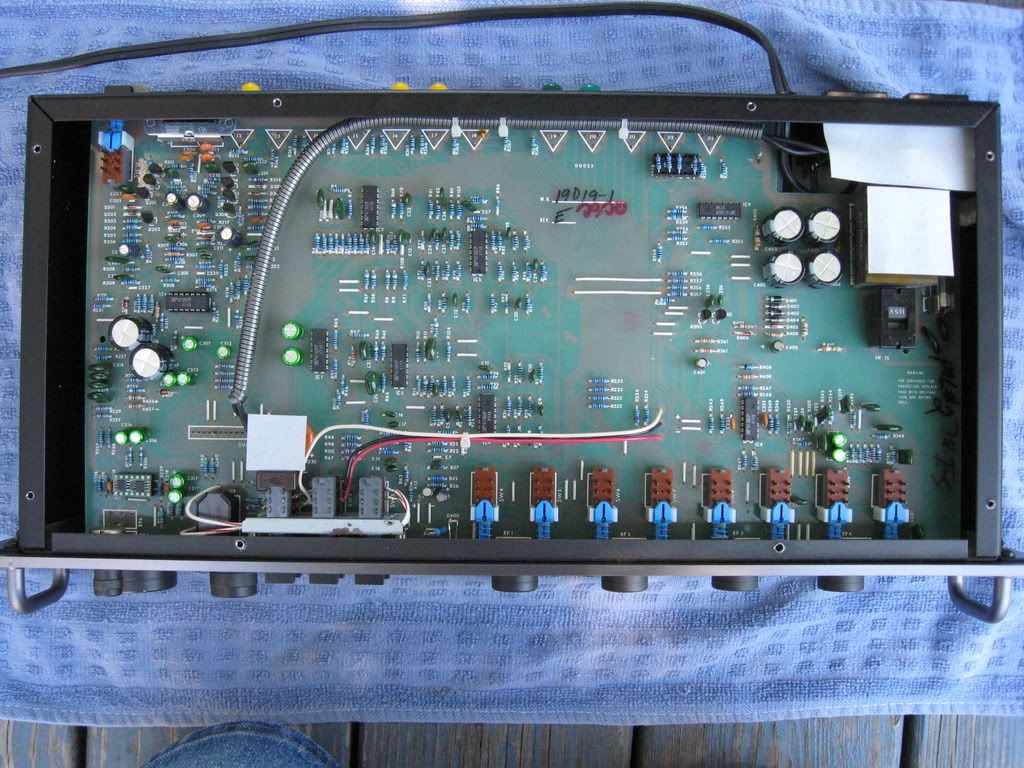
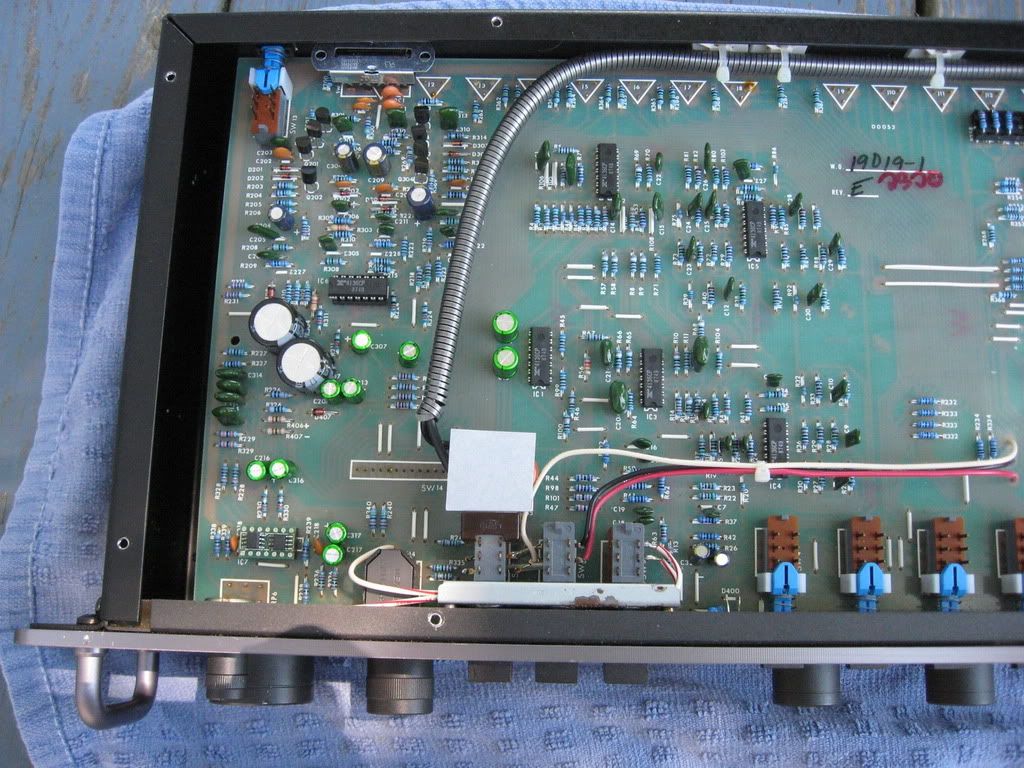
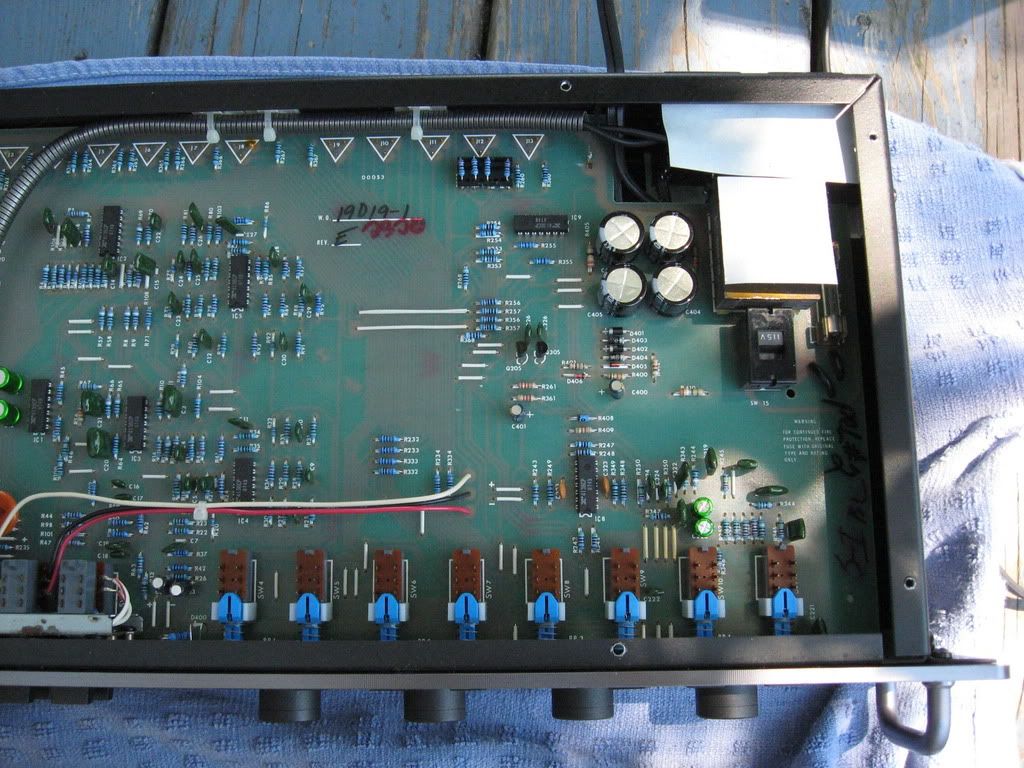
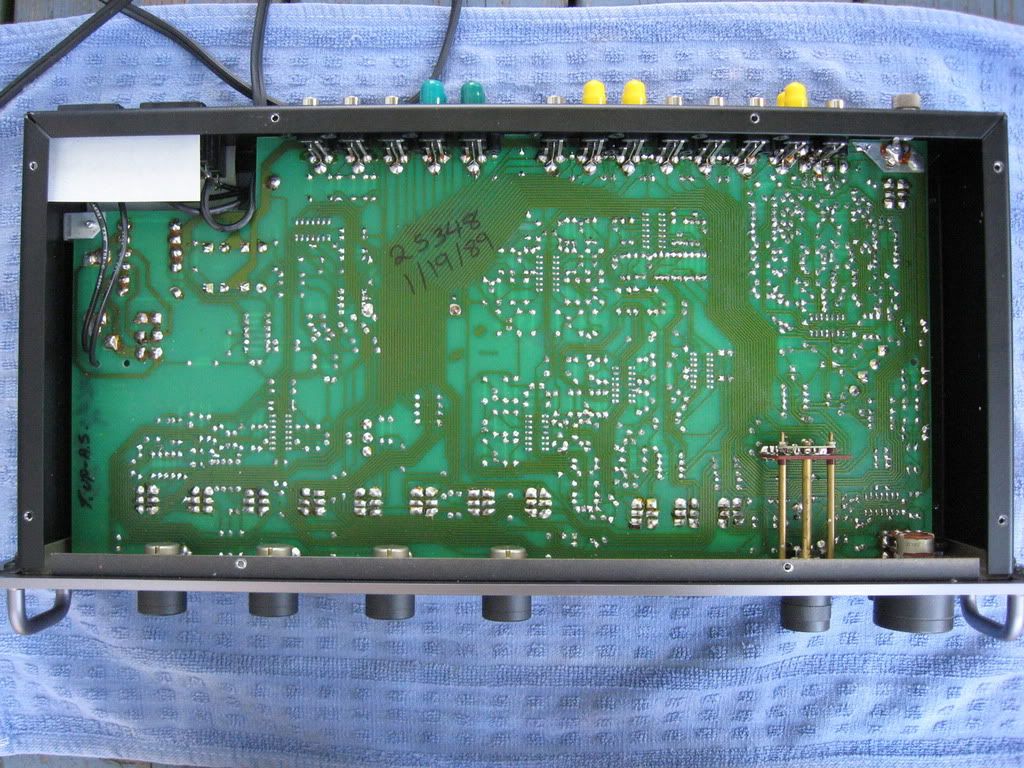
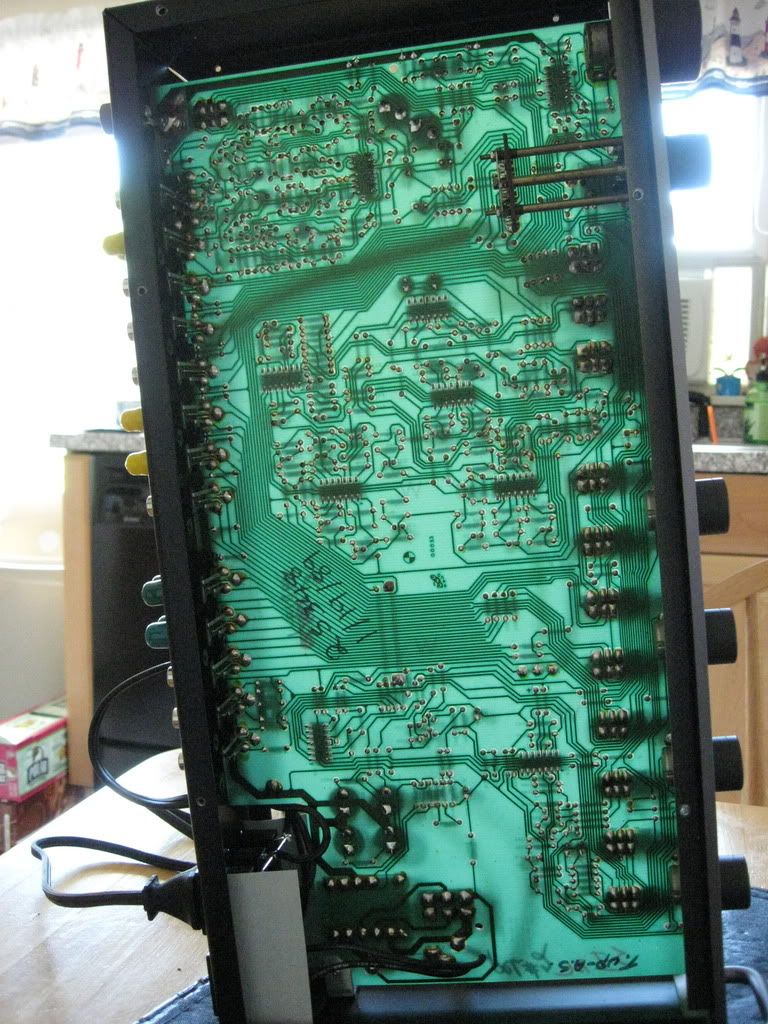
Below are photos of the nearly completed and excellent sounding C-1.
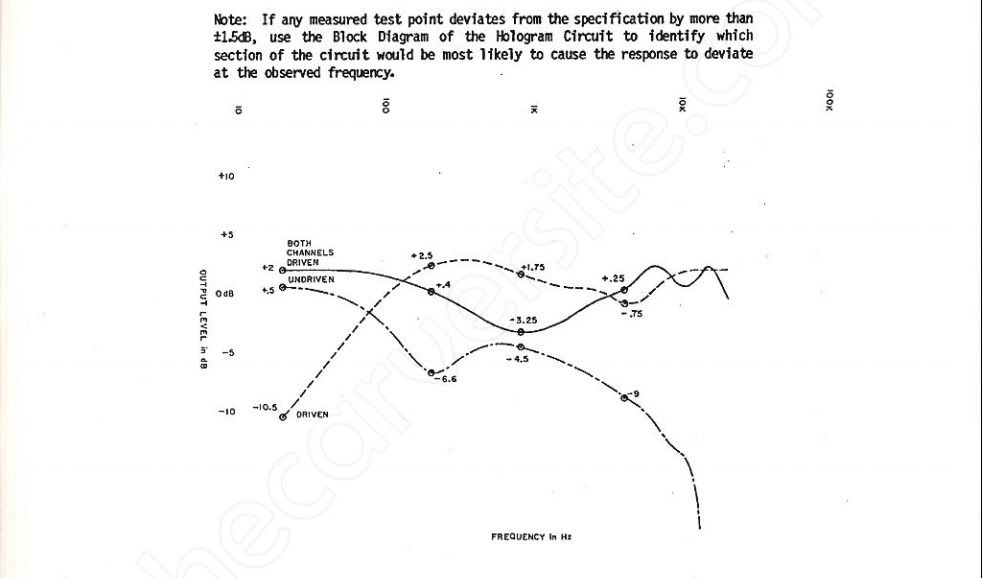
Below are images of the Sonic Holography circuit operation before and after the refurbish. As you can see from the image in the service manual the SH circuit was not functioning properly. There were some definite issues with the timing delay. The following images only show the results of the "Both Channels Driven" tests and "One Channel" Driven tests. The "Undriven Channel" tests were just as good I just had a brain fart and forgot to record them.
The following image is from the service manual.
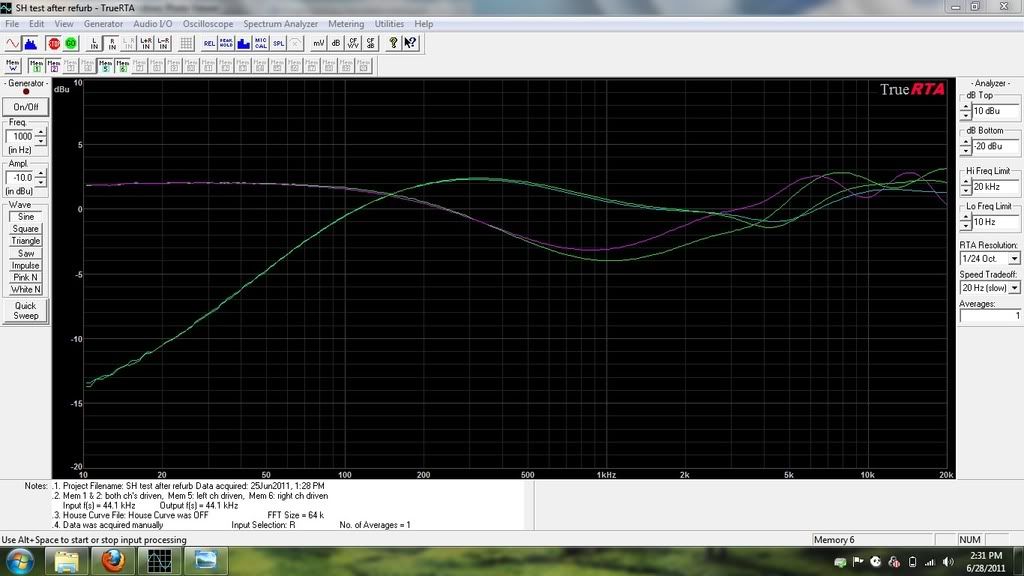
The following image is the SH circuit before I replaced all the resistors with 1% metal films.
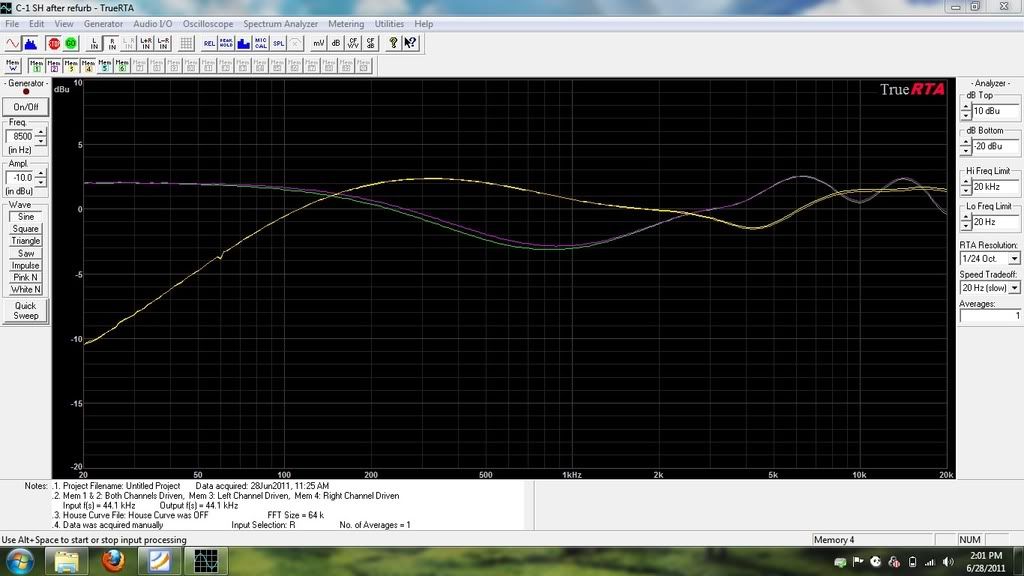
The following image is SH circuit after the 1% metal film upgrade.
First off, let me start with a little history:
I purchased my C-1 used on Ebay a few years ago (don't remember exactly when) and it was my primary preamp for a couple of years after that. I used it with an NAD 2200PE power amp. I've always liked this preamp because of it's flexibility and numerous inputs. I always thought it sounded good but knew it was capable of being better. I just couldn't see spending money on it because of its age and cheap selling prices on the auction site.
About 3 years ago I purchased an RSP-1 preamp because I had upgraditus and felt that I was missing something. I was right. The RSP-1 had a fuller midrange and just sounded smoother overall. Plus the remote control functionality was a nice bonus.
Anyway, back to the subject of this thread.
I recapped the C-1 a year or so ago. I used Panasonic FC caps throughout and replaced the IC7 with OPA2134's on a Brown Dog adapter. I didn't use bipolar caps in the signal path because at the time I didn't want to question the designer. After all, who knows better than the person that designed the equipment?
Well thanks to BillD I've replaced the caps in the power supply section with Nichicon HE caps and the signal path caps with Nichicon ES's. There was a noticeable improvement in clarity from replacing the polarized Panasonic FC's with the Nichicon ES bipolar's. Now I was hooked. I decided I was going to replace the resistors in the signal path as well. Bill recommended 1% metal film resistors. I replaced those and liked the results. At that point I was like a drug addict going through withdrawal. I had to do more. I made the commitment to replace most if not all the resistors in my C-1 with 1% metal film resistors hoping to reap the benefits of the low noise and tighter tolerance of metal film resistors.
I'm finally to the point, after replacing over 230 resistors and the above mentioned capacitors, where I only have a few straggler resistors to replace, mostly due to my error in ordering parts. I also have a Brown Dog adapter on it's way with OPA2134's mounted on it for the phono stage (IC6), for which I've socketed for quick swap out when it does arrive.
Unfortunately I can't get accurate noise levels because the noise floor of my sound card does not go low enough. I can say though that my sound card displays a noise level of -105dB. So if I'm correct the noise level of the line level inputs must be at least that low. The MM phono input is measurable at -100dB. That's with the RC4136 op amp.
Below are photos of the nearly completed and excellent sounding C-1.
Below are images of the Sonic Holography circuit operation before and after the refurbish. As you can see from the image in the service manual the SH circuit was not functioning properly. There were some definite issues with the timing delay. The following images only show the results of the "Both Channels Driven" tests and "One Channel" Driven tests. The "Undriven Channel" tests were just as good I just had a brain fart and forgot to record them.
The following image is from the service manual.
The following image is the SH circuit before I replaced all the resistors with 1% metal films.
The following image is SH circuit after the 1% metal film upgrade.