Toilet internal leak: is flapper the only possible culprit?

Thanks @Chrisxo55441

I used a hack saw blade with a bunch of duct tape wrapped around one end for a handle. Cut through the bolts no problem. Access was actually very easy.

But...

I installed a new flush valve and can still see that the water still dribbles into the bowl.

No leaks at the bolts or the tank-to-bowl gasket. I cleaned and inspected all mating surfaces and saw no defects. Made sure that the flush valve was centered in the hole when tightening it, and tried two different new flappers (Fluidmaster & Corky). I even removed the fill tube from the fill valve (no change). The gasket on the bottom of the fill valve (Jones & Stevens "Douglas" model) seemed a bit harder than I would have thought. But I compared it to others and they were the same.

What could I have done wrong? The flush valve (chosen for me by the expert at local plumbing supply) is plastic so I did not want to tighten the (plastic) nut too tight. Would over-tightening or under-tightening this nut cause a leak?

The frustrating, and puzzling, thing is that the water dribble into the bowl looks exactly as it did before I replaced any parts. :confused:

How old is the toilet?

As mentioned in post#21, in our case, they found it to be microcracks in the porcelain itself causing slow leakage.

If you can temporarily completely seal off the hole in the bottom of the tank so there's nowhere for the water to leak through except for something like microcracks, you could at least rule it out.
 
Would over-tightening or under-tightening this nut cause a leak?

under tightening would, press down on the flapper and watch the bowl if the trickle stops then is the flapper if doesnt stop tighten the nut if it is still dribbling you need to remove the flush valve and see if the tank is cracked around the hole area
 
That particular toilet is approx. 10-15 yrs old. I think mine is a flapper issue, if you drop tissue into the toilet you can see it push away from front/right (so opposite of the bowl). Not sure if this is where the leveling of the toilet starts to collect first. My flapper (though a the cheapest replacement available) is the same age as Roger's also.
 
under tightening would, press down on the flapper and watch the bowl if the trickle stops then is the flapper if doesnt stop tighten the nut if it is still dribbling you need to remove the flush valve and see if the tank is cracked around the hole area

Will do.

How many times can I remove and re-install the tank and still use the same, new, tank-to-bowl gasket? That new gasket is a nice thick and soft one (softer and more easily compressed than the gasket mating the flush valve to tank).
 
Last edited:
The soft gasket (underneath the tank) is fine, and will not be the cause of tank leakage. The tapered harder rubber gasket that seals the bottom of the "snorkel" flush valve, is where you are experiencing leakage. That always benefits from a good soft wax prior to installing the new assembly. If you have some beeswax, rub the porcelain inside the tank around the large hole. Paraffin wax is too hard to be useful. You will want to torque that gasket fairly tight, hand tight won't be tight enough due to the "roughness" of the unglazed inner porcelain surface.
 
The soft gasket (underneath the tank) is fine, and will not be the cause of tank leakage. The tapered harder rubber gasket that seals the bottom of the "snorkel" flush valve, is where you are experiencing leakage. That always benefits from a good soft wax prior to installing the new assembly. If you have some beeswax, rub the porcelain inside the tank around the large hole. Paraffin wax is too hard to be useful. You will want to torque that gasket fairly tight, hand tight won't be tight enough due to the "roughness" of the unglazed inner porcelain surface.


I am going to check for cracks as suggested above. I also intend to put some food coloring in the tank water and see if that yields any clues (such as revealing cracks perhaps).

If the tank appears to be intact I will try the beeswax. Where do I get it?

The threaded end of the flush valve is plastic and so is the large nut. I can torque it more than I did before but the material is not very substantial.
 
Last edited:
Call your local Ace hardware, they should have some beeswax, also Wal-Mart may have it around the canning supplies, Tractor Supply, Atwoods, craft store like Hobby Lobby. I always keep some on hand as it keeps my saw blades from building up pitch from the softwoods. Works good on hacksaw blades too.
 
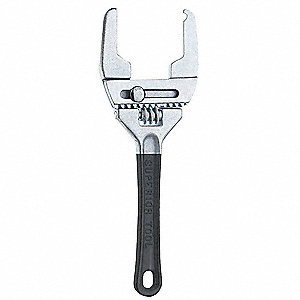
a spud wrench will get that nut tight, they cost about $15 bucks maybe or if your ace has rentals maybe you can one for a day cheaper

2GWK4_AS01
 
You don't want to use the toilet bowl wax ring for inside the tank. It's too soft for longevity under that gasket and is a waste. The harder beeswax will carry the sealing load long term. When I did building maintenance for a large apartment complex, I encountered this situation numerous times.
 
You don't want to use the toilet bowl wax ring for inside the tank. It's too soft for longevity under that gasket and is a waste. The harder beeswax will carry the sealing load long term. When I did building maintenance for a large apartment complex, I encountered this situation numerous times.

I have looked online for any local sources of beeswax. Not at Walmart or True Value. Would plumbing supply house have it? There are two decent ones in my town.

Thing is I need (want) to get this done this afternoon because my tenant will be home around 5 and I have been inconveniencing her with several other projects recently.

I have Burts Bees lip balm...it is beeswax and is not as soft as a toilet ring (I don't think). Think that would be sufficient?
 
a spud wrench will get that nut tight, they cost about $15 bucks maybe or if your ace has rentals maybe you can one for a day cheaper

Good idea. I have a large pair of channel locks but it is a bit tricky using them in that position. I should have the proper tool for future jobs anyway.
 
Thanks again to everyone who posted :thumbsup:

Apologies for the delay in updating the thread. Things have not exactly gone according to plan which, for me, is not uncommon when involved in plumbing adventures...


In a nutshell:
On Friday I replaced the new flush valve with another new flush valve (Fluidmaster). This time, I used a proper tool (an Irwin flat combination plumber's wrench @ $10 from Lowes) to tighten the nut on the flush valve. Thinking that surely this time I had made a good seal, flushed, waited, but there was still water dribbling down the back of the bowl after the tank and bowl filled. :confused:

So Monday I went back to the plumbing supply and got a new gasket for the flush valve. Thinking that possibly I had over tightened the nut the last time, I wanted to try again with a fresh gasket. Took the tank back off, got everything put back together, tested, and yet again, water dribbling into the bowl when it shouldn't have been.

At this point I was at a loss as for an explanation. I shut off the supply and flushed, emptying the tank except for about an inch or so below the rim of the flush valve. My thinking was to isolate the seal between the flush valve and the tank, while eliminating the seal between the flapper and the flush valve from consideration. Sure enough, still had the dribble happening which should point to a bad seal flush valve to tank.

But then I decided to empty the tank completely, just to verify my most recent conclusion. And to my surprise....even with the tank empty and literally dried out with a towel, and also with the insides of both the flush and fill valves dried out with paper towels, and the fill tube removed...water still dribbled into the bowl. It was not gushing, or steady, but it was there pretty much as I had been seeing on my previous attempts.

I had noticed when drying the inside of the flush valve for my test, that I could see water standing below the valve, in the upper back part of the bowl where the flush valve empties. After mulling this a while, I decided to get out my carpenter's level. I discovered that this toilet is tilted backward, towards the wall, at between 1/2 to 3/4 inch total incline. So my theory, the only explanation that I can come up with, is that because the toilet is not level, water in the back part of the bowl does not empty properly after a flush, some of it stays and it is this water that slowly dribbles out. Perhaps there is some kind of capillary action happening along the trails of mineral deposits that have developed over the years? I don't know if this is a one-in-a-million thing, or something that plumbers see frequently, or if this is indeed what is happening.

So I don't think I can fix this, not completely. The dribble is less than when I started, I believe because some (most maybe) was leaking under the old flapper. But all of the flush valve and/or gasket replacements did nothing to improve the situation. The good news it that I have gotten pretty good at removing and re-installing a toilet tank. And perhaps this is a good lesson for me in that there are times when I have to accept imperfection, lol.
 
Last edited:
How old is the toilet?

As mentioned in post#21, in our case, they found it to be microcracks in the porcelain itself causing slow leakage.

If you can temporarily completely seal off the hole in the bottom of the tank so there's nowhere for the water to leak through except for something like microcracks, you could at least rule it out.

I did consider your suggestion as I was working on this. In this case I don't believe that micro cracks could have been the cause. The under side of the tank was bone dry throughout. I do not see how it would be possible to have cracks that leaked into the bowl, but not through the bottom of the tank just outside of the drain hole.


Thanks for the link
 
you could put some plastic plumbing shims under the rear of the bowl but that would probably mean reseating the toilet. if it is just collecting water inside at least its not raising the water bill any and could just be left as is.
 
thank you @Chrisxo55441

I was not aware of the plumbing shims. When, or if, I replace that toilet in the future I may need to use those. For now I think I will just let it be.
 
Back
Top Bottom