

Hi,
Thought I'd share the process I used to replace the meter lamps on a CA810 with LEDS. There is also a good DYI on lamp replacement here
http://www.audiokarma.org/forums/showthread.php?t=158644&highlight=ca810
The owner of the CA-810 I had in for a check/service wanted the meter lamps replaced with LED's, and this is how I went about it.
I followed the linked DYI above regarding access to the lamps, removed them and then set about making up the LED replacements.
I had some CREE LC513FWH1 5mm white High brightness LEDS on hand that I have used for other LED conversions, and I like these particular ones because they have a 60 Deg beam angle which I think is better than the narrow beam LEDS.
In order to fit the LEDS to the Rubber lamp holders it was necessary to remove the ridge at the end of the LED body with a file

I then trimmed the leads and soldered on some 28 AWG tinned copper wire (wire wrap wire) to the leads

and then fitted the LEDS to the lamp holders - when fitting these I oriented the anode of the LED to be on the right had side of the lamp holder when the "Stanley" brand name was uppermost - any other measure for identifying the polarity would work.

I had earlier measured the open circuit voltage of the lamp supply - 83 volts. There were two 5W resistors in series with the lamp supply (220 and 270 ohm), and these needed to be changed in order to provide the correct current limiting for the LEDS. I chose a nominal led current of 12ma, and this required two 2.7K ohm resistors to be fitted in place of the existing ones ( I used some 2W resistors I had on hand, 1W would easily do the job).
I then fitted the lamp assemblies to the Lamp PCA - note that the innermost pin that the innermost lamp assembly fits to is positive, so each LED assembly needs to be oriented so that the anode is to the right when looking at the amp from the front

An initial check showed that the middle of the meter was a little darker than the sides - due to the directionality of the LEDS, so I used some sandpaper on the front to the LEDS to break up the light a little.
The final result
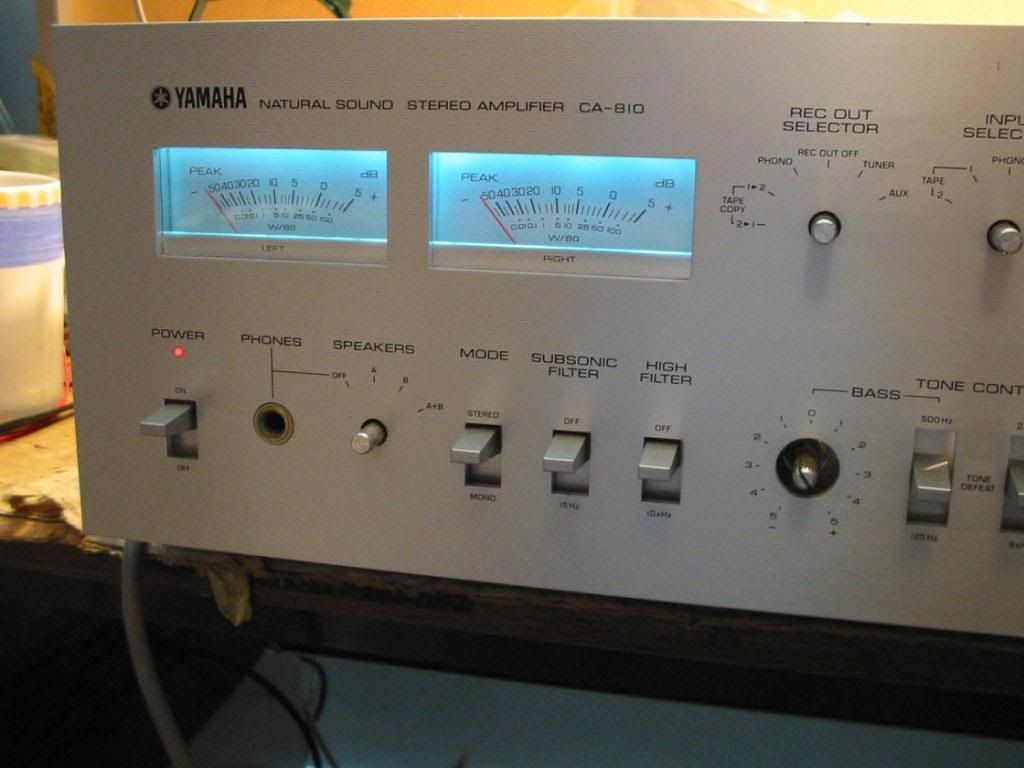
I am happy with the result, and for those who want a brighter illumination, the LEDS can be run up to 25ma max, just change the value of one or both of the 2K7 series resistors.
Cheers
John
Thought I'd share the process I used to replace the meter lamps on a CA810 with LEDS. There is also a good DYI on lamp replacement here
http://www.audiokarma.org/forums/showthread.php?t=158644&highlight=ca810
The owner of the CA-810 I had in for a check/service wanted the meter lamps replaced with LED's, and this is how I went about it.
I followed the linked DYI above regarding access to the lamps, removed them and then set about making up the LED replacements.
I had some CREE LC513FWH1 5mm white High brightness LEDS on hand that I have used for other LED conversions, and I like these particular ones because they have a 60 Deg beam angle which I think is better than the narrow beam LEDS.
In order to fit the LEDS to the Rubber lamp holders it was necessary to remove the ridge at the end of the LED body with a file
I then trimmed the leads and soldered on some 28 AWG tinned copper wire (wire wrap wire) to the leads
and then fitted the LEDS to the lamp holders - when fitting these I oriented the anode of the LED to be on the right had side of the lamp holder when the "Stanley" brand name was uppermost - any other measure for identifying the polarity would work.
I had earlier measured the open circuit voltage of the lamp supply - 83 volts. There were two 5W resistors in series with the lamp supply (220 and 270 ohm), and these needed to be changed in order to provide the correct current limiting for the LEDS. I chose a nominal led current of 12ma, and this required two 2.7K ohm resistors to be fitted in place of the existing ones ( I used some 2W resistors I had on hand, 1W would easily do the job).
I then fitted the lamp assemblies to the Lamp PCA - note that the innermost pin that the innermost lamp assembly fits to is positive, so each LED assembly needs to be oriented so that the anode is to the right when looking at the amp from the front
An initial check showed that the middle of the meter was a little darker than the sides - due to the directionality of the LEDS, so I used some sandpaper on the front to the LEDS to break up the light a little.
The final result
I am happy with the result, and for those who want a brighter illumination, the LEDS can be run up to 25ma max, just change the value of one or both of the 2K7 series resistors.
Cheers
John


