studiolabber
New Member
Okay, I removed the upper reel and can see how easy it is to remove and replace the brake assy. Also, the reason that the brake was not released when P or FF was selected. It basically jammed in position and did not move away when the tape tensioner tried to "convince" it to do so. I lubricated the assy and it seems to have freed up.
Here is another question Doc, looking at the picture of your deck and looking at mine, they have obviously been looked after in different ways (see my picture). Is it worth the learning curve I am going to have to go through to 0make this a worthwhile project or should I just use this Sony for parts and look for a better prospect?
Here is another question Doc, looking at the picture of your deck and looking at mine, they have obviously been looked after in different ways (see my picture). Is it worth the learning curve I am going to have to go through to 0make this a worthwhile project or should I just use this Sony for parts and look for a better prospect?

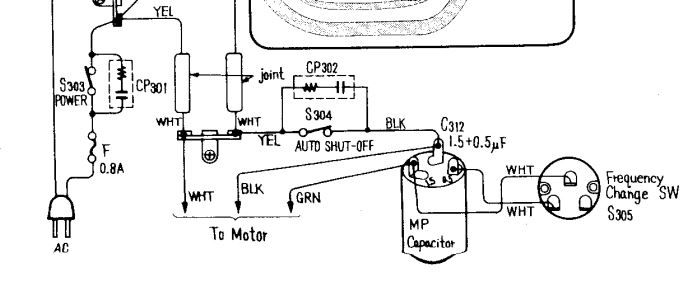
 I got it working and then the motor run capacitor blew, with waxy gunk all over the protective cap. I plan on replacing it with a 1.5 uF 250 V capacitor, however I wanted to make sure I am wiring it correctly.