I used
http://www.mouser.com/ProductDetail/ALPS/SPPJ320600/?qs=%2fha2pyFadugx9X5pK4Wd8RNOtA31HNm8pOoCUWpUWAaJPzXotLoXWA%3d%3d and the contact spacing was the same. The switch was less than half the size so I had to do a bit of craft work.
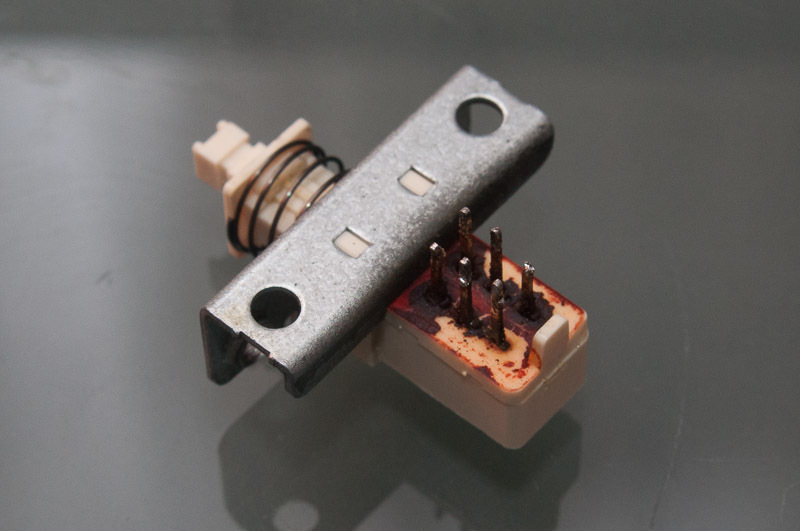
The switch holder is a single switch metal bracket and it is a U-channel with tabs to hold the old switch. The front and back have low walls that have to be removed. Dremel made short work of that. Then the through board mounting tabs (not the electrical contacts) on the new switch were moved, one bent forward one bent back. Looking at it now, the back tab could have been used (maybe) as a through board mount, but the switch is in and working fine.
I then had to epoxy the switch to the switch support across the very front edge of the switch and using the front tab bent to the front. Since this is the main switch used on this unit, it must be firmly mounted, so I'm going to put a dab of epoxy at the back of the switch, too. The switch support and location are set, epoxying the switch in the bracket where the bracket mounts and where the contacts fit the original holes.
Next was the switch push. It is much smaller on the new switch and the push extension (those white plastic pieces on the front of the switches, did not fit, loose. Well JBWeld seems to fill that void easily. Now with the switch position fixed and the push extension installed one can work with the extension length, it is too short now. It needed to be maybe 5mm longer. I thought of lots of ways to go this but went with heat shrink, then cut to length then filled with a chunk of plastic to give it strength and then added more heat shrink to make it a larger diameter. The front panel push has a |_|-shaped opening and if the switch push is too small it will fit in the middle opening and not do anything or get stuck. Now with the switch mounted to the bracket, push extension installed and lengthened it is time to install the switch with the bracket and bolt the bracket in place and solder the unit into the tuner. Thinking about this, that is probably the proper order, too. Installing the bracket with the switch attached is going to fix the position of the switch and although close if soldered in first the installation of the bracket could put stress on the switch contacts.
Test and test and then put a final dab of epoxy on the back of the switch for a bit more strength for those times the switch is man handled. Good for another 20+ years.
Replacing with the exact switch would have been a whole lot easier but I'm not in France able to source one easily from Clinique Audio, but I guess they might be happy to send one. I didn't know how small this switch I put in was even though the dimensions are on the drawing. I was most interested in the contact spacing.
What you see as JBWeld everywhere is actually epoxy for the switch being held in the bracket and separately, the push extension being held on the end of the switch itself.
Got the pointer dial rail all cleaned and lubricated while the unit was open, too.
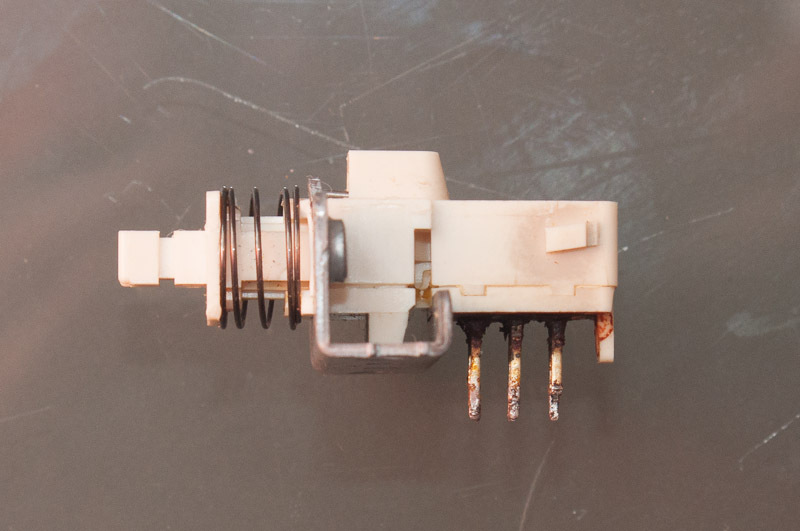
Now that the tuner is up and working I can sacrifice the original switch. Looking at the first post, you can see that the switch has a two part construction. I took the switch apart and cleaned it up and it now works. But putting it back together it needs glue to hold it. New is better, old, used, cleaned and working might be a way to go if one must. This switch type as two conductors in a U-shape in the switch that pinch the flat terminals from the external connections inside the switch. The left connects the front two when off and the back two when on (the middle connection is one of these in both cases), same on the right side. Because the pinch of these metal U-shaped units might be compromised, that is the reason a new switch is going to be better. But this switch was very dirty inside so who knows how long it might last with a good cleaning. Glad I have a new switch in my unit.


")

