Restoring bass performance on your RS4.5's

rabbit

Well-Known Member
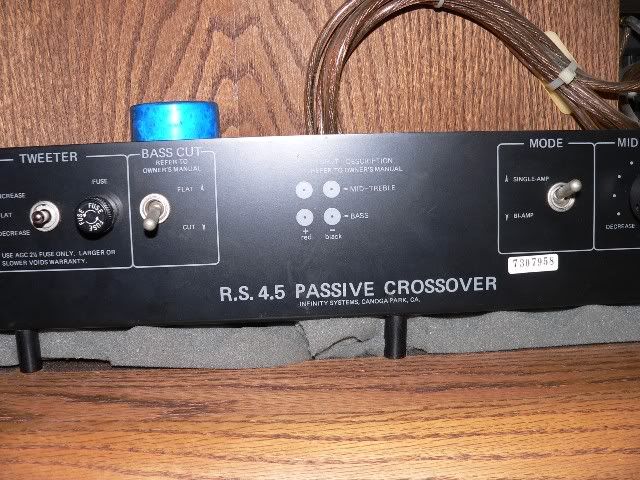
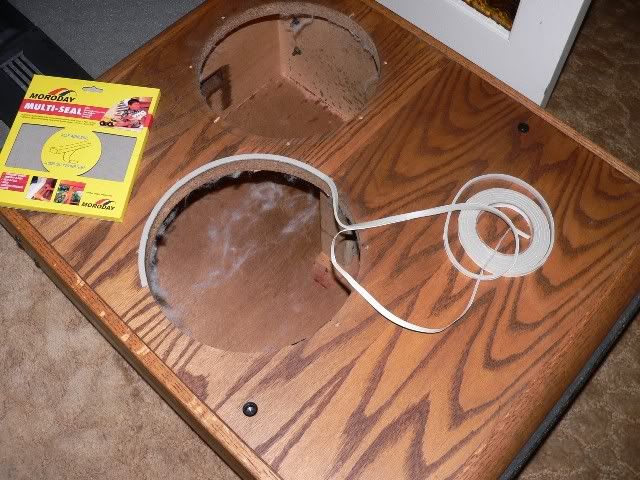
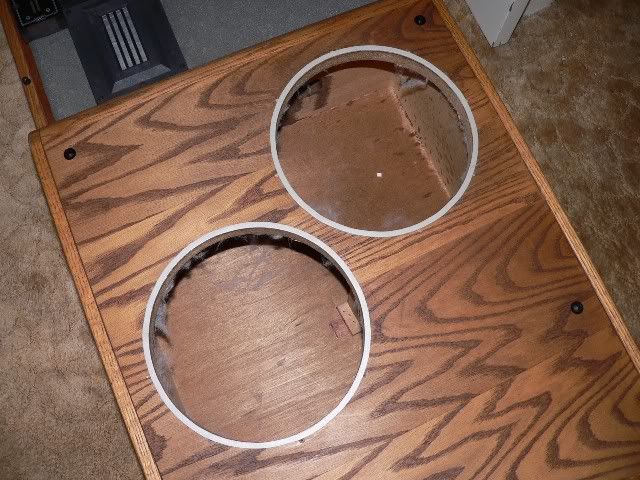
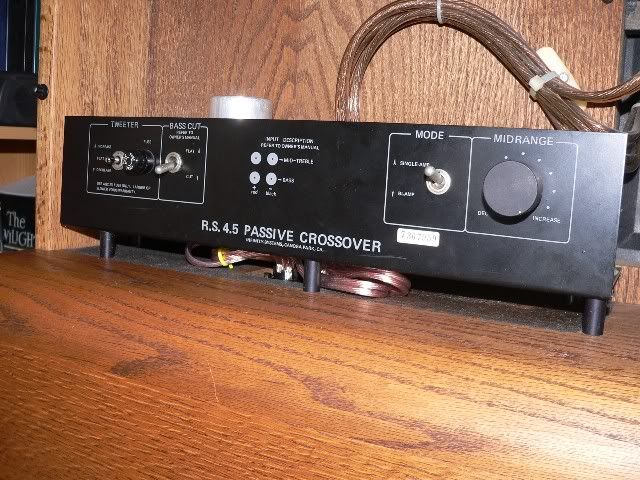
Owners of RS4.5's who have replaced the foam on their woofers may not be aware of another weakness in these speakers also related to foam rot. Please read on to find out what I discovered which adversely affected the bass performance and how I went about correcting it. (Also check my other thread on repairing dry joints on the crossover boards)

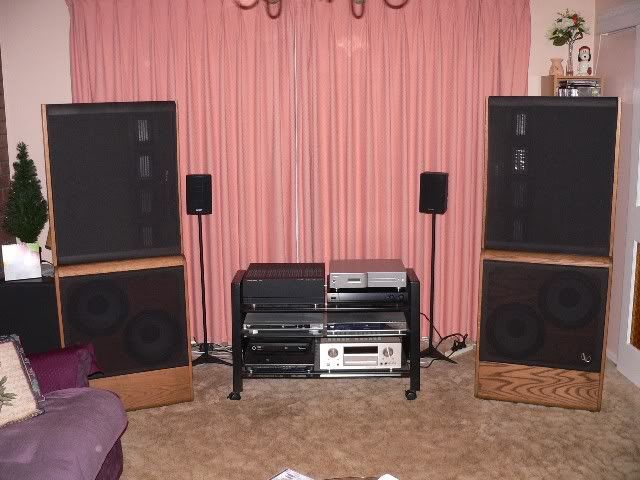
I recently acquired a pair of RS4.5's from the second owner of these speakers. These speakers had not seen much use over the years and most of the time had been put into storage because the original owner who bought these speakers in the late 70's early 80's had subsequently bought a set of RS-1's when they first came on the scene.

Of course over time the woofer foam surrounds had perished and all woofers had been refoamed. However the previous owner told me that he always thought they lacked bass so I took this into consideration when I got the speakers. I also noticed this lack of bass but sometimes this can be a room issue as well :scratch2:

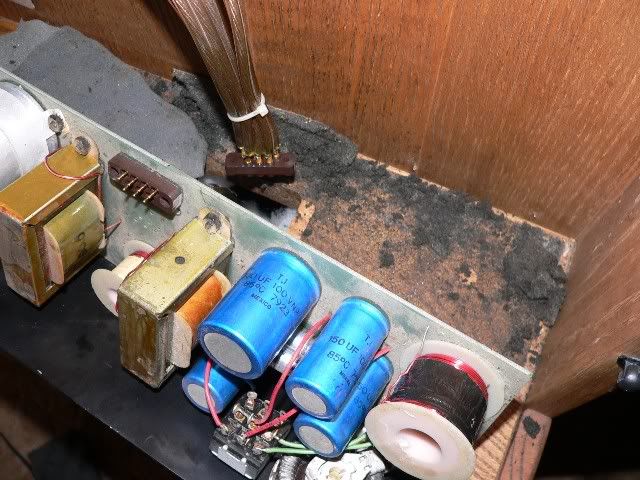
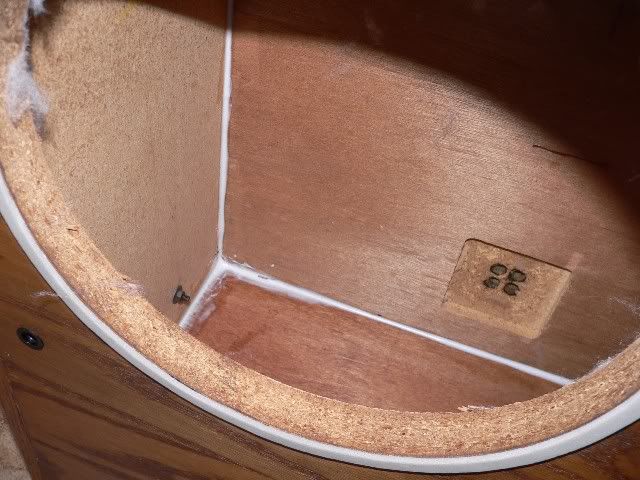
Originally I suspected the large bipolar 2000 uF caps in the crossover may have gone low in value over time. First thing I did was to check the continuity of the voice coils on all of the woofers using an analog multimeter. Using the Rx1 range on the multimeter help me established that one of the Watkins 2 ohm voice coils on one of the woofers had been wired out of phase so that as one woofer pushed out the other pulled in. Needless to say this one speaker was never producing any deep bass at all :saywhat:

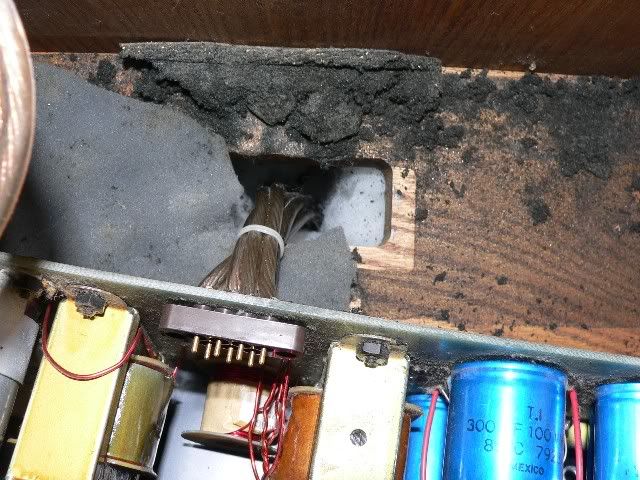
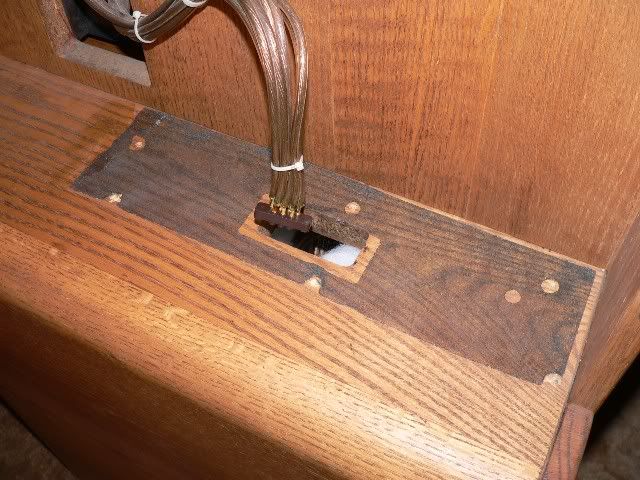
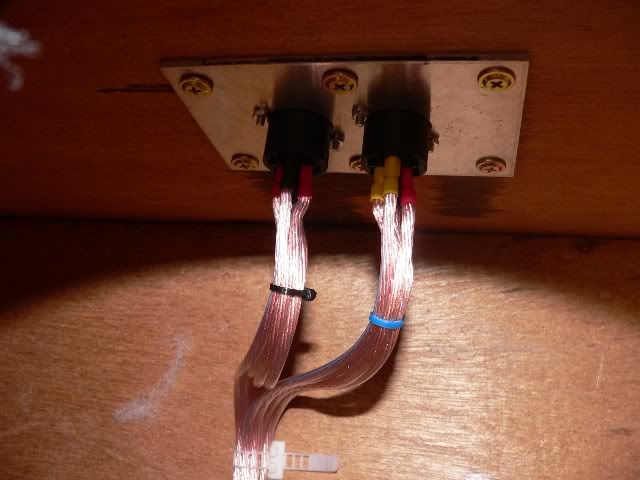
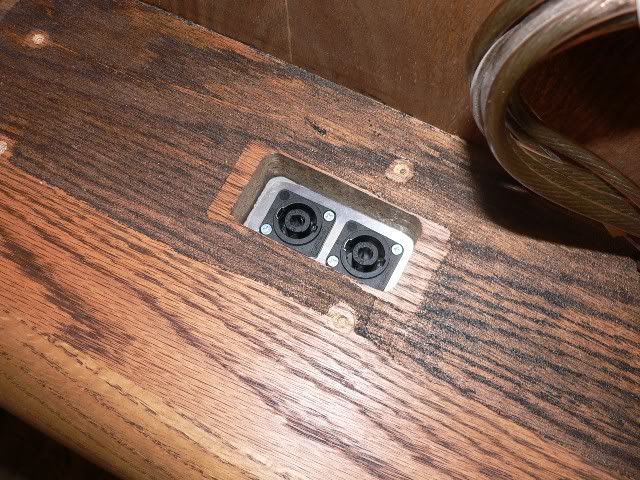
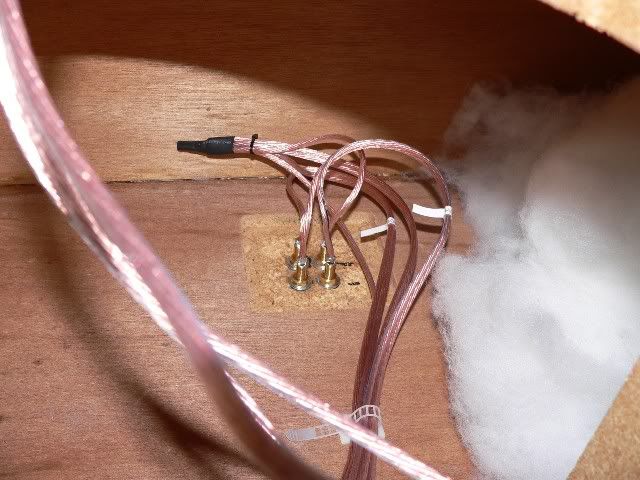
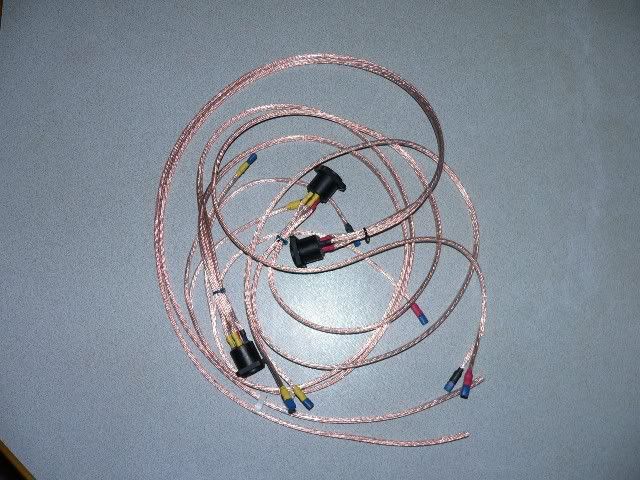
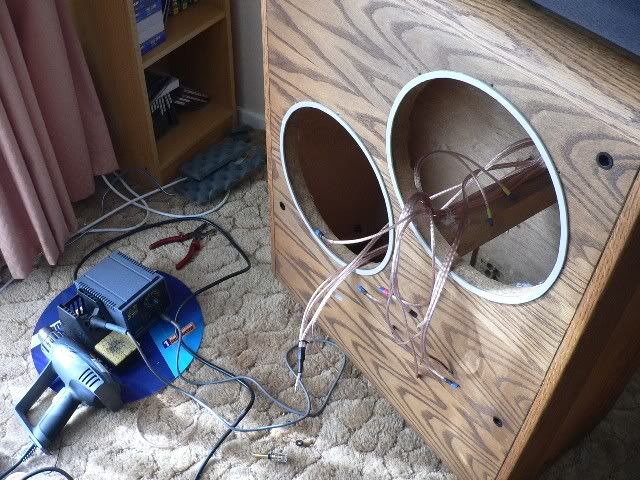
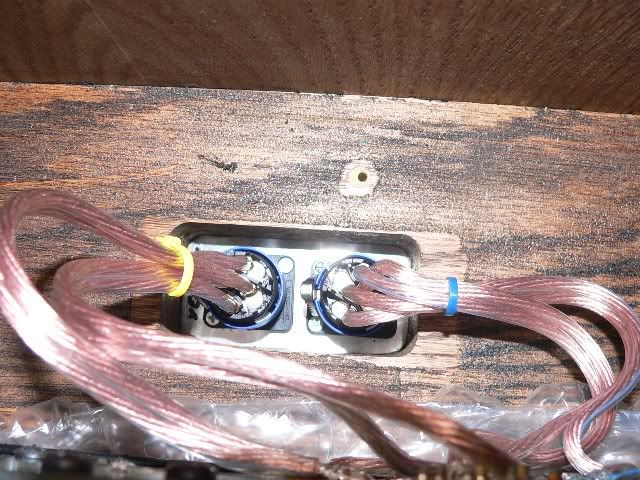
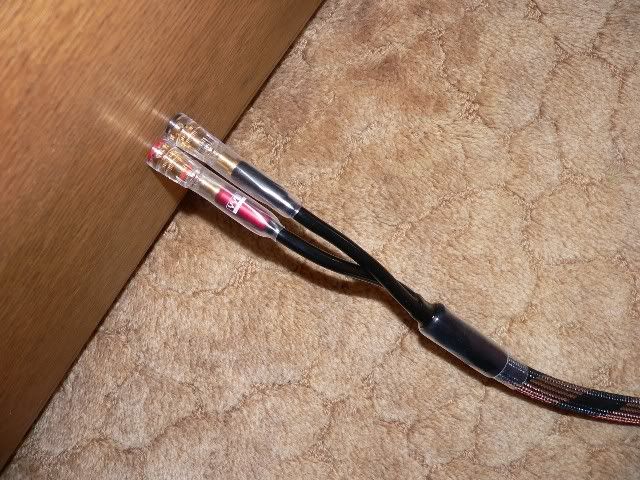
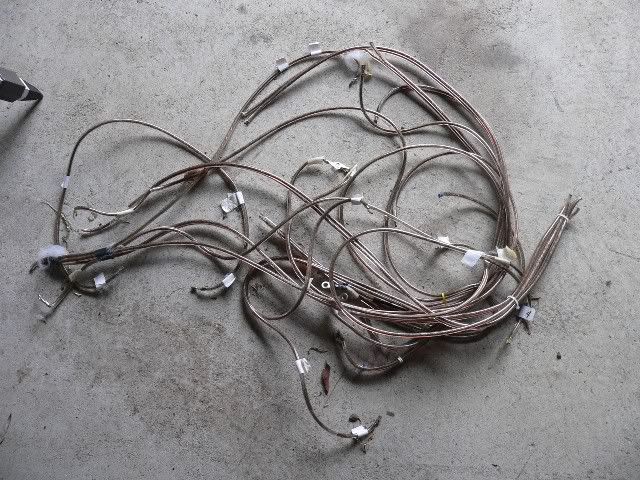
I unscrewed the offending woofer and noticed at one stage these speakers had been rewired with Monster Cable. Also the spade connectors terminating the wire had been soldered on rather than crimped on so when I went to reverse the woofer connections one of the spade connectors just fractured. I tried to re-terminate it and notice that when I stripped back the Monster cable the copper wire had oxidized considerably and I had to use a razor blade to scrape back to the bare copper. Things are not looking good here with this old cable :tears:

6d4eeb17.jpg


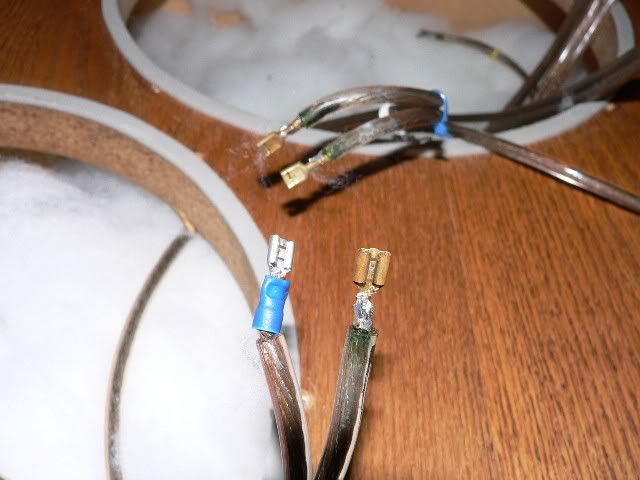
The old Monster cable had gone past it's use by date and had to be replaced because it had oxidized underneath the plastic sheath and could not be re-terminated.

b717350f.jpg
 
On further investigation I notice quite a bit of black foam like material in the enclosures. This material seemed to be similar to the perished foam material used on the baffle. That's when I discovered another problem.

The cable loom in the bass enclosures runs up through a fairly large opening in the top of the enclosure and which sits beneath the crossover modules. Removing the six screws that hold the crossover module to the enclosure now revealed a hidden problem.

Infinity used a piece of foam to block the hole where the wiring loom passes from the bass enclosure to the crossover. However over time this foam, like the foam on the baffle board and the woofer surrounds has perished and essentially is not blocking the opening anymore. What we have is essentially a sealed enclosure with a small vent that is adversely effecting the bass performance because the enclosure is no longer sealed. At worst the energy from the back of the woofer which is out of phase with the front is weakening the bass performance. Depending on how bad the foam has rotted the opening is also acting as a vent just like it would in a vented enclosure. At certain frequencies this opening will resonate with the enclosure volume and damp the cone movement thus effecting the frequency response. All in all this is a totally undesirable result :(

As you can see in the pictures below, someone at one stage has attempted to half fix the problem by shoving some foam under the crossovers without gluing it which essentially does nothing from an acoustic perspective :(

0008e322.jpg


As you can see underneath the crossover PCB the original foam has rotted exposing the opening for the cables.

213db140.jpg


75834658.jpg
 
Where are the pix??

I have had to dump them into photobucket because the upload business doesn't seem to work for me anymore :(

Continuing on.....

My original solution to this problem was to wack a bit of foam in the hole and block the opening as best I could. This would be the easiest way out for a quick fix. What I really would have liked to do was to be able to unplug the crossovers completely so I could test them on the bench. So the following is my solution to the problem.

I decided to fit an aluminium plate to each opening and install two 4 pole Neutrik Speakon connectors for each box. There are 7 connections to the crossover so two 4 pole connectors are needed. These connectors are designed for speaker applications and can handle 30 A RMS continuous.

Here is the kit for this.

Two 80mm x 120 mm x 3mm thick aluminium plates.
Four Neutrik 4 pole Speakon sockets.
Four Neutrik 4 pole Speakon plugs.

cdba7ae9.jpg
 
great work. There was a period when fiberglass or poly fill was switched to foam. Advent foam is totally rotten. Infinity loved to use simple, cheap methods to hot rod their designs, and attention to the details can make all the difference. While the cabinet is open why not add some diagonal stiffeners inside the lower cabinet? 4.5s always seem bass shy, possibly because they are always pulled away from the back wall, however you may have discovered some interesting keys. We had the lucky situation to compare 4.5s and a custom set of 6.5s built for Jon Nork in the same room. Bass performance differences wrer obvious, with a much better balance in the 6.5s. Nork wanted "faster" bass, but what we heard was a shy 4.5 and a natural 6.5, differences beyond the scope of crossover dial turning.
 
After removing the crossover remove all of the excess foam. This shouldn't be too hard as the stuff literal falls off ;) I used a vacuum cleaner with a brush attachment and all of it more or less was sucked up into the vacuum cleaner. ;)

fd61a018.jpg
 
OK, they are there now. Great pix!

My 4.5s have foam underneath the crossovers and I suppose it is original. I do notice it has dried out a bit around the edges but it is generally ok and appears to be firmly in-place. I have never taken the crossovers off the cabinet so I don't know what it looks like underneath.

My woofers were refoamed by a previous owner. I have not taken them out to check as you did but now I am wondering about how good of a job was done and what else was done to them. I have not noticed a marked loss of lows but as you say, so much of low frequency response is room dependent, it might be hard to tell if the bass is compromised.

Great post, thanks for bringing this to light!
 
You need to drill the aluminium to accommodate the two Neutrik sockets. I forgot to take a picture of the plates after I had drilled them but I do have a picture of them installed.

The first picture is the plate with the two Neutrik sockets installed from below the top of the bass enclosure.

8cba3402.jpg


The second picture is from the top of the bass enclosure.
Not readily visible is some foam gasket to make a good seal between the plate and the enclosure ;)

9f3db673.jpg
 
OK, they are there now. Great pix!

My 4.5s have foam underneath the crossovers and I suppose it is original. I do notice it has dried out a bit around the edges but it is generally ok and appears to be firmly in-place. I have never taken the crossovers off the cabinet so I don't know what it looks like underneath.

My woofers were refoamed by a previous owner. I have not taken them out to check as you did but now I am wondering about how good of a job was done and what else was done to them. I have not noticed a marked loss of lows but as you say, so much of low frequency response is room dependent, it might be hard to tell if the bass is compromised.

Great post, thanks for bringing this to light!

It's a major weakness in the design and it can easily go unchecked :( I only stumbled across it by accident ;)

Next phase of the operation is to remove the woofers from the enclosures and remove all of the stuffing and put each lot in its own bag.

Note that there is no proper foam gasket or sealant so this is another source of potential leakage :(

2c196d7f.jpg


Use some stick on adhesive foam door trim and run a gasket around each speaker opening.

The closed cell foam is better than the open cell foam so use that if you can ;)

65287247.jpg


When finished it should like this

6204743c.jpg
 
While you're at it and you have the stuffing out you may as well seal up the corners of the enclosure with some silicon sealant. You'll need one 300 ml tube to do both enclosures and it's a bit tricky getting at the front corners of the enclosures ;)

2ced6834.jpg
 
Next you need to make up a proper wiring loom. It helps to strategically locate some screw-in cable ties and then work backwards from that so you get the lengths right. I used quality speaker cable from my local electronics store.

- Figure 8, 259 0.12mm strands in each side.
- DC resistance 0.003 ohms per foot.
- Inductance 0.23uH per foot.
- Roll length 100 Metres
- Sold per metre

It appears to be the same cable Infinity used in the later Infinity designs such as the Ren 90's when Infinity started spending a bit more money on interconnect ;)

7aa5ee81.jpg


The previous owner made a bit of a mess with the speaker terminals and soldered the retaining nuts onto the terminal thread so may as well throw some new speaker terminals in whilst everything is open ;)

a973509a.jpg


I used gas tight crimp on connectors and a proper crimping tool. Plus I used color coded heat shrink tubing for identifying each speaker connector ;)

83495fbb.jpg


ae7ecf46.jpg
 
Next you need to solder some short lengths of wire (8 inch) from the Neutrik plugs to the crossover. You can't use the back shell of the plugs because they are too long.

This is what they should look like plugged into the sockets on the aluminium plate. Because you can easily unplug the crossover its easy to test components in the crossover on the bench. Fortunately the large bipolar electros still measure OK otherwise it would be an expensive replacement ;)

05c913e7.jpg
 
When installing the crossovers note there is no longer any foam to hold the aluminium standoffs in position so there is a bit of a fiddle to screw it back up unless you use some double sided tape etc. Note also that the standoffs are made out of anodized aluminium and could short out the PCB tracks if the anodizing and solder mask on the PCB was scratched away. In situations like this it is best to err on the side of caution so I installed some fiber washers between the back 3 standoffs and the PCB.

4efb3a6a.jpg


Make sure the cables are seated correctly between the crossover PCB and the top of the bass enclosure. Although the speaker cable I used is relatively thick it also very pliable because it uses lots of strands of thin wire ;) Try and avoid the speaker cable that looks thick but has more insulation than copper making it look like it has lots of copper. This is much harder material to deal with and it is not very flexible :(

Now screw up the crossover using the six screws. Note that there is one long brass screw with a cheese head which goes through the center of one of the inductors and another quarter inch hexagonal head that goes through another inductor ;)

e27abae0.jpg
 
Once you have completed the wiring looms you can put the stuffing back, connect up the woofers and screw the woofers back into the enclosure. With the woofers installed gently pumping both cones at once with your fingers should now offer a large amount of resistance as the air leaks in the enclosure have now been minimized ;)

I check the polarity of the woofers using an analog multi meter set on Rx1 range. There is enough current to slightly move the cones forward or backwards depending on the polarity. (Note most analog meters have the black test lead positive with respect to the red test lead) You need to find the right points on the crossover to check for continuity of the voice coils and proper polarity. Because the woofers are heavily damped they will be slow to move in and out with the small current from the multi meter.

Bear in mind that the 2 ohm parallel connected voice coils are less sensitive than the 4 ohm series connected ones. Having said that if the woofers are out of phase they will freely move in opposite fashion so you will readily be able to observe that your wiring is correct ;)
 
Some finishing touches are the new speaker terminals and a set of decent speaker cables with good quality banana connectors ;)

20700dda.jpg


6948b085.jpg
 
My setup consists of:-

Pioneer D6 CD/SACD player,

Yamaha CX-1 Preamp,

Harmon Kardon PA2400 Signature series Power Amp switched for 4 ohm operation.

This power amp is a good match for the Infinities. It has 8 Toshiba output devices per channel and a High Current Capability of +/- 100 amps ;)

b595369f.jpg
 
OK, they are there now. Great pix!

My 4.5s have foam underneath the crossovers and I suppose it is original. I do notice it has dried out a bit around the edges but it is generally ok and appears to be firmly in-place. I have never taken the crossovers off the cabinet so I don't know what it looks like underneath.

My woofers were refoamed by a previous owner. I have not taken them out to check as you did but now I am wondering about how good of a job was done and what else was done to them. I have not noticed a marked loss of lows but as you say, so much of low frequency response is room dependent, it might be hard to tell if the bass is compromised.

Great post, thanks for bringing this to light!

You really need to take the crossovers off to properly inspect the foam and the opening. Like I said a lot of the foam had already fallen inside the speaker enclosures and really wasn't doing the job it was supposed to do of sealing up the enclosures :(

I'm not sure why Infinity did this instead of putting a proper plug and socket arrangement like I have done. Like everyone else at the time they assumed the foam was going to last forever. However history has shown otherwise :(

I measured the bass response using near field microphone technique but my SPL meter is only good to 30 Hz. With a swept sinewave the speakers were measuring flat to 30 Hz although the room cutoff was about 40 Hz ;)

In my experience if you set speakers up on the short side of a rectangle room bass will be weaker compared to the long side of the room. But on the long side you will excite more room modes and the bass will be stronger and colored.

Definitely the speakers are doing a lot better job in the bass than when I first got them. At least the speaker that wasn't producing any bass at all because the 2 ohm Watkins voice coil was reversed on one speaker, is now producing bass ;) Now I can sleep at night and I have now rediscovered my CD collection with these speakers and hearing stuff in the recordings that I never heard before ;)
 
great work. There was a period when fiberglass or poly fill was switched to foam. Advent foam is totally rotten. Infinity loved to use simple, cheap methods to hot rod their designs, and attention to the details can make all the difference. While the cabinet is open why not add some diagonal stiffeners inside the lower cabinet? 4.5s always seem bass shy, possibly because they are always pulled away from the back wall, however you may have discovered some interesting keys. We had the lucky situation to compare 4.5s and a custom set of 6.5s built for Jon Nork in the same room. Bass performance differences wrer obvious, with a much better balance in the 6.5s. Nork wanted "faster" bass, but what we heard was a shy 4.5 and a natural 6.5, differences beyond the scope of crossover dial turning.

As you can see on a couple of the photos Infinity through their Infinite wisdom had already seen the need to brace the enclosures although maybe some addition bracing, lead lining or tar might help a bit ;)

I find when listening to the RS4.5's that the bass is tight and only there when it is supposed to be ;) I think a lot of us have been spoilt by one note colored bass from HT systems which is invariably hopeless for music as it gets tiring after a while :(

The other trick is to bi amp the speaker and possibly raise the level of the bass amps above the mid-hi amps in order to bring up the bass.

I have a Sansui B-2101 power amp which I might bring into action in order to drive the top end in a bi-amp configuration. It has level controls so you can adjust it independently of the bass amp ;)
 
You really need to take the crossovers off to properly inspect the foam and the opening. Like I said a lot of the foam had already fallen inside the speaker enclosures and really wasn't doing the job it was supposed to do of sealing up the enclosures :(

I'm not sure why Infinity did this instead of putting a proper plug and socket arrangement like I have done.

I measured the bass response using near field microphone technique but my SPL meter is only good to 30 Hz. With a swept sinewave the speakers were measuring flat to 30 Hz although the room cutoff was about 40 Hz ;)

In my experience if you set speakers up on the short side of a rectangle room bass will be weaker compared to the long side of the room. But on the long side you will excite more room modes and the bass will be stronger and colored.

Definitely the speakers are doing a lot better job in the bass than when I first got them. At least the speaker that wasn't producing any bass at all because the 2 ohm Watkins voice coil was reversed on one speaker, is now producing bass ;) Now I can sleep at night and I have now rediscovered my CD collection with these speakers and hearing stuff in the recordings that I never heard before ;)

Beautiful work, it must be satisfying to know you have checked and reworked the wiring!

I wonder why Infinity "sealed" the cabinet opening with foam in the first place given they could have just drilled a smaller hole and caulked it shut after threading the cabling through? Could it be that the cabinet was not designed to be sealed tight? Is the foam covering of the hole acting like some sort of heavily damped vent? What kind of cabinet is this supposed to be?
 
Back
Top Bottom