looking for instructions on cleaning pots w/ Deoxit

progger7

Active Member
I've done some searches on AK and haven't come up with a thread explaining how to clean the pots - I have a Marantz 2275. The left channel cuts out sometimes. Can anyone point me to a good thread w/ detailed instructions for a newbie? I know it must exist on here somewhere.
 
Wow, I can feel your frustration just reading your post. Fortunately, your problem may not be as dire as you think.

You say you don't like taking things apart. You don't need to take much apart to use DeOxit correctly on 90+ percent of receivers. Basically, you need to unscrew the top and bottom covers, and PERHAPS (but often not) remove the front faceplate. It's really pretty easy to do, if you can just use a screwdriver to unscrew (and screw back in) a screw, and point a spraycan, turn a knob back-and-forth, and wiggle a little Q-tip or mascara brush!

Maybe this will help you:

Arkay's "Idiot's Guide" (because it takes one to know one... :D) to a DeOxit job:

Note: Although this is a simple enough thing to do, all written out in detail like this it gets a bit long. You might want to print this out on paper and read it through once or twice before beginning, perhaps even keeping it beside you as you do the work, and checking off the steps as you go.

MATERIALS:

*A screwdriver or two that will fit the screws holding on the covers.

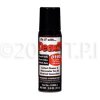
*A DeOxit kit, with both spray can (with little red straw) and little bottle of red DeOxit, and the same for the DeOxit Gold (formerly called ProLube).

* Either a little mascara brush (or two) or a couple pipe cleaners and/or some Q-tips (the kind that don't come apart easily). If you buy one of the DeOxit kits that comes with some little things like these, then that's all you'll need. You might also want a few paper towels.

* If it turns out that you need to remove the faceplate (but you may not have to), then you might also need a very small allen wrench or jeweler's screwdriver to remove the tiny set-screws that are sometimes used to secure larger knobs and maybe two rounded-bottomed spoons (regular kitchen spoons) to pry up knobs that are stuck tightly on the shafts.

STEPS:

Remove Top Cover:
1. Remove the screws that are holding on the top cover, and put them safely aside in a small paper cup or dish or something, as you remove them, so they won't be lost. Label that container ("top cover screws") and set it where you won't spill it or lose it. Lift off the cover and set it aside in a safe place where it is out of your way but you can find it again.

Remove Bottom Cover:
2. Stand the receiver up vertically, so you can access the bottom of the receiver. [You may wish to put down a piece of cardboard or srap of linoleum or something like it underneath the receiver, to protect your table-top from scratches, and to facilitate turning the receiver around sometimes for easier access.] Repeat step 1 for the bottom cover. You might need to remove the feet, as well, in order to remove the bottom cover, but sometimes you don't have to. Be sure to put the screws into their own receptable and label it ("bottom cover screws").

Only Remove Faceplate if Necessary:

3. Look at the area behind the faceplate. Can you see the potentiometers and switches? Those are the things that the shafts of the knobs and such on the front panel go into. If you can see them, and access them at least with the little red straw tubes that come with DeOxit spray cans, then you don't need to remove the faceplate. This is the case with most receivers.

Removing the Faceplate:
4. I won't detail the process for removing the faceplate itself on a particular model, but give general instructions, as it will vary from model to model and usually isn't necessary, anyway.

If you do have to remove the faceplate, study it carefully first, and take some digital pics and make notes, so that you can replace it properly afterwards. MOST of the time, though, it is very simple: just remove the knobs from the front, and unscrew a couple of screws holding it from the backside, and it will lift right off.

If there are a lot of knobs with different sizes, you might even want to make a diagram on a sheet of paper, and tape each knob where it belongs, on the diagram.

Dealing With Removing Stubborn Knobs...

To remove stubborn knobs that don't want to pull off by hand, use two rounded spoons: slip one spoon under opposite sides of the knob, and push down on the spoon handles to "lever up" the knobs. Put protective cloth or cardboard underneath the spoons first, though, to protect the faceplate against possible scratches.

Some knobs, often the larger ones like the volume knob, have a tiny screw set down inside a small hole on their side, which anchors them to the shaft. With those, you need to use a tiny-sized allen wrench to loosen that, before the knob can be pulled off. Sometimes you'll need a jeweller's screwdriver (Phillips head), but almost all of the brands require allen wrenches instead. Usually these are about 1.5mm in size. Both sets of small allen wrenches and jeweller's screwdrivers can be found cheaply at any good hardware store. Get a set of the really tiny ones, and one of them should fit.

Some knobs shafts may be anchored to the faceplate with hex nuts. If those are there, you can either loosen them with an appropriate-sized hollow-shaft hex-nut driver, if you have one, or else carefully get it started using needle-nosed pliers (be careful not to slip and scratch the faceplate: you may want to protect it first with a couple layers of masking tape to be safe). unscrew the nuts and any washers underneath, and set them aside in a safe place, labeled so you you'll remember where to put them back when re-assembling.

Now Let's Start Cleaning the Pots (Potentiometers)...
5. So, let's assume you've already removed the top and bottom, and --only if necessary (which it probably wasn't)-- the faceplate, and you can see all the pots and switches. Potentiometers ("Pots" for short) are the little cylindrical can-like things with a shaft sticking out of them. There will be one (or else some kind of switch) at the end of each shaft leading in from a control knob.

There will be one or more small holes in the outer metal case of each Pot. These may be drilled holes, or just openings created where the metal cases had little tabs bent inwards to hold them on. It doesn't matter; just find one or more small holes that give access to the inside of the pot.

Start with one, and direct the spray from the DeOxit spray can, using the straw, into the hole and give it a good spray or two into the interior. You don't have to over-do it; the DeOxit will run all over inside, once you get it sprayed right in there, but use enough. Usually two blasts for about a second each will be enough. If there are multiple holes, shoot a blast through each hole, to ensure you get some into the contact areas.

After spraying, immediately (a few seconds won't matter, but don't wait five minutes or the DeOxit will have evaporated too much) work the corresponding knob back and forth (from left to right) a few dozen times, through its full range of motion.

Repeat the spray-and-turn process described in step 5 for each and every pot.

Clean the Switches, Too:
6. Also do the same cleaning process for every switch. You want to clean the surfaces where electrical contact is made, so spray those and work them back-and-forth.

Sometimes the switches are not enclosed in cases as the pots are, so you can see their contact surfaces. In these cases, spray (or brush) the DeOxit directly onto the contact surfaces. Some switches are covered in metal boxes like the pots are, though. SOMETIMES these boxes have little covers that easily lift off: if so, you can remove the cover and spray the contacts directly. Whatever form they are in, it doesn't matter: just spray through any little holes or openings you can find in the case, or else directly on to the contacts, and then do the back-and-forth thing with the knob shaft, a few dozen times or more.

After Cleaning Each Time, Apply Lubricant/Protectant:

7. For EACH of the above things you've cleaned (pots and switches), AFTER cleaning them with the DeOxit red stuff, you'll want to follow-up with a shot of DeOxit ProLube or DeOxit GOLD, to lubricate and protect the switches. Just spray it in there and work the knobs a couple times to spread it around. You don't need to work the knob dozens of times for this step, since you aren't trying to scrape off oxidation any more, just spread the lubricant.

Clean Jacks and Socket Contacts, Too:
8. After you have finished cleaning all the pots and switches along the faceplate, you still aren't quite done. Look at the jacks where the headphones get inserted. There will be some springy metal strips there, that make contact with the headphone jack when it is inserted. Clean those off with the red DeOxit, using small mascara brushes (or Q-tips) inserted through the jack-hole, or even just reached in through the side if there is room for them. [Use DeOxit red stuff from the little bottles for this, not the spray. Clean them well, then add a layer of the ProLube/Gold stuff. Just apply it with a Q-tip or brush, same as the red stuff. Alternatively you can just put some of it on the headphone plug, and run it in and out of the jack a few times, turning it a little, as a means of application. Again, you don't need to "work" the lube so hard: use the red stuff for the cleaning, and the gold as a final step, just to add a protective and lubricating film to your newly-cleaned surface.

Repeat this process for any other contacts that haven't been cleaned, such as microphone jacks if there are any, in the faceplate area. At this point, you should have cleaned every pot, switch or jack in the faceplate area.

After the Front-side contacts, Clean the Back-side Ones, Too:
9. Now turn to the BACK of the receiver. There will be more contact points there, where RCA jacks are inserted for inputs and outputs. You'll need to clean each one of the jacks. Don't just clean the outside parts you see from the outside. It is critical that you clean the INSIDE parts, where the center shaft of the plug goes in. Use either pipe-cleaners or mascara brushes, with some DeOxit brushed on them from the little DeOxit bottles. Brush in-and-out with the DeOxit-ed mascara brushes or pipe cleaners, as if they were, uh... well, you know, "getting it on"! :D You'll probably be able to see the contact surfaces from the inside, and can see that they are getting cleaned. When you think they've had enough and are fully clean, add a final dose of the ProLube/Gold stuff to lubricate and protect the newly-cleaned surfaces.

Make Sure You Clean ALL the Connector Surfaces:

10. Now, having cleaned all the RCA jacks, look at what else is on the back of the receiver. You probably have some more contact surfaces there, where electrical contact is made between two conductors, such as screw-connectors to attach antennae, and some form of speaker connectors. Clean each of those surfaces, too, following the same steps as above (a good scrubbing with red DeOxit, followed by a protective bit of the gold stuff). By this time, you should be able to do this "on autopilot", while enjoying background music from your other system. :D

Don't Forget to Clean the Fuses, too:

11. There is another type of contact surface that you shouldn't forget: the fuses! There will probably be one power fuse, accessible from the back side of the receiver. Unscrew the cap that holds it in place. You may be able to do this with your fingers. Otherwise it will probably have a big "x" you can use a thin coin like a dime or a large phillips-head screwdriver to loosen it up with. Remove the fuse and clean both ends of it, as well as both ends of the fuse holder. You'll probably need to stick a DeOxit-carrying Q-tip, mascara brush or pipe cleaner into the hole, to clean the inside contact surface. Again, you can follow-up with the Gold stuff (but you knew that already by now, huh?).

Now look at the inside areas of the receiver. There will probably be a few more fuses scattered around the circuit boards inside. One by one (so you don't mix them up!), remove and clean the ends of the fuse itself, along with the little holders that it clamps into. Then replace the fuse, and move on to the next one. Repeat until you've cleaned up every fuse you can find.

You Are ALMOST Finished!...
12. At this point, you should have cleaned up every electrical contact surface --pots, switches, and jacks-- in the front and back of the reciever, as well as all the fuses. Basically, you are FINISHED with the DeOxit cleaning process!

But the Relay Contacts May be Dirty, Too:
BUT... there is one thing I should mention, just to be complete: There is one more non-permanent or intermittent contact type in your receiver, which can oxidize and affect function and sound. That is the contact surfaces in the relays.

These are usually semi-complex-looking thingies housed in clear plastic boxes, with black plastic bases. You can see the little contact points on metal leaf-spring things inside them. I would suggest just leaving them alone, unless you find they are causing a problem, as they can sometimes be tricky to open up (some cases aren't made to be opened), and if you screw them up you'll have to buy new ones.

But if you really want to be thorough, those surfaces should be cleaned, too. IF the case comes off, then you can just gently put a little strip of regular typing/photocopy paper between the contacts, gently close the contacts on the paper, and pull the paper out. You may see some dark streaks or smudge lines on the paper the first time you do this: that is the carbon/oxidation being removed. Do this about twice, or until the paper comes out completely clean. Be careful to do this gently, making sure you don't twist or bend the metal strips: the contact surfaces need to make perfectly square face-to-face contact.

If the relay contacts are very dirty, you may need to try using a VERY fine sandpaper, like 1500 or 2000 grit, but try the regular paper alone first --scratches from sandpaper are more likely to create faster re-oxidation in the future. Frankly, if the contacts are that dirty that you need sandpaper, you might want to consider replacing the whole relays, but that is a task beyond the scope of this post.

MOST OF THE TIME, you'll be fine just leaving the relays alone, so you may want to skip this if it intimidates you, but as long as you can get the case open easily, it is worth doing.

IMPORTANT REMINDER: You DO NOT USE DeOXIT OR ANY OTHER CLEANER ON RELAYS!!! Just dry clean them with paper (or very, very fine sandpaper/emery paper).

A Few Things to Consider Before We Are Done:
13. NOW you have cleaned every single contact surface in your receiver. The electrons should be able to flow freely through all their intended channels, pretty much as they did when the thing was brand new. YOU ARE ALMOST FINISHED!

Many people recommend waiting overnight, to be sure all the DeOxit has dried, before turning on the receiver. Just as many people (including myself) wait only ten minutes or so before turning the power back on, and never seem to have a problem. The choice is yours.

In any case, if you plan to do further troubleshooting, you may wish to plug in and turn on your receiver before re-attaching the casing, to try it out. I you do this, remember that there is dangerous live current inside it, and don't touch anything inside, except the usual controls and such on the outside that you would touch anyway in normal use. Also, if you have the case off, make sure nothing foreign (like a screwdriver shaft, pipe cleaner, etc...) is touching anything inside the receiver. If you accidentally short anything out, you may not only hurt yourself, but you may easily "fry" parts of the receiver.

However, if you are a non-technical person who doesn't know what they are doing and won't want to start fiddling with further repairs, anyway, then I suggest you close it all back up, before testing it.

There is one reason why you might want to test it first, though: Sometimes one DeOxit treatment isn't enough to fully clean really dirty contacts, and problems may remain or recur if they aren't yet clean enough. If you test it at this stage and still get some crackling when operating one of the controls, you can blast it again with DeOxit and re-crank that control (i.e., repeat the whole cleaning process for that control) again. It is easier to do this before putting the case back on, than after!

Re-Assembly Time:
But let's assume that you are finally finished and ready to re-assemble things:

Start by re-attaching the faceplate and knobs, if you took them off (you probably didn't, anyway). Then re-attach the bottom plate (including the feet, if you removed them). Last of all, replace the top cover.

If you set your knobs and screws and such all aside carefully, and kept the screws for each section in separate, marked containers as I suggested before, this should be very easy. If you kept the screws for each section separate, then if at any stage one screw is left over (a "proverbial" problem!), at least you'll know which section it came from, which will considerably shorten the time and hassle it will take to find where it goes.

Once everything is all covered back up again, you should have a receiver that looks just like it did before, but now all the oxidation that acted like blockages in pipes have been cleared out, and the electrons have freedom to flow again where they are supposed to. Connect it back up, turn it on, and check the sound. Try all the functions and controls. Turn them all back and forth a little or operate them a few times. Everything should be quiet and right.

Some Simple Troubleshooting:
If you still have crackling or dropouts, then one of two conditions exists:

(1) Some of the contacts (as mentioned above) may not be clean enough yet, so you may need to open it back up and clean those. Most of the time you can tell if this is the case, as the problem will come and go exactly when you fiddle with that particular contact, so you can tell which control needs re-cleaning. HOWEVER, if there are several contacts that are still dirty and are chopping in and out randomly, it can be a little confusing to identify which ones are the problem. [That is one reason why we don't always bother to test the results after cleaning each separate control. It is better to clean them all first, and then test.] It is very unlikely this will happen, though, if you followed the above instructions properly.

OR

(2) If you are still having problems, there may be something else wrong, like failing components inside. That is for a tech to handle (or DIY, if you are willing to learn enough electronics repair), and beyond the scope of this post.

Most of the time, if you have followed the above process, your receiver will function fine, and sound markedly better than it has in many years.

What's Next?
I'd still recommend doing (or having done) a complete re-cap and check-over, setting of bias and DC offset, and tuner alignment, but that is way beyond this post. Even if you decide to take it to a tech and have all (or some) of this done, at least you may save some money by having done this much first, since otherwise your tech will do it first, himself, and charge you for his time doing it. Remember to tell the tech exactly what you did!

NOW You have FINISHED!
CONGRATULATIONS! You have just finished your first full, correctly-done DeOxit treatment of your receiver! :banana: :thmbsp: Do it once, do it right, and you shouldn't have to re-do it for quite a while. Now you can just sit back and enjoy the :music:!

Whew! Time to give my fingers a rest and go eat... Hope that helped ya!

Has also been recommended to followup Deoxit with Faderlube to relubricate the pots.
 
Check CAIG's website - Faderlube is the stuff for pots, not Deoxit. Deoxit is great for metal-to-metal stuff (switches) but if you have the dilution, not the 100% solution, you can lift the carbon traces off the pots, rendering them useless.

A simple search should reveal dozens of threads discussing this.
 
Not intended to start a which Caig product is best to use. Do a search and you will see many satisfied users and can decide for yourself.

There are also advocates of 100% Deoxit D100 and other products.

And I have been confused by a lot of specialty Deoxits.

But for availability and performance Deoxit D5 and Faderlube are the most accessible without having to go online. And probably the ones most without any knowledge of differences will pickup. And they work as evidenced by many testimonials even if you just use one or the other or something else.

But I'll go by markthefixer's recommendation if you use Deoxit follow by Faderlube on pots (rotational controls) just because I trust his experience. He has actually taken pots apart to see Deoxit effects. And he is the Go To Guy on a lot of tech repair on the Pioneer board.

Source: http://www.audiokarma.org/forums/showthread.php?t=172178
07-02-2008, 03:38 PM
There are many previous threads about those operations available through the search function.

Deoxit is (usually) a spray can of an effective contact cleaner,that chemically loosens the sulphate type corrosion that forms in switches and controls after many years of exposure to the stuff we breathe. Then we operate the daylights out the switches and controls to scrub the loosened corrosion away.

Since the switches and pots are usually sealed from the front to keep coffee, pop etc out of them, the nooks and crannies to spray into to get deoxit to the actual contacts are from the inside. Sometimes there is some disassembly required to get to the more deeply buried switches etc...

Faderlube is also a spray can, of lubricant, to ensure continued long life from your rotatonal type controls.

...

Years ago I had given up on vintage equipment repair, because I had never found an effective cleaner (and I had LOOKED!!). I had equipment (including an SX-636) that was malfunctioning ONLY because of the corroded controls, that I had kept for sentimental reasons, but had no expectation of ever working again due to the unavailability of uncorroded replacement controls.

THEN I heard of, and tried, Deoxit. Within days I had everything cleaned and working. I was in HEAVEN!!

We have seen COUNTLESS examples of deoxit resurrection on this board, and deoxiting is now the de-facto first step in just about every repair... It REALLY prevents us from chasing ghost symptoms.

Deoxit (D5) and faderlube (F5) are available at Guitar Center, Fry's and quite a few mail (web) order houses. Generally they go for 10 bucks a can, but a can will last quite a while when used but not over used (less than 1 second bursts gets more than enough in )...

The following addressed why Faderlube after Deoxit D5:
http://www.audiokarma.org/forums/showthread.php?t=130031&highlight=faderlube+markthefixer
10-16-2007, 11:37 PM
The 5% deoxit is a pressurized spray that usually gets into the crannies of the switches where it can start breaking down the corrosion. Mechanical motion and friction of the switch contacts breaks the loosened corrosion free and sweeps it out of the contact path.

For a long time Deoxit D5 was also used on pots, until two problems came to light:
1) The 95 percent solvent carrier DID clean the junk out of the pots, BUT it also cleaned out the surface lubricants, leading to long term wear and failure because deoxit itself does not have adequate lubrication properties. Thus the addition of faderlube into the cleaned and treated pots rectified that problem.
BUT
2) in some older pots the 95 percent solvent carrier attacked the "glue" that held the painted on resistance element onto the lower insulating layer of the pot. When this comes off... it's no longer a pot.... it's a doorstop.

I believe Caig recommends just using faderlube on pots, and counts on the flush of lube to displace the crud in the contact path.

My theory about using D100 addresses the commutator contacts in a pot, which are located between the stationary outside connection for the moving contact and the moving contact itself, because it slides bridging between the resistance element on one set of contacts and the output terminal connection on the other. NOW MAYBE a LOT of lube in the pot protects the commutator from oxidation, and maintains a good contact, there IS a precident for that:

I KNOW of one series of oscilloscopes (Hewlett Packard 17xx series) that have a type of thick grease covering the stationary contact traces on a printed circuit board, coupled with high pressure moving contacts (to get through the grease) to get long term reliable contacts.... until the grease solidifies after 20-30 years... I got a LOT of them going again by cleaning and regreasing those switches....

SO:
5 percent deoxit for any metal to metal electrical contacts, and work the snot out of the switch etc for it's FULL range...

faderlube on any pot... with an optional drop of d100 in first to treat the commutator contacts, work the pot hard, then put in the faderlube: beause the faderlube will probably flush the d100, that's why you work the pot BEFORE faderlubing it .... to break up any corrosion on the commutator.

Also note on the same thread where KingBubba saying D5 is not recommended for pots and he posts the white sheet:
5% Deoxit is not recommended for pots due to the fact that the solvent that it is cut with will hold the possibility of dissolving the traces in some types of pots. Use 100% Deoxit followed by Faderlube or use Faderlube. Here is the white sheet from Caig:
DeoxitInstructions.jpg


You can also do a good bit of reading at Parts Express where they have most if not all pertinent data sheets on all Caig product.

Although I have yet to use Caig Gold or Shield, their point about it, on the white sheet, is reasonable. I cut my 100% Deoxit with 92% alcohol 10 to 1 and use that to flush very dirty pots, switches and faders. Although there is no recommendation for this particular type of use, it has worked well for me on some faders that were really bad. I then followed with 100% and Faderlube after the flush dried up. It works for me.

Confused yet? It can take months to decipher and search for a definitive Deoxit statement with so many threads with different experiences. So what does it mean? I guess, Deoxit D5 followed by Faderlube on rotary controls is ok, but if you want to be safe, just Faderlube could work. Actually Faderlube is cheaper.
 
Wow. This is an incredible post for those of us who are very new to this. I hope this would become a permanent sticky up at the threads.

DK
 
Wow!

I just recently "showered" my Yamaha CR-2020 with Deo5 (except the tuning capacitor)

Deo5 was gushing out of every nook and crany....

I am just waiting on the DeoFader maybe to repair the damage if I have done any...

I actually fixed the muffled sounding right channel and my receiver sounds great..

AK is great!
 
thank you Terra1 (and Arkay)! This is super helpful and will be my guide as I tackle this project this weekend. AK rocks.
 
terra1, as markthefixer pointed out (as does CAIG on their website), the D5 *can* lift the carbon traces on potentiometers.

I know, because I hosed a Grommes tube integrated with D5 - as I twisted the pots back and forth to "clean", I was actually removing all the conductive surface. :tears: (That would be Mark's "No. 2", quoted in your post.)

Faderlube or D100 for pots, D5 for switches and metal-to-metal conductive surfaces. (Starting a "which CAIG product is best to use is a good thing. :) )
Then start one. I not smart enough to attempt it.

I thought you originally said just Faderlube. But now I see you say or 100% deoxit - D100. That's the frustrating thing about all these searches people recommend. Everybody always adds something later.

I just tried to help answer the specific question specifically about Deoxit instructions without throwing the poster into a search and then trying to decipher it all. If people are going to use deoxit on roatary controls then at least followup with faderlube.

Certainly a search could be mind boggling and full of misinformations and no guarantee they will find that particular best practice. So I tried to give both sides above. Arkay's was the most detailed procedurally, but I tried to make sure Faderlube was mentioned. Deoxit or Faderlube the mechanical procedure is the same and I assume the main point or question of this thread.

I still maintain that most people will think and see Deoxit D5 when they read it and see it in the store. So might as well mention to followup with Faderlube if they already bought D5.

It took me awhile to figure out that the 100% Deoxit D100 people were talking about was actually sold or listed as Deoxit D100S-2. And that Deoxit D100 people are referring to is different than Deoxit D5 that lists ingredients as D100L -- what the hell is that all about?! But again, D100 is not readily available locally.

We can tell people to search, but its frustrating when all the little details get left out and people just refer to Deoxit generically. And then people say well but that's not correct. And you have to really dig to figure out the difference between application for switches versus rotary knobs like Volume and Balance knobs.

Sorry if this sounds like a rant. but serious about taking months to decipher all this. And serious about the frustration. ;)
 

Attachments

  • D100s-2.jpg
    D100s-2.jpg
    10.7 KB · Views: 73
I'm going to jump into my firs Deoxit adventure tomorrow (Sunday). yikes! I've been playing my system all morning and noticed the left channel cuts out, or cuts out partially, mostly when I'm playing my turntable (rather than CD's or radio). While I have the case opened up, is their a particular place I should be sure to use Deoxit? Should just spraying it on all the pots do the trick in your experience?
 
Noted one mention of Yamaha so I thought I would add this bit. The CR-620 and CR-820 have the tone controls mounted on a circuit board that unfortunately has the trace side up. I have yet to discover a technique other than removing the faceplate (I usually have them off for cleaning in any case) and un-doing the kex nuts so that I can slide the board+controls into the chassis so that I can get at the openings on the pots. There is also a shield over the power switch that must be removed (2 screws) to do this.

On the CR-1020 and CR-2020 the tone controls can be reached with the red straw from above. The multi-ganged volume controls are another story. While I used to follow the same proceedure as the 620 and 820 so far as the volume pot was concerned I came up with a new proceedure. Use heat shrink tubing (about 2 inches long) to join two red straws. Use a heat gun to bend the end of one into a J shape. This tool will let you reach under the controls to where the opening is.

The CR-n40 series seem to conveniently have a small round hole in the side of all the pots.
 
I'm going to jump into my firs Deoxit adventure tomorrow (Sunday). yikes! I've been playing my system all morning and noticed the left channel cuts out, or cuts out partially, mostly when I'm playing my turntable (rather than CD's or radio). While I have the case opened up, is their a particular place I should be sure to use Deoxit? Should just spraying it on all the pots do the trick in your experience?

Follow instructions above regarding pots, switches and connections on back and note the concerns pointed out re: Deoxit D5 v D100 v Faderlube.

If it also happens a little on CDs or radio, then it could still be the volume or balance pots. But when you spray you also need to work the controls back and forth to scrape away any corroded matter. You should hear some improvement. You may have to reapply so be patient.

If its just your turntable and not the CD or radio, then it may be just connections in the path to the turntable. But cleaning may at least eliminate that as the source before thinking it might be something more serious.

I would spray the button or switch mechanism for the phono in the back of the faceplate and the connections on the back. If you don't have pipe cleaners, I would spray the back connections and insert an RCA plug and twist to clean the jack. And spray and scrub the Ground terminal on the back with a q-tip or toothbrush.

If your turntable has a clear bottom, you could check to see if the connections are secure. Make sure the wires on the cartridge are inserted fully. You could probably try cleaning those contacts with some some q-tips dipped in deoxit there too. If the turntable still has problems, then I might try removing the bottom of the turntable and cleaning the RCA jacks and Ground connects there. Or the cleaning doesn't help then maybe ask in the Turntables and Tapes board for suggestions.
 
Well, this is all very useful. And all very confusing.

So I went to the Caig website and - though the info is scattered throughout the site - they do clear some of it up, as to which product to use.

Their "Audio/Video 9-1-1" info sheet: http://store.caig.com/s.nl/it.I/id.52/.f?sc=17&category=-117

"Detailed DeoxIT® product information, directions and recommendations for legendary audio/video performance.
(SB-AV9-1-1.pdf, 80k)
(Bulletin No. SB-AV9-1-1, Revision Date: 03/26/2006).

1. Connector Maintenance
2. Vacuum Tube Maintenance
3. Fader Maintenance
4. Potentiometer Maintenance
5. Difference between 5% and 100% products

Applicator recommendations included for each procedure."

And from their knowledgebase, on what to use for carbon pots or carbon/metal pots: http://store.caig.com/s.nl?ctype=KB&it=I&id=2919&KB=215&category=9

"If the pots are truely carbon contacts then we would recommend the DeoxIT FaderLube. If they are/could be carbon wipers with metal contacts, then we would recomment the DeoxIT D100S-2 product.

If you do not know, I would use the FaderLube first. If that solves the issue than you are good-to-go. If their is meatl on the pot, then the FaderLube will not dissolve oxidation and your issue may still remain. Then use the DeoxIT D100S."


In either case, it's the 100% solution you should use, because the solvent could dissolve any lube or glues that are in there.

Caig forum links for cleaning pots:
http://www.deoxit.com/caigb1/view_topic.php?id=42&forum_id=10
http://www.deoxit.com/caigb1/view_topic.php?id=34&forum_id=10
http://www.deoxit.com/caigb1/view_topic.php?id=33&forum_id=10
 

Attachments

  • SB-AV9-1-1.pdf
    84 KB · Views: 12
Well, this is all very useful. And all very confusing.

So I went to the Caig website and - though the info is scattered throughout the site - they do clear some of it up, as to which product to use.

Their "Audio/Video 9-1-1" info sheet: http://store.caig.com/s.nl/it.I/id.52/.f?sc=17&category=-117

"Detailed DeoxIT® product information, directions and recommendations for legendary audio/video performance.
(SB-AV9-1-1.pdf, 80k)
(Bulletin No. SB-AV9-1-1, Revision Date: 03/26/2006).

1. Connector Maintenance
2. Vacuum Tube Maintenance
3. Fader Maintenance
4. Potentiometer Maintenance
5. Difference between 5% and 100% products

Applicator recommendations included for each procedure."

And from their knowledgebase, on what to use for carbon pots or carbon/metal pots: http://store.caig.com/s.nl?ctype=KB&it=I&id=2919&KB=215&category=9

"If the pots are truely carbon contacts then we would recommend the DeoxIT FaderLube. If they are/could be carbon wipers with metal contacts, then we would recomment the DeoxIT D100S-2 product.

If you do not know, I would use the FaderLube first. If that solves the issue than you are good-to-go. If their is meatl on the pot, then the FaderLube will not dissolve oxidation and your issue may still remain. Then use the DeoxIT D100S."


In either case, it's the 100% solution you should use, because the solvent could dissolve any lube or glues that are in there.

Caig forum links for cleaning pots:
http://www.deoxit.com/caigb1/view_topic.php?id=42&forum_id=10
http://www.deoxit.com/caigb1/view_topic.php?id=34&forum_id=10
http://www.deoxit.com/caigb1/view_topic.php?id=33&forum_id=10
This is an old thread and since then there has been a sticky created for a Deoxit tutorial.

Here's a summary of my accumulated notes.

You will get different answers, based on different experiences and preferences.

These are tips from various threads:
Pot/potentiometers are the rotary knobs. If you use Deoxit D5 recommended to followup with Faderlube F5 to replenish lubrication.
Switches can be levers or buttons. Use Deoxit.
Sliders are knobs that slide like on equalizers. Recommended to use Faderlube only on these.

Some will recommend only Faderlube F5 or Deoxit D100 on rotary knobs so as to play it safe and not lift and damage sensitive membranes or coatings -- or lose that silky resistance when turning the knob because of using the more solvent offerings. Although I don't know if it might just be the repeated working back and forth.

I don't use the Radio Shack twin pack of Deoxit DN5 and Gold GN5 because it's uneconomical. And the 14 gram quick drying breath sprays seem more suited for cleaning RCA jacks and connections rather than for fully flushing switches, pots and other contact cleaning.

So I prefer the 5 oz (142 gram) Deoxit D5 (which has more solvents and flushing action for cleaning) and/or Faderlube F5 (for more lube) for just about all my cleaning applications. Just my preference.

Radio Shack DN5 GN5 twinpack about $15
Deoxit D5 5oz $13.99 Faderlube F5 $11.99 at Fry's

14 grams v 142 grams: You get 10 times more product for less than half as much more dollars.

Also do not confuse D100L which is listed as the ingredient in Deoxit D5 with Deoxit D100. If you want 100% Deoxit (no solvents) look for D100 or D100S-2 on the label of the can.

Back to CRC or alternatives. There are cheaper electronics cleaners, but for large cleanup to be economical, I will use Puretronics (or any specifically for audio electronics and non-residue) or anhydrous 99.9 alcohol from Fry's for general cleanup and use Deoxit specifically for pots, sliders and final contact cleanups or where I deem worthy of the best stuff. Careful of some sprays which spray out freezing cold which can damage solder joints. Or Radio Shack's special contact tuner cleaner which sprays out white bubbly and crackly like pop rocks before it clears up and leaves a greasy petroleum residue.

Tutorial on cleaning with Deoxit (sticky in General Audio):

The Idiot's Guide to Using DeOxit (revisited)
http://www.audiokarma.org/forums/showthread.php?t=207005

Tips on cleaning tuner (sticky in Tuners):

How to clean a tuner (analog)
http://www.audiokarma.org/forums/showthread.php?t=144163
See thread for recommendations.

DESCRIPTION OF VARIOUS DEOXIT
http://store.caig.com/s.nl/it.I/id.66/.f

A) Standard Spray: Provides flushing action
Products:
DeoxIT® D5 Spray (D5S-6) & DeoxIT® D5 Mini-Spray (D5MS-15)
DeoxIT® GOLD G5 Spray (G5S-6) & DeoxIT® GOLD G5 Mini-Spray (G5MS-15)
DeoxIT® SHIELD S5 Spray (S5S-6) & DeoxIT® SHIELD S5 Mini-Spray (S5MS-15)

Formulation: 5% DeoxIT® (active ingredient), 75% odorless mineral spirits (carrier solvent), 20% propellant

Formulation contains petroleum naphtha (odorless mineral spirits) solvent, and is briefly flammable (until solvent evaporates within 2-3 minutes). It's slower to evaporate, providing flushing action to remove surfaces dirt, grease and other contaminants. Is ideal for connectors and components removed from equipment or those that are easily accessible. It is safe on plastics. When in doubt, always test for compatibility, especially vintage equipment with aging ABS plastic(s).

B) Non drip - Quick Dry Spray: Nonflammable, fast evaporating carrier solvent formula

Products:
DeoxIT® DN5 Spray (DN5S-6) & DeoxIT® DN5 Mini-Spray (DN5MS-15)
DeoxIT® GOLD GN5 Spray (GN5S-6N) & DeoxIT® GOLD GN5 Mini-Spray (GN5MS-15)
DeoxIT® GOLD GX5 Spray (GX5S-6N)
DeoxIT® SHIELD SN5 Spray (SN5S-6N) & DeoxIT® SHIELD SN5 Mini-Spray (SN5MS-15)

Formulation: 5% DeoxIT® (active ingredient), 75% 1,1,1,3,3-PENTAFLUOROPROPANE (carrier solvent), 1-5% isopropyl alcohol, 20% propellant

May be used where fast evaporation and/or non-flammability is required, and no dripping is preferred. It is also safe on plastics.

C) 100% Spray: No solvents, metered one-shot valve

Products:
DeoxIT® D100 Spray (D100S-2)
DeoxIT® GOLD G100 Spray (G100S-2)

Formulation: 20% DeoxIT® (active ingredient), 80% propellant

May be used where maximum lubrication is needed, but solvents are not desired. For example, where cleaning and lubrication is required or over-spray might adversely affect sensitive plastics. DeoxIT® utilizes a metered valve which sprays short bursts of 100% liquid.
 
Last edited:
Back
Top Bottom