Hi all ... I know there are a million threads about home made RCMs, but here is a "low budget" and "low skills" version:
$2: ice cream maker at a thrift shop
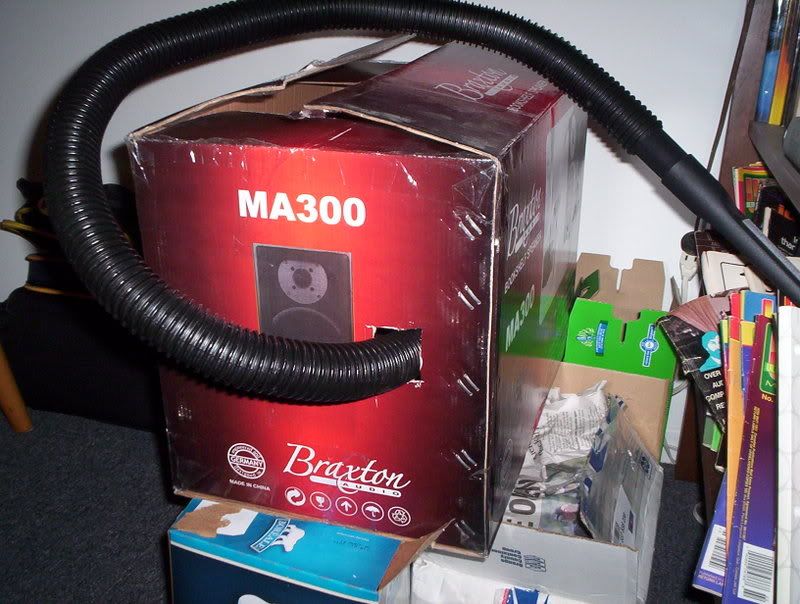
$29.95: smallest Sears wet/dry "shop" vac (on sale from $39.95)
$16.95: Nitty Gritty vac sweep replacement kit (from Audio Advisor on-line)
$free: hockey puck found in basement
I disassembled the ice cream maker to get at the "gear" that inserts into the bottom of the frozen bowl in which ice cream is made. I drilled three holes to mount the hockey puck. I inserted a 1/4"x20 bolt through the bottom of the puck so it sticks out the top as a spindle for the record. I screwed it all together and reassembled the ice cream maker base. A simple nut clamps the record down plenty strong.
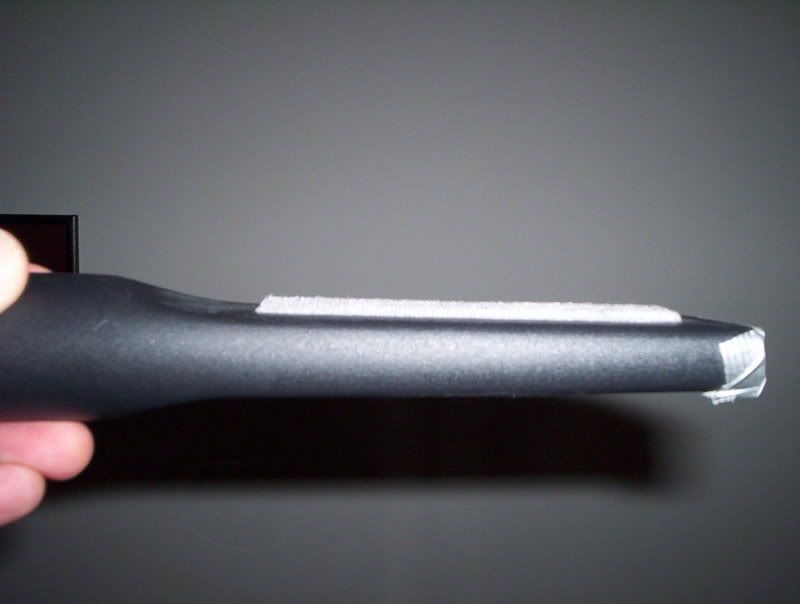
For the vacuum part, I closed the hole in the end of the crevice/wand tool with electrical tape. (Hi tech, huh?) The I cut a slit along the edge to the dimension of the opening in the RCM cleaning pad using a Dremel tool. The peel-and-stick cleaning pad was attached and Viola! The vacuum is very strong and the record gets attached to the suction wand pad with a "foomp!" sound. The high torque motor in the ice cream maker spins away and soon the record is clean and dry.
While I am satisfied with the results, there is an area for improvement: The ice cream maker spins at about 38 RPM. At that speed, the vacuum wand is zipping by and doesn't seem to get much of the "schmootz" sucked up with each pass. Therefore it takes a minute or two (lots of passes) for everything to be clean and dry. I have experimented with rotating it by hand, much slower, and I am much more satisfied with the end result. It seems that the record is clean and dry in two or three passes. It also seems to me that the suction would be more effective deep down in the groove with a few slow passes than with many fast passes. Yes? No?
Any suggestoins as to how to slow this thing down? I tried a big variac, but no go. (Google searches revealed why.) Re-gearing the output is probably beyond my ability and/or threshold of patience.
Any suggestions?
Thanks for looking ... I am open to critical comments!
[EDIT: PICS ARE A FEW POSTS DOWN. TROUBLE UPLOADING FIRST TIME]
$2: ice cream maker at a thrift shop
$29.95: smallest Sears wet/dry "shop" vac (on sale from $39.95)
$16.95: Nitty Gritty vac sweep replacement kit (from Audio Advisor on-line)
$free: hockey puck found in basement
I disassembled the ice cream maker to get at the "gear" that inserts into the bottom of the frozen bowl in which ice cream is made. I drilled three holes to mount the hockey puck. I inserted a 1/4"x20 bolt through the bottom of the puck so it sticks out the top as a spindle for the record. I screwed it all together and reassembled the ice cream maker base. A simple nut clamps the record down plenty strong.
For the vacuum part, I closed the hole in the end of the crevice/wand tool with electrical tape. (Hi tech, huh?) The I cut a slit along the edge to the dimension of the opening in the RCM cleaning pad using a Dremel tool. The peel-and-stick cleaning pad was attached and Viola! The vacuum is very strong and the record gets attached to the suction wand pad with a "foomp!" sound. The high torque motor in the ice cream maker spins away and soon the record is clean and dry.
While I am satisfied with the results, there is an area for improvement: The ice cream maker spins at about 38 RPM. At that speed, the vacuum wand is zipping by and doesn't seem to get much of the "schmootz" sucked up with each pass. Therefore it takes a minute or two (lots of passes) for everything to be clean and dry. I have experimented with rotating it by hand, much slower, and I am much more satisfied with the end result. It seems that the record is clean and dry in two or three passes. It also seems to me that the suction would be more effective deep down in the groove with a few slow passes than with many fast passes. Yes? No?
Any suggestoins as to how to slow this thing down? I tried a big variac, but no go. (Google searches revealed why.) Re-gearing the output is probably beyond my ability and/or threshold of patience.
Any suggestions?
Thanks for looking ... I am open to critical comments!
[EDIT: PICS ARE A FEW POSTS DOWN. TROUBLE UPLOADING FIRST TIME]
 :beer:
 . I use a junk table as the spinner , all manual . I did buy a VPI brush and was using a puck but now have a Michell record clamp that is doing double duty . It works great , I find about 4 or 5 spins by hand dry the disc well and suck everthing up . I have had great results , a new noisy record was much quiter after and I had an old copy of a Tim Hardins greatest that some one gave me , couldn't play it , but today it sounds ok , still tick's and such but at least as good as some of my old 70's stuff. As I am in an apartment I have the shop vac in a cardboard box to try and keep the nosie down , it helps a bit but not much . that little red beast howls . I also have a small hole in the sealing tape , this is supposed to reduce the suction a bit and help maintain airflow . Next would be a nice cabinet to put it all in . But cost minus the clamp was about $100 with fluid and it does the job . A nice automatic unit would be better but a bit rich for me right now .