Recapping Cambridge Audio 640P Phono Preamp

HypnoToad

Ms Puss Puss
Subscriber
I read many posts on vinylengine.com about modding a 640P Phono Preamp that's already a good performer right out of the box. Not being a tech I decided to take the safe approach and just recap it to see if any improvement could be had for a modest investment.

I picked up a nice used unit from a fellow AK'er and this is how it went.

Lead free solder warning, this is not easy to work with, the old lead based solder they used was MUCH easier. It took me up to ten minutes to remove a capacitor because this stuff is like steel, it doesn't melt easily and doesn't run like lead solder.

I used this method to remove the capacitors:

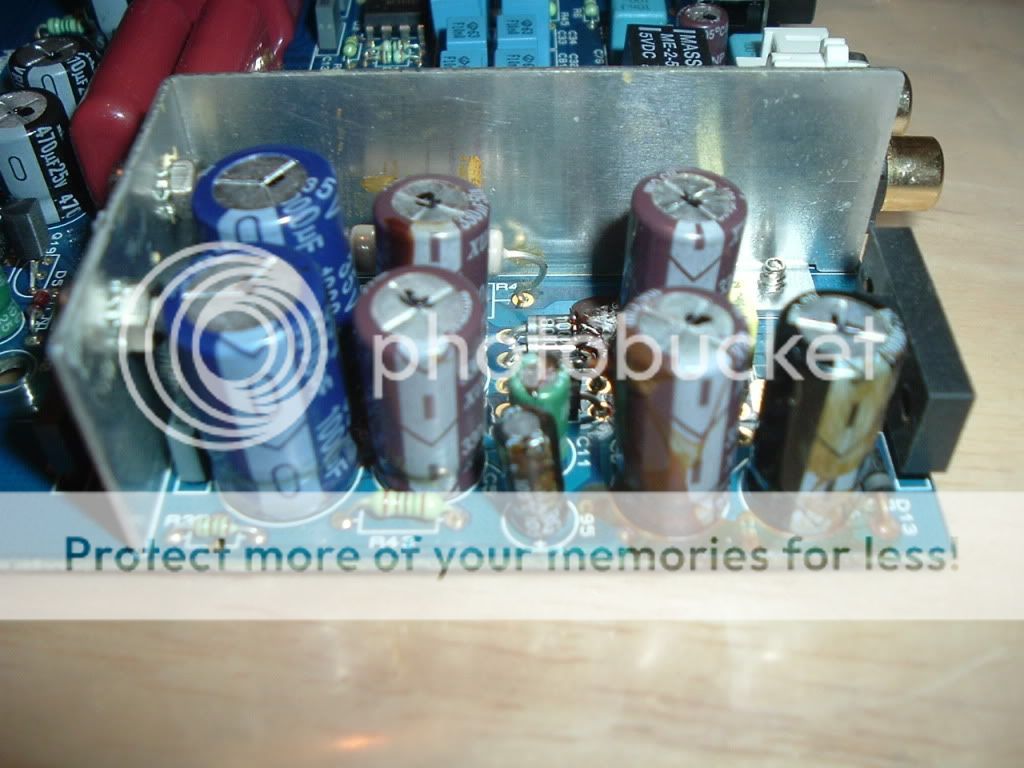
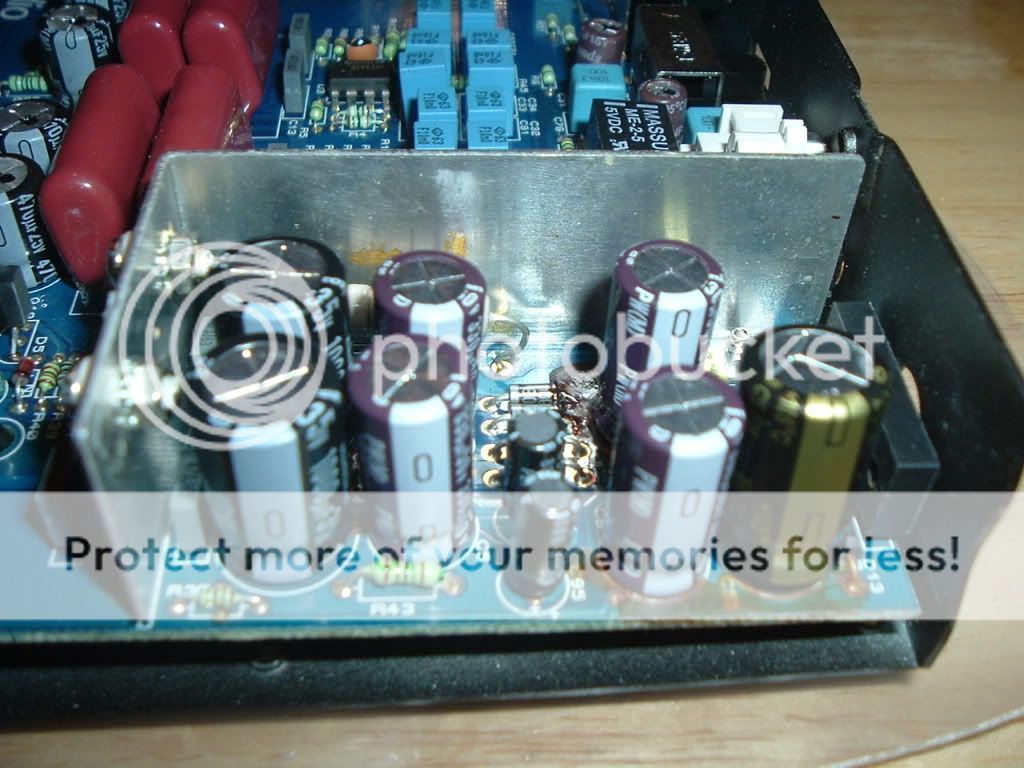
I cut the stubby ends of the legs on the solder side of the board as close as I could to the solder joint. I then used solder wick to remove as much solder as I could, but the holes are so small and the legs are a tight fit, so even the most minuscule film of solder will hold them in. I would then reheat them to gently pull the leg out. On a lot of holes I would have to ream them out so the new legs could fit, a thin film of solder would slightly reduce the hole size making it too tight for the new legs of the new capacitors.

I check each solder joint I make with a magnifier and a resistance meter just to make sure.

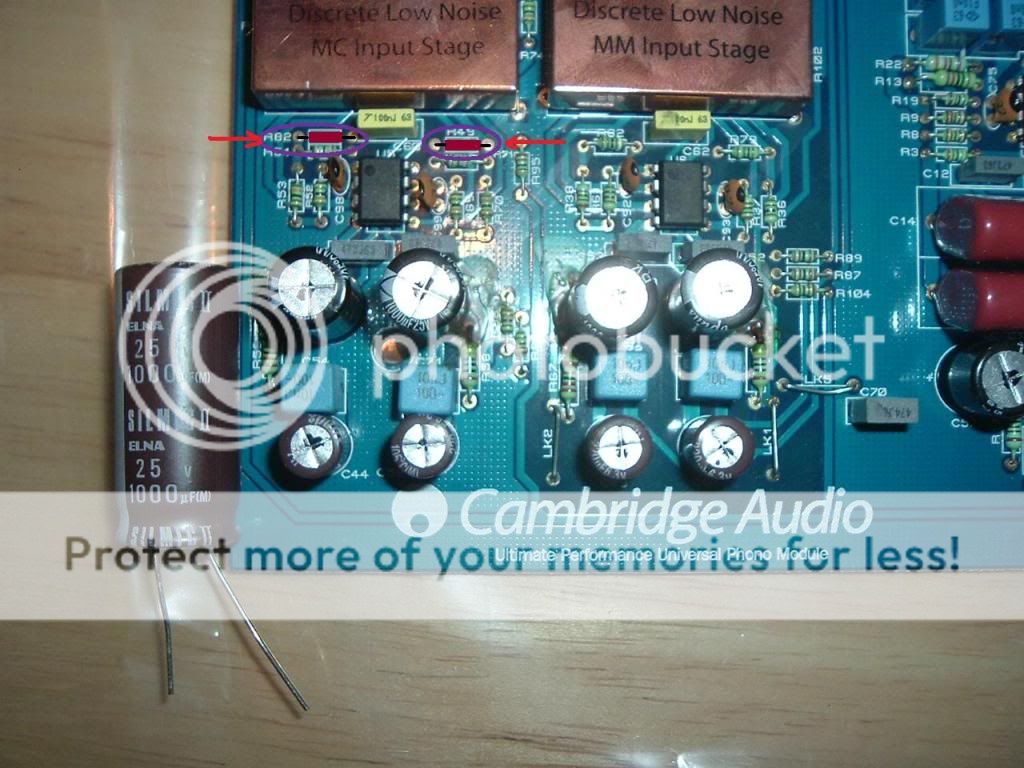
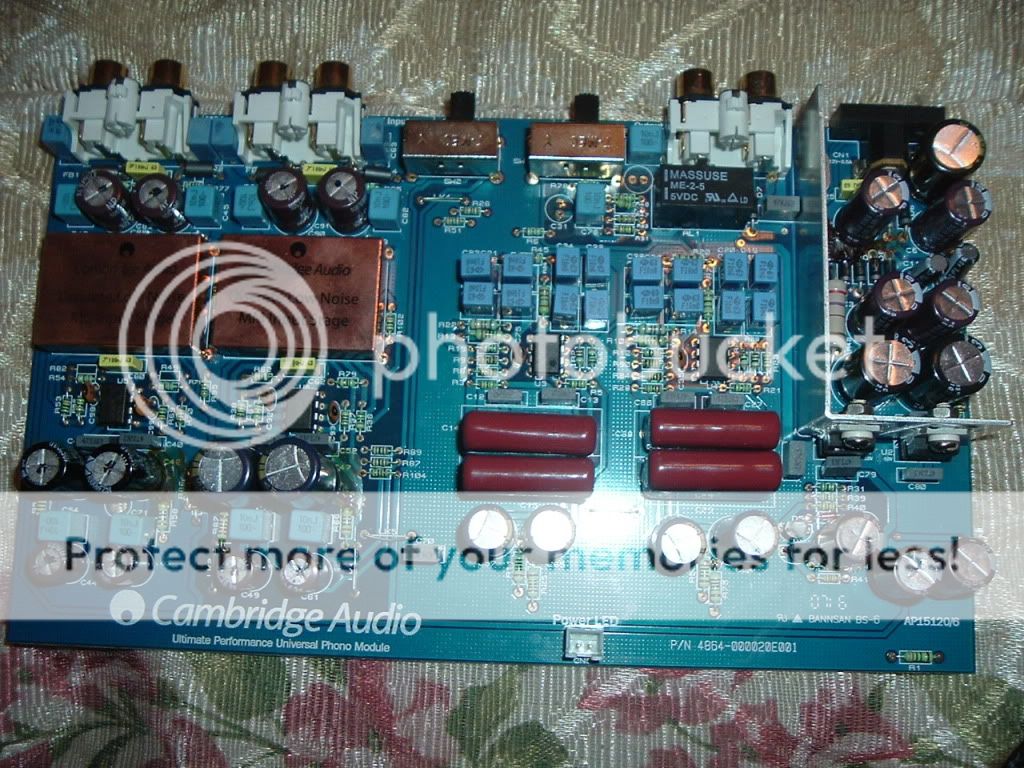
Here is the untouched board, notice the brown glue in places, very untidy.

640PBefore.jpg


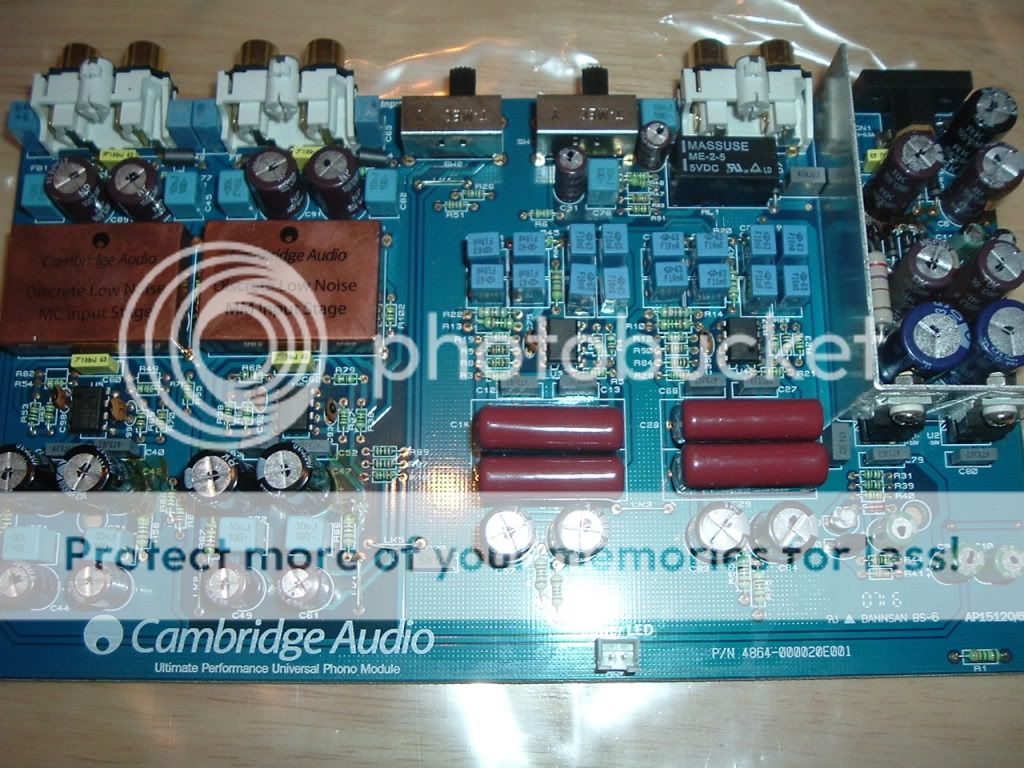
There are 30 electrolytic capacitors all up but I only would replace 24 as I don't own a low output MC cart, I have the 6 replacements on hand, but I wanted to get the MM part done first.
 
Power Supply First

I decided to start on the power supply where I used Nichicon for the power supply and ended up with one Panasonic, the original caps were Xunda. A cheap Chinese cap not held in high regard on BadCaps.net. So I figured that a good name brand had to be better.

Here are before and after pics:

Before:

Notice all the brown glue stuck everywhere.

PSBefore.jpg


After:

Some of mine are not as straight as I would like but I am still learning.

PSAfter.jpg


Less than $6.00 for all the power supply caps.
 
Main board next.

I was going to use Elna Silmic II caps for the most of the main board, but they were rediculously larger than the originals and the legs much thicker. Rather than do a hack job I decided to throttle back and use Panasonic FC's.

Here's a pic with about half of them done:

640PInt.jpg


The caps with the black dots are the originals and the ones without are the replacements, the replacements under the MM stage op amps are much bigger than the originals to their left. All the replacements were bigger, bigger is better right?

Also notice there are two caps missing near the switches at the top. They arrived tonight.

Here's the final pic with them all replaced except the MC phono stage ones, as I explained they will be done later after some serious testing of the MM stage.

640PEnd.jpg


Total cost for caps was less than $30.00 including shipping from Digikey, if all ordered at once.
 
Does it work? How does it sound?

My wife and I listened to it before the mods and compared it to the Cambridge Audio 540P, the cheaper model and one we have used for a while in our bedroom system.

The rest of the system is a Technics SL1700 with Grado Gold, Jolida 801A tube amp and Polk SDA 2A's.

Before Recap:

We found this combination with the 540P gave us a very even, non fatiguing sound. Switching in the stock 640P we had more detail and a bigger sound stage but as she put it, it was a bit scratchy. The top end was bright and not nearly as smooth as what we were used to. After a night of listening we put the 540P back and our smooth non fatiguing sound was back.

After Recap:

I put the 640P back in the system and plugged it up, gingerly connected the power and nothing, no smoke, no noise, no snap crackle or pop.

So far so good, I put on an album we listen to a lot and have listened to on the stock 640P.

We both noticed immediately the harshness in the top end was gone, the detail was there but more so, the sound stage was much bigger, wider and more 3d.

This was immediately, don't the new capacitors need to burn in?

We kept listening and we were hearing detail we hadn't before on this system. The bass was tighter, with the stock unit and the 540P it could get a little flabby, none of that was present now.

I put on some Beethoven on Deutsche Grammophon and it sounded great.

Should I expect it to improve even more?

Even if it doesn't it was well worth it, I mean people spend more on a set of phono cables don't they?

Here's an update after two hours of listening:

This thing is opening up even more the detail is outstanding and the background is as black as I have heard, voices are super smooth and the singers sound like they are in the room. You can hear every guitar pluck as clear as clear. I couldn't be happier with this little experiment, makes me think those Xunda caps were pieces of ...........

I am leaving it switched on all the time like the 540P so we will see how much more improvement there is in this thing.
 
Last edited:
Another update:

I leave it on all the time and play a few records a day on it.

The main difference is the added detail, wider sound 3D sound stage with more air between instruments.

It seems to have opened up a little more and seems smoother since it was first done.

Makes me wonder if it's actually burn in or it's your ears getting used to the different sound.

Either way for less than $30.00 if anyone else tries it let me know what difference it made.
 
Just a note of thanks for posting your experience with the project. For an utter inexperienced noob in regards to this kind of undertaking the pictures and descriptions help immensely. For $30, whether the results are more psycho-acoustical than actual fact is really immaterial in the end. And as you said when first powering up that there was difference in that the higher end became smoother, so even on that score it would be worth upgrading. Thanks again.
 
thanks for this post Hypnotoad.. i just got a 640p myself.
i noticed you posted about the caps over at bad caps.. looks like the folks there dont know the difference between cambridge soundworks whicih is owned by creative and cambridge audio which is currently owned by richter sounds. :D :D

anyhow, i plan to let it run 24/7 to see how the sound changes if any at all.

regards,
asmd.

Another big change you can make is removing the two 220pf input capacitors and altering the impedance to match your cart.

P.S. Be very careful with the PITA lead free solder they use.
 
Speaking as a total noob who has never soldered anything other than some bulb replacements (wires) on a receiver, how would this job be on a cheaper 540P--just for the experience? If I could find one on an auction site for cheap, would the time and trouble produce a noticeable benefit in sound quality in addition to the benefit/experience of doing the work? Thanks.
 
thread revival....

Any more break in after the recap? I'm close to picking up one of these guys soon.

Have you considered some of the op amp upgrades that are out there?
 
I need a list of all the caps to buy, so I can order in one shot without going though the whole 640p first, also recommendations for OPAMPS
 
Speaking as a total noob who has never soldered anything other than some bulb replacements (wires) on a receiver, how would this job be on a cheaper 540P--just for the experience? If I could find one on an auction site for cheap, would the time and trouble produce a noticeable benefit in sound quality in addition to the benefit/experience of doing the work? Thanks.

I just did my 540p recently with Panasonic FC electrolytic's and fitted op amp sockets and have since changed the op amps to AD823 input and LM4562 output which work great, also removed the 220pf ceramic input caps, it's a fantastic upgrade, takes to a whole new level of performance. It's a toss up between it and my ProJect Tube Box II. I would also suggest changing out the 100pf ceramic bypass caps on the input op amp with polystyrene, silver mica or polypropylene, I plan to do that myself.

As for the de soldering it's tricky, I just bought a Hakko 808 desoldering gun that makes it easy. Using solder wick I found it nearly impossible.

003-3.jpg


Here's the 540P parts list with Digikey part numbers:

6 x P10325-ND CAP 220UF 50V ELECT FC RADIAL
1 x P11212-ND CAP 10UF 25V ELECT FC RADIAL
6 x P10269-ND CAP 100UF 25V ELECT FC RADIAL
2 x P1180-ND CAP ELECT 100UF 25V SU BI-POLAR
1 x AD823ANZ-ND IC OPAMP JFET R-R DUAL LN 8DIP
1 x LM4562NA-ND IC OPAMP AUDIO STER AB 8DIP
2 x ED90105-ND IC SOCKET 8DIP .300 TIN
 
Last edited:
thread revival....

Any more break in after the recap? I'm close to picking up one of these guys soon.

Have you considered some of the op amp upgrades that are out there?

I need a list of all the caps to buy, so I can order in one shot without going though the whole 640p first, also recommendations for OPAMPS

I second Anti-Hero. I'd like to see a quick list so I can order all at once.

Many Thanks


Since then I have put in op amp sockets and after some trial and error and help from Jim Reeves we settled on using AD823's in the input stage's and LM4562's in the output stage, this is a magical combination! The power supply section gets a little tight with the new caps but they do fit okay.

For the 640P here are all the parts and numbers you need for Digikey:

AD823 = AD823ANZ-ND

LM4562's - LM4562NA-ND

4 x Op Amp Sockets - ED90105-ND

Capacitors:

2 x P1179-ND CAP ELECT 47UF 25V SU BI-POLAR
4 x P1144-ND CAP ELECT 220UF 6.3V SU BI-POLAR
4 x P1146-ND CAP ELECT 470UF 6.3V SU BI-POLAR
4 x P11258-ND CAP 330UF 50V ELECT FC RADIAL
2 x P10305-ND CAP 1000UF 35V ELECT FC RADIAL
1 x P10312-ND CAP 1UF 50V ELECT FC RADIAL
3 x P10269-ND CAP 100UF 25V ELECT FC RADIAL
1 x P11212-ND CAP 10UF 25V ELECT FC RADIAL
4 x P10275-ND CAP 470UF 25V ELECT FC RADIAL
5 x P10278-ND CAP 1000UF 25V ELECT FC RADIAL

The Polystyrene bypass caps for the op amps I got from Parts Connexion in Canada, they are not expensive but shipping is the killer:

2 x 22pf 160v

2 x 33pf 160v

2 x 47pf 160v

Some have used silver mica caps with success to replace the stock ceramics.


Let me know the results.

Warning: The desoldering on this is very tricky unless you have a de soldering gun/station I wouldn't advise it.:no: 
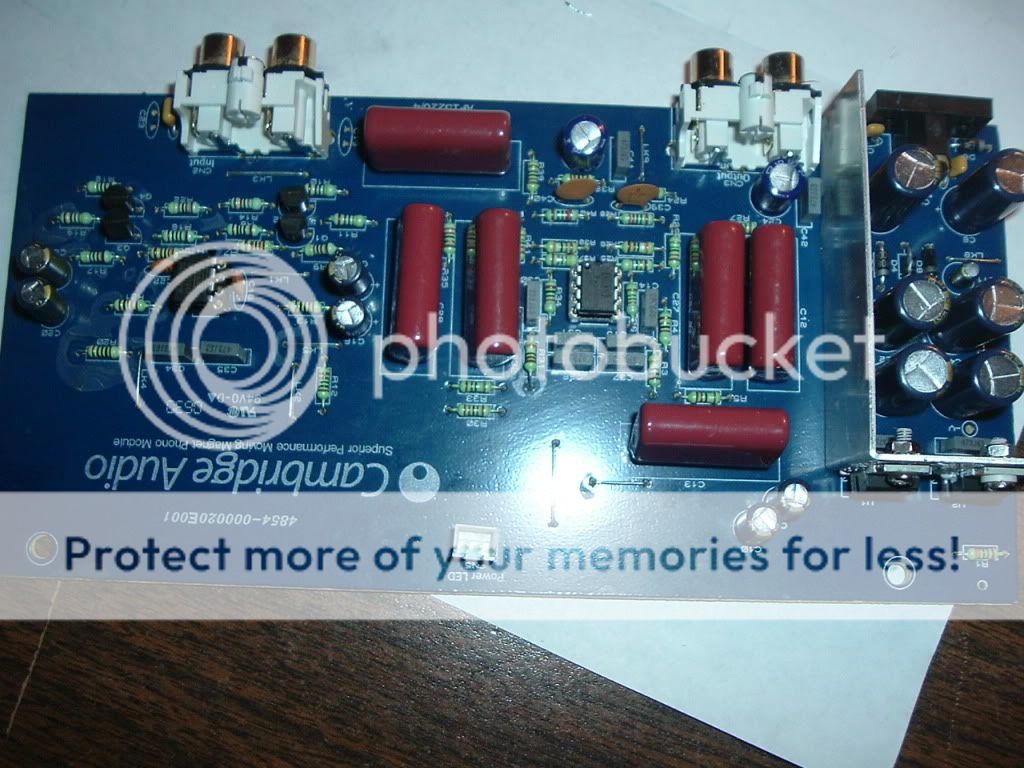
Also make sure you take note of the orientation of the op amps, the little circular crater must be at the same end as the original otherwise bye bye op amp.
 
Last edited:
Why change out the op amps? Is it a removal and re-solder or is there more to it? Why different op amps on the input vs. output side?
 
Why change out the op amps? Is it a removal and re-solder or is there more to it? Why different op amps on the input vs. output side?

The standard NE5532 op amp is alright but I found the OPA2134's and LM4562's to be far superior, it's small outlay for a big increase in sound. They are pin to pin compatible. I suggest that you put in op amp sockets like these:

http://search.digikey.com/scripts/D...lang=en&site=us&keywords=ED60000-ND&x=13&y=17

Then it's a simple matter of changing them out if you want to try something different.

The LM4562 is more revealing, has more detail but can be too bright and sterile. The OPA2134 has that typical Burr Brown sound that's on the warm side. So I used the LM4562's in the input stage for their revealing detail and so as not to be too sterile I put the OPA2134's in the output stage. It's kinda like tube rolling, each having different attributes and one can be used to balance out the other. That's my theory on it, although it may be mental illness on my part.:D

You can use either in both stages if you like.
 
So I ordered the recommended caps, 4 of each op amp and the 4 op amp sockets. I'll try the op amp-rolling thing. Sounds like fun.

Are there any other op amps to try out?
 
So I ordered the recommended caps, 4 of each op amp and the 4 op amp sockets. I'll try the op amp-rolling thing. Sounds like fun.

Are there any other op amps to try out?

Hope you like the results.:music:

There is OPA637 but it's a single circuit op amp and is around twenty five dollars a piece. You need two of these on an adapter board for every one of the others. The increase in performance is not worth it IMO.
 
Did you try flipping the location of the different op amps? Results?

I'm running a Denon DL-305 LOMC cartridge. The upper range was brittle and harsh while the bottom end needed help. Unless something changes with the upgraded parts I still prefer my Shure V15 II. It may be MM but the quality and frequency response is there.

It could be that the Denon has too low an output 0.2mv, especially if you don't get enough volume out of it. You might try putting 18ohm metal film resistors in R49 & R82, they are blank slots. You will see them already in R54 & R71 nearby, this lowers the total resistance to 9 ohms and increases the MC sensitivity by another 6db. I haven't tried it personally as I don't have a LOMC cart. But others have and say it works well with the DL-103.

004M.jpg
 
Back
Top Bottom