• The move to the new server is done. There are some software and database maintenance updates in process. This has us passing the hat around to help out. We appreciate any donations. Seriously, even a dollar helps. The payment page may be found here - https://www.audiokarma.org/support.html

Another Bose 901 restoration thread

leesonic

Captured on security camera...
Subscriber
I thought I'd upload some pictures of my ongoing Bose 901 Series IV restoration. I got these speakers with a bunch of other audio gear recently. The cabinets are in pretty good shape, apart from a huge piece broken off on the back that I'll have to fix.

But more on the cabinets later. Like a lot of these speakers, the surrounds on the drivers were all rotten, take a look.

Bose901resto02.jpg

I carefully removed all the drivers, writing on the back with a Sharpie the color wires that were connected to them, and I also labeled them to make sure I kept them in the same location as before.

I bought a surround kit from eBay and set to work. Here is a picture of what the driver should look like once the old surround has been removed.

Bose901resto03.jpg

The eBay kit I bought came with a test tone CD, and instructions on how to use this to correctly center the voice coils. Now I know some people have used this method and got good results. After I did four drivers this way, I played some bass heavy music and some other test tones through them. What I noticed was two of the drivers sounded alright at low to moderate volumes, but I could hear some rubbing at higher levels.

So I decided to do it the old fashioned way, and shim the voice coils. The eBay seller was very helpful and understanding, he sent me four additional surrounds and enough dust caps to do all 18 drivers FOR FREE!

I found some yogurt pots that were exactly the same size as the inner diameter of the surrounds. After applying the glue to the inside of the surrounds, I placed the yogurt pots on top, and used some sockets to weigh them down while they dried.

Bose901resto04.jpg

Moving on down the dairy food aisle, I found I could cut (and then tape back together) some cottage cheese pots to the exact dimensions of the outer part of the surrounds. I used a piece of the front cover of a glossy magazine and a piece of plain white paper to make up the shim. Then I applied the glue around the frame, put the cottage cheese pot over the surround, and then weighted them down with some cups. I used a piece of foam padding and cardboard to spread the load on the edge of the cottage cheese pots.

Bose901resto07.jpg

Bose901resto06.jpg

Bose901resto05.jpg

And here we have nine little drivers, all with new surrounds, just waiting to go back into their cabinets.

Bose901resto08.jpg

Lee.
 
Last edited:
Register to hide this ad
If I had to do it over, I would have just rewound the speaker wire to the speaker terminals instead of soldering. I never shimmed, only one driver was off center and this was easily fixed. There is a lot of tolerance with the Bose voice coil. I'd you run out of glue, Walmart sells Allwil(sp?) in the art and craft section. Worked fine.

Have fun!
 
Cute trick, there. Here's an additional test you might want to do on the drivers before you mount them up:

- Download a function generator onto your computer and connect the sound card to your stereo rig.

- Connect one speaker to a channel with the volume all the way down.

- Now, fire up the function generator and learn how to use the variable frequency control up and down. Set it for about 50 hz or so to start.

- Bring up the volume of the rig until you see the cone moving much as you did with the vendor's CD. The key, here, is not to have it running at full excursion, which will likely cause the scraping you were hearing earlier.

- Now, run the frequency up and down at various volume levels. That is, set a volume level and run the frequency up and down. You're listening for rattles, scrapes or other sorts of sounds that might indicate voice coil or bobbin problems in the magnetic gap.

- Reinstall the drivers (you'll first put dust caps on, right?) and pay attention to the torque on each of the drivers. While those plastic baskets will not deform, there's no need to strip out the screws in the particle board.

Note! If you choose to resolder the wires, use a heat sink of some sort to channel heat away from those lugs. They're surrounded in plastic and will quickly deform as the plastic around them melts! They were designed for the wire wrap technique and not soldering.

- Lastly, re-run the frequency sweep trick and listen again for cabinet rattles, etc.

Hope that helps.

Cheers,

David
 
Restoring Bose 901 drivers.

Excellent thread/post on the restoration of speakers from a set of Bose 901's!
Any plans on restoring the actual cabinets prior to installing all nine drivers?
May be give'em a light sand-down then re-stain or paint? Just my opinion but I'm sure they're going to sound just great and please post pictures of the final completed project, I for one would like to see.
Thanks for posting and sharing.
 
I used sharpies and labeled each speaker just as you did. Each speaker went back into the exact spots i took them out of. Nice rebuild keep the posts coming.
 
Nice well done. I bought a pair of 901's last saturday for $40. So this is in my future along with many other amp rebuilds and stuff. Long cold winters here. Haha.

I am gonna save this page so I can come back to it later on.
 
I never shimmed, only one driver was off center and this was easily fixed. There is a lot of tolerance with the Bose voice coil.

Like I said, I'd rather shim them and get them exactly centered than use the test tones. But if you can get good results with the tones, then that's great.

Thank God you're not lactose intolerant. Cool rebuild, one is in my future.

I should have chose the 1% fat, small curd cottage cheese, that might have taken away some of the midrange coloration and improved bass extension.

Cute trick, there. Here's an additional test you might want to do...(snip snip)...function generator...variable frequency control up and down. Set it for about 50 hz or so to start.

That sounds like a good idea, I might try that, although I have some "bass test" CDs that have sweeping tones on them.

Reinstall the drivers (you'll first put dust caps on, right?) and pay attention to the torque on each of the drivers. While those plastic baskets will not deform, there's no need to strip out the screws in the particle board.

I have new dust caps to go on them, the eBay supplier sent these. As for the particle board, the screws screw into the plastic baffles, there is no-where on these speakers where driver mounting screws go into particle board. That opens up a different set of problems as a couple were already stripped out, but nothing some epoxy resin shouldn't cure.

Excellent thread/post on the restoration of speakers from a set of Bose 901's! Any plans on restoring the actual cabinets prior to installing all nine drivers? May be give'em a light sand-down then re-stain or paint? Just my opinion but I'm sure they're going to sound just great and please post pictures of the final completed project, I for one would like to see.
Thanks for posting and sharing.

I plan to sand them down and give them a coating or three of Tung oil. I just did one cabinet of a pair of Mission 737Rs this way, and it's almost like a wooden mirror, the surface is so smooth and shiny. I used 220 grit, then 800 grit, then wire wool. So I have the other Mission cabinet to do, then it's onto the Bose.

My only worry is I might not be able to get an equalizer to hear these things how they meant to sound. They seem to be going on evilBay for well over $100, and I'm on a bit of a budget, unless I can sell some of my items in Barter Town.

Lee.
 
Started sanding down one of the cabinets today. Here's a picture of it after I'd finished with the 220 grit paper.

Bose901resto09.jpg

And here it is after just one coat of Tung oil.

Bose901resto10.jpg

After that comes another rub down, this time with 800 grit, then more Tung oil, then a rub down with very fine steel wool, then more Tung oil.

Lee.
 
Last edited:
Here are the drivers, with new surrounds and dust caps.

Bose901resto11.jpg
Bose901resto12.jpg
 
Last edited:
Can some one please tell me how to remove the center caps out from the paper cones buit without doing any damage? Thank you.

You will have to use an exacto knife and cut around the very edge. Only cut 90% and leave just a bit left so you can "peel back" the dust cap and leave it intact. Then when done, glue it back on. You will see a clear bead when done but it looks good.

I would have opted to keep the original bose logo dust caps but the replacements look good. Just a personal preference.
 
great wood, I would do mine but there always seems to be something that sits on top of the speakers, lamps, coin jars, disco balls ect
 
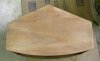
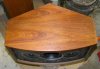
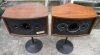
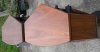
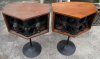
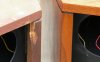
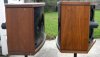
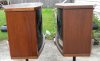
I guess I should have taken some before and after pictures of the same cabinet, but it doesn't matter. Here are some pictures of the cabinet I've already refinished, with the one that I still have to do. I've included a close-up of the repair I have to make as well.

Bose901resto13.jpg
Bose901resto14.jpg
Bose901resto15.jpg
Bose901resto16.jpg

Bose901resto18.jpg
Bose901resto17.jpg

Lee.
 
Last edited:
I have a question. I bought a pair of 901 IV's. Unfortunately I do not have a EQ yet. Seems to be rush lately on eBay for them.....Anyhow. Could just use my regular amp to realign the cones while I refoam them? Or would this be completely useless?
 
I have a question. I bought a pair of 901 IV's. Unfortunately I do not have a EQ yet. Seems to be rush lately on eBay for them.....Anyhow. Could just use my regular amp to realign the cones while I refoam them? Or would this be completely useless?

You don't need the EQ to refoam these drivers. You just use a test tone CD through your regular amp, but be warned, each driver is only 1ohm and would probably overload your amp. You need to either put some 8ohm resistors in series with each speaker if you do one at a time, or daisy chain four (or eight) together to give you a four (or eight) ohm load you amp can handle.

Lee.
 
How are you going to handle the repair of the impact damage that you have shown on the second speaker?
 
Back
Top Bottom