• The move to the new server is done. There are some software and database maintenance updates in process. This has us passing the hat around to help out. We appreciate any donations. Seriously, even a dollar helps. The payment page may be found here - https://www.audiokarma.org/support.html

Wharfedale W70D total restoration - need advice

Winters

Active Member
Hello,

I have just bought a pair of beaten-up, battered, scratched, rough, broken (you name it...) Wharfedale W70Ds speakers that I plan on doing a full restoration of. I will document everything I do with photos so my story may serve future generations :) .

My biggest concern is what to do with the cabinets. These things look rough and there is no question about it.

So far I've taken 15 photos so instead of uploading them here, I created a Picasa album, I hope it's okay with the forum rules:
https://picasaweb.google.com/103991080364705961426/W70d02?authkey=Gv1sRgCPbysu30nKLIIA

All in all, they work i.e. they produce sound. Both midrange pots are stuck, they do not work at all, the treble pots seem to be totally worn, they do not attenuate anything, touching the knob mutes the whole speaker.

I planned on:
- removing all the veneer
- filling the dings/holes
- having the cabinets re-veneered professionally, I've never done this before so I don't know whether I'm up to the task.
- rewiring everything with high quality OFC cables
- replacing the capacitors
- replacing the potentiometers -- what type and value do I need?

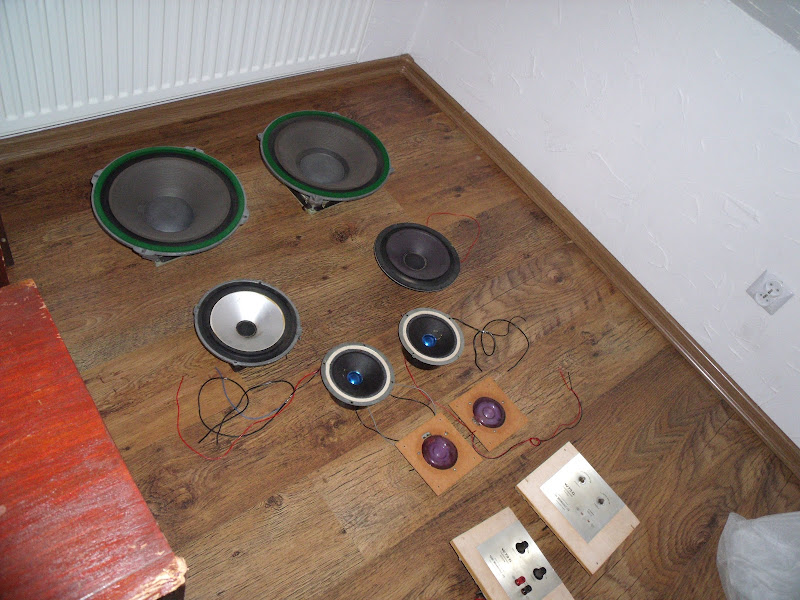
I still have to take them apart - I don't think the 8" drivers are an original matched pair. Will post about it later.

Well, wish me luck :smoke:
 
Last edited:
Register to hide this ad
Shipping damage? Looks like the pots say 20 ohm linear on the back, but it's hard to see via picture. I've had good results using motor oil caps in Wharfedales. You may also want to ohm out the tweeters as they have a small defect that causes them to go bad (the purple donut type).
 
Just finished for today...

Both 8" drivers are Wharfedale, but one had its cone replaced by a not-so-good technician. I guess these speakers are from a transition period when they changed all the magnets from round to square.

DSCF3249.JPG


All the speakers tested OK with an ohm meter. The next step is to find and buy a pair of Wharfedale Dentons as they have the same 8" drivers as W70Ds. Shouldn't be a problem.

I have reasons to think that the current finish is not original. I found a very faint "OILED WALNUT" stamp on the back of each cabinet. At one point it must have faded badly and someone painted them with a very low-quality siding stain. It has a red tint to it and it comes off when I rub it with a finger...

The big dent/ding on the corner is what worries me the most at this point. What can I do with it?

DSCF3252.JPG
 
Started removing the veneer today, looks good so far.

DSCF3256.JPG


Tools I use are just a hot air gun and a knife.

DSCF3257.JPG


Halfway through

DSCF3265.JPG


One side done.
 
you got a great project going there, I'm not very good at woodworking repair but I'll bet that cabinet can be made to look new. especially that you're going to veneer them, that should hide any work you need to do.

great old speakers you've got there.

keep us posted
 
progress

Removing veneer is not as easy as it seemed to be. The sides are relatively easy, it peels off rather easily after applying heat but top and bottom are ROCK SOLID. Don't know what kind of glue they used but probably the same stuff NASA used back in the day...

DSCF3275.JPG


Here is how it looks after...

-applying serious heat with the heat gun (almost started burning)
-sanding
-ironing through a wet towel
-ironing directly over the veneer with lots of steam
-pouring a kettle full of boiling water on the veneer (despair)

Still have to try dissolving the glue with some solvent - what do you guys recommend? If that doesn't work, I will have to sand the veneer off which means a lot of elbow grease and mess.

NOTE: The front piece is solid wood and was not veneered, only stained.

The sides are done and ready to veneer. After removing most of the veneer I sanded the remains off to get a nice flat surface. Some spots required more violence and I ended with some ugly dings that asked for wood filler:

DSCF3273.JPG


I sped the drying process up by applying heat with my trusty heat gun and then sanded the excess residue.

More pics in the album - link is in my first post.
 
Last edited:
I would replace the front trim on both speakers with new wood. The damage requires replacement in that area and matching to the other pieces will be problematic. The reality is that if I am cutting 3' of trim, it is just as easy to cut 30' or 300', the amount of material being the only limit.
With a powered sander, the veneer would be just a bad memory within an hour. Maybe you can borrow one if you don't own one. Good luck with your speakers.
 
Seems like a good idea, I will take it into consideration. That would also allow me to take the baffle out and replace the grill cloth.

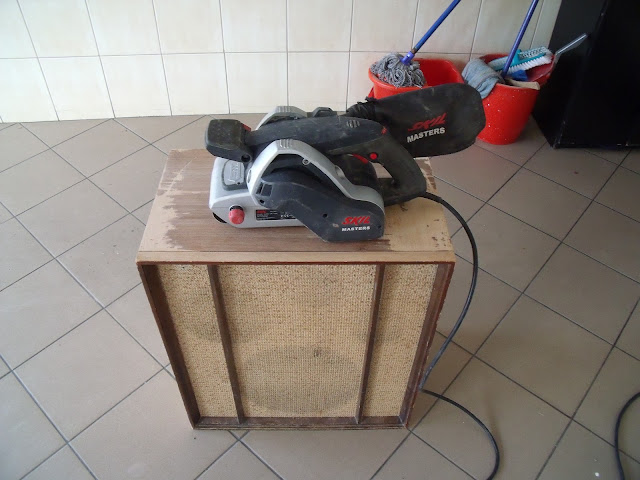
I'm using a powered sander, but it's a $20 one... I will borrow a serious belt sander next week.
 
I borrowed this beast today:

DSCF3278.JPG


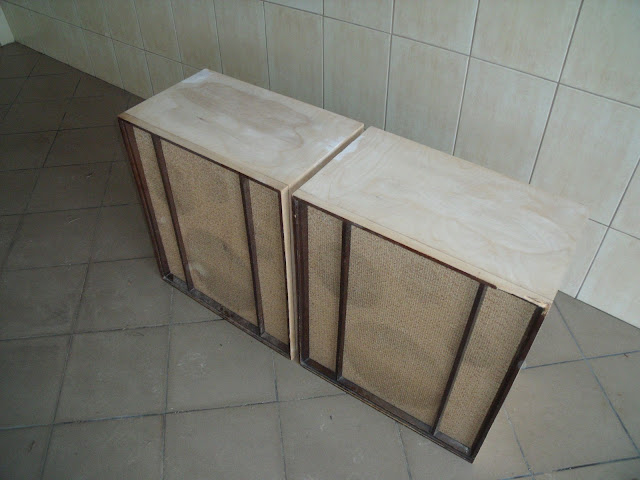
And here's how my veneer looks like after an hour of work:

DSCF3290.JPG


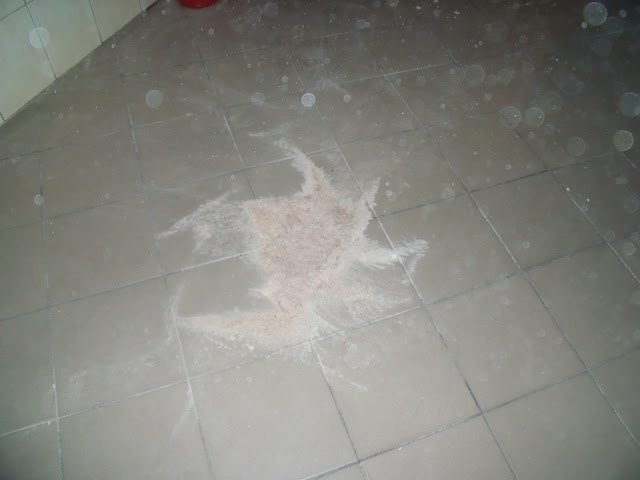
This was my first encounter with a belt sander. Man, it removes A LOT of material! Lose focus for a second and you end up with an uneven surface. I had to do some filling but it turned out rather nice and smooth.

DSCF3286.JPG


Up next: crossovers.
I will have to take the pots apart and clean them thoroughly. Both midrange attenuators are stuck, if I don't get them to work I will have to bypass them with resistors.

As for capacitors, I think I will go with Jantzen for the mids and get some NOS 1970s Polish military oil caps for the tweeters.
 
Last edited:
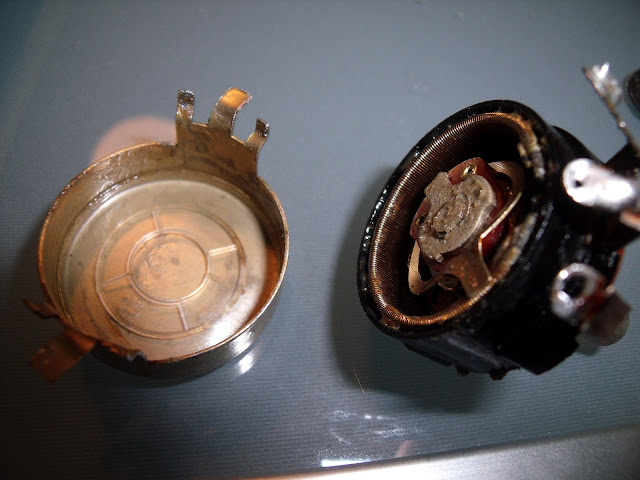
Started doing the crossovers today. First problem to solve were the potentiometers and as I said in the first post - both midrange pots were stuck. Disassembling was easy, all I had to do was bend 6 small metal tabs that hold the cover in place.

This is what I found in both midrange pots:

DSCF3315.JPG


Horror! I have no idea how on earth it is possible that both midrange drivers worked. On the other hand, the tweeter pots needed just a good cleaning:

DSCF3312.JPG


What you see is a mother-lode of brown, sticky gunk. A messy job for sure!

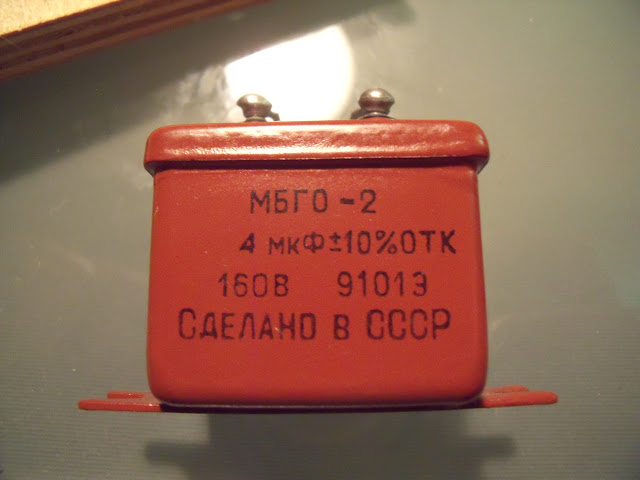
Also, replaced 4uF capacitors with NOS USSR PIOs of same value.

DSCF3320.JPG


DSCF3322.JPG


QUESTIONS:
What to do with the burned potentiometers? As far as I'm concerned they are scarce, I can't find anything like these. They are 20 ohm linear. I put them back as I want to keep the original looks and I'm thinking about bypassing them with resistors. What value do I need?

What would cause such damage within a potentiometer?
 
The pots shouldn't be too-hard to find, though it may take several months of scouring online.

Whatever you do, leave the baffles ALONE. These are sand-filled (as far as I know) and so is the back panel on each cab. Do not drill into the back. The sand is the key to this speaker's low-resonance. As far as cab-construction is concerned, you want to keep them stock. Gilbert Briggs was a wizard when it came to speaker-dampening, so there's no sense trying to modify them. Also, I would not go changing tweeters or anything. They used some seriously-thick veneers on the old Wharfedales, so I can understand what a PITA it is to remove them and the glue. I like that you went with paper-in-oil caps on these. I want to do that with my W90's (They were recapped, but I believe the guy used electrolytics rather than PIO, and the ported, Briggs-era models might have come stock with PIO's... Not sure... I bet they'd sure sound great with PIO's though). Earlier this week, I replaced the cheap ceramic cap in the back of my electric guitar with a NOS paper-in-oil one. Made a huge difference (I actually put two different caps in there and made it switchable between the PIO and an orange drop Sprague... Gives me much more tonal variation with the pickups).

When you finish these, you should do another thread in the SPEAKERS section (This thread should really be there too, but no biggie).

I have the W60E's, which are virtually-identical to the W60D. I also have the much-earlier W60's (from the early '60's) which are a two-way, ported model and not sealed like the later W*** models. My main speakers are the original, ported W90's with alnico drivers (6 drivers per cab - Two 12.5" woofers, two 5" midwoofers, and two 4" Super 3 cone-tweeters).
 
I assure you that the baffles will be left alone. Front trim is what is going to be replaced.

I think that the pot damage could've been caused by poor power handling of these potentiometers. Midrange needs more power that the tweeters which explains why the treble pots remain undamaged. Correct me if I'm wrong.

I think that 4uF caps in my Wharfedale were oil, 16uF caps look different and are smaller and made by "ELKOMOLD" (?)
 
Last edited:
I think you'll really-enjoy these speakers. The Wharfedales from this period are very-underrated (as are the earlier, Briggs-era ported models). I've had very-good luck with these old models. They suit my music tastes extremely-well (In other words, they sound great with just about anything).

If you like the sealed Wharfs, then I bet you'll REALLY-like the earlier, ported ones with the alnico drivers.

I'm listening to Can's "Tago Mago" album right now... Weird stuff. Music to chow 'shrooms to...There is something seriously-eff'd-up about this band (For starters, I think the lead-singer is mentally-ill).
 
I assure you that the baffles will be left alone. Front trim is what is going to be replaced.

I think that the pot damage could've been caused by poor power handling of these potentiometers. Midrange needs more power that the tweeters which explains why the treble pots remain undamaged. Correct me if I'm wrong.

I think that 4uF caps in my Wharfedale were oil, 16uF caps look different and are smaller and made by "ELKOMOLD" (?)

That's cool. I just figured I'd mention it, since it's #1 on the list of Wharfedale do's & don'ts.

I'd definitely like to put PIO caps in my W90's. They already sound phenomenal with the caps that the previous owner had installed (electrolytic, I think), but I'd love to get even better sound from them (It's amazing what these speakers can do with 30-40 watts of power from a tube amp or tubelike receiver/amp).
 
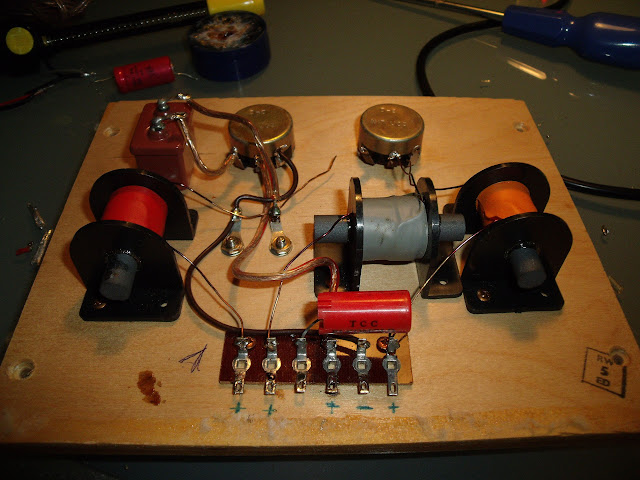
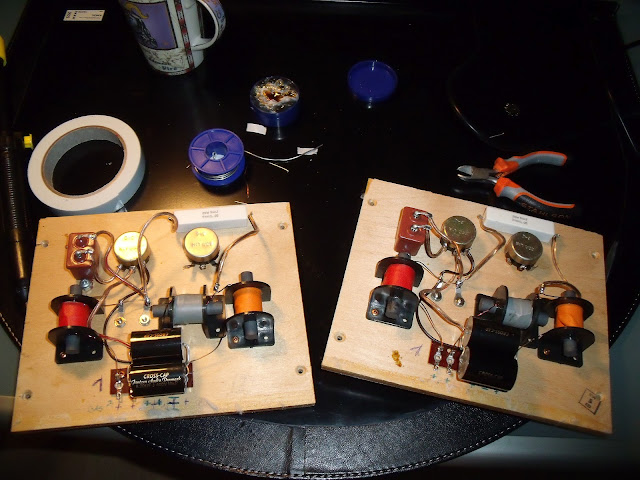
Finally, I'm back to working on my Wharfedales. Crossovers are done.

DSCF3351.JPG


Here's what I did:
- replaced 4uF caps with NOS USSR PIOs
- replaced 16uF ELKOMOLD caps with Jantzen (2x 8,20uF in parallel)
- bypassed the midrange pot with a 20W 9R resistor - equal value to the potentiometer at 1 o'clock position
- replaced some of the wiring
 
I'm going to have the cabinets repaired and veneered by a qualified carpentry shop. It's going to cost me dearly, but they are known for their collaboration with a local museum so I'm pretty much sure the results will be fantastic.

I've already bought some nice cream basket weave grill cloth, not exactly the same as original but looks period-correct and I thought I'd see if taking the baffles out is possible without pulling everything apart.

It is.

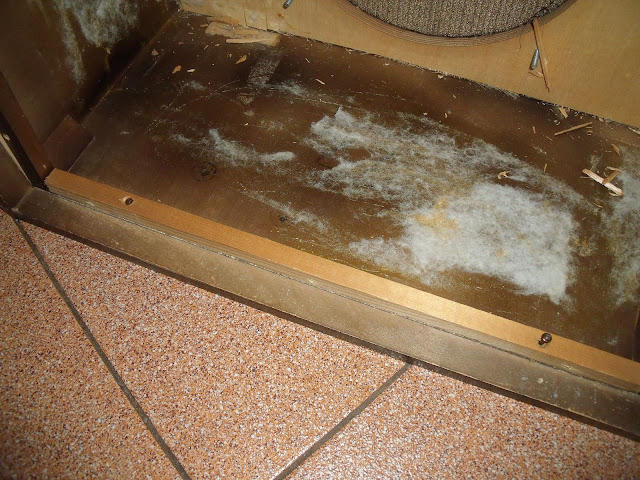
The baffle is held in place by a few corner pieces (do they have a specific name?). All of them but three are simply screwed in place, the rest is glued.
DSCF3354.JPG


Took the glued ones out with a good ol' hammer and a chisel:

DSCF3356.JPG


Then I had to remove this board and its counterpart at the other side. No biggie, just remove 2 screws.

DSCF3358.JPG


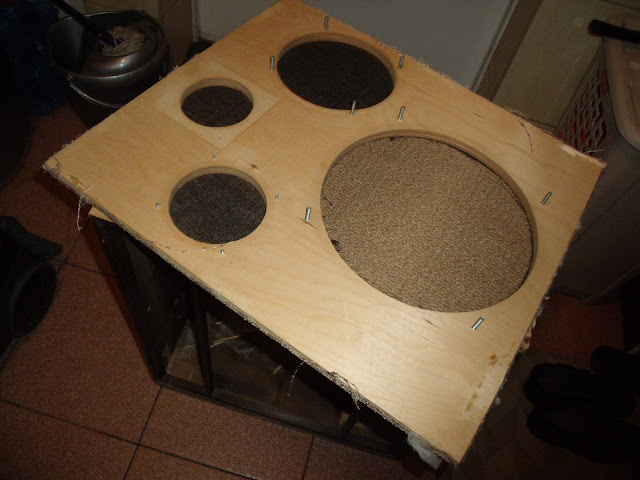
Next, I just punched the baffle out. It required some brute force but it's made out of thick plywood so no worries.

DSCF3360.JPG


Job done!

DSCF3361.JPG
 
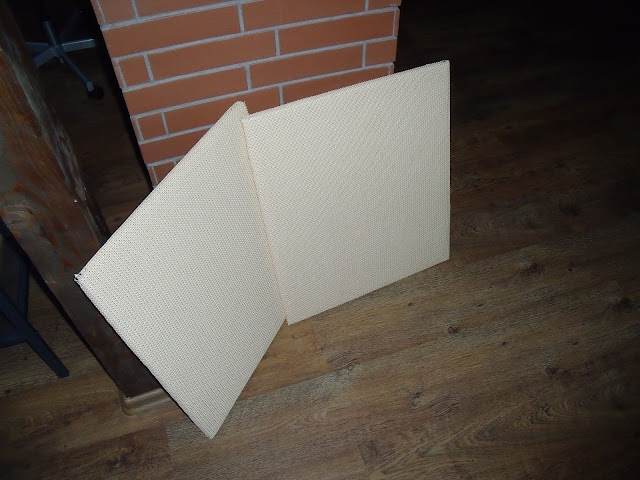
New grill cloth:

DSCF3362.JPG


There are two layers, the underside is regular, thin, black cloth whereas the front is thick basket-weave.
 
beautiful job so far. I have some W70E and like them a lot. They did not require the same level of restoration as yours.

Seems like most of these old speakers end up in the dumpster if they involve much time and effort.
 
Back
Top Bottom