

pete_mac
Super Member
Yep... ANOTHER AU-999 thread! hehe :thmbsp:
I'm embarking upon a full restoration of a clean AU-999 on behalf of a stereo.net.au member.
I'll be throwing some nice components into this amp, along with the various preamp and EQ mods and enhancements as outlined in various threads on audiokarma.
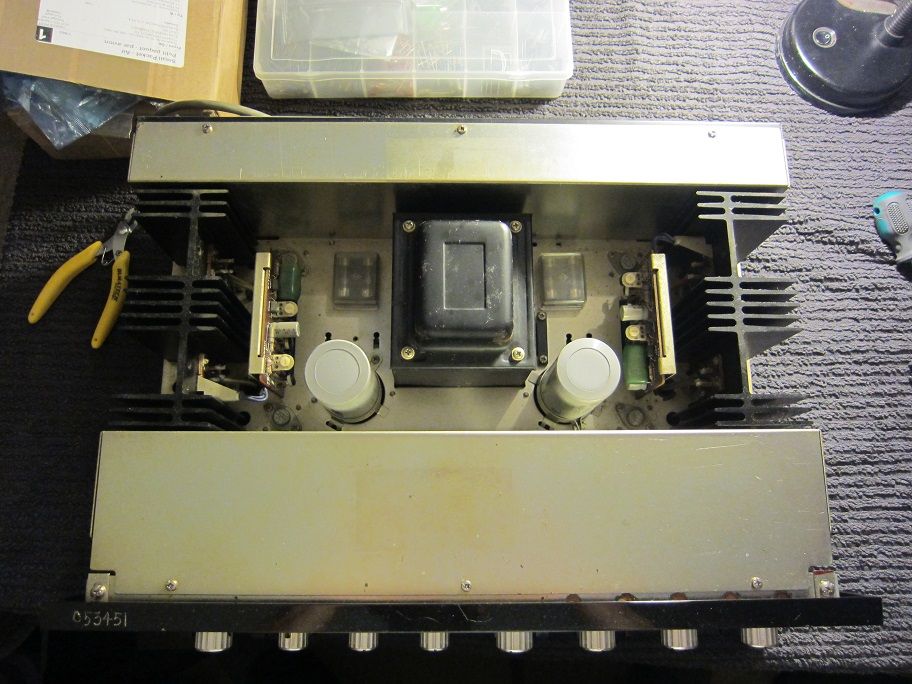
Top cover removed:
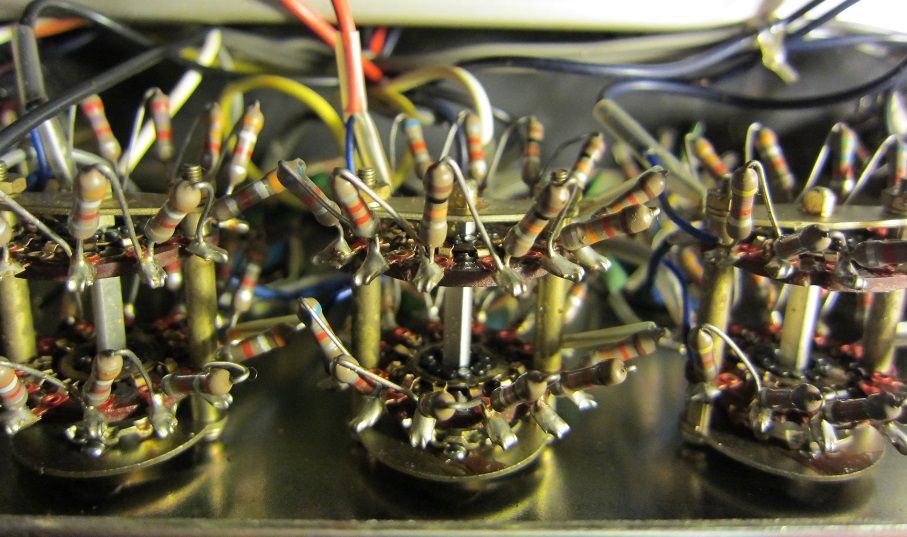
The resistor ladder networks for various controls are very cool indeed!
I'm loving that many of the boards are mounted vertically and fit inside slots on the chassis, making this amp quite easy to work on.
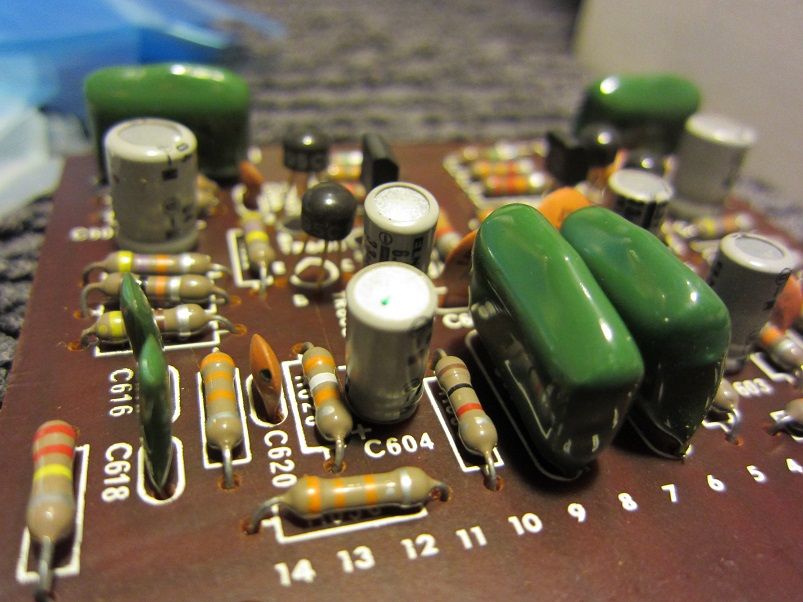
Original grey Elna caps:
New Elna Silmic II caps:

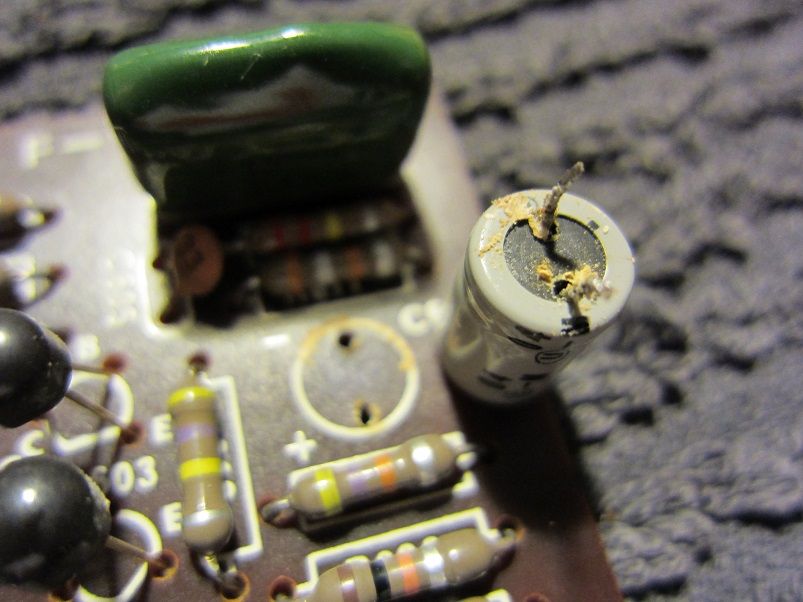
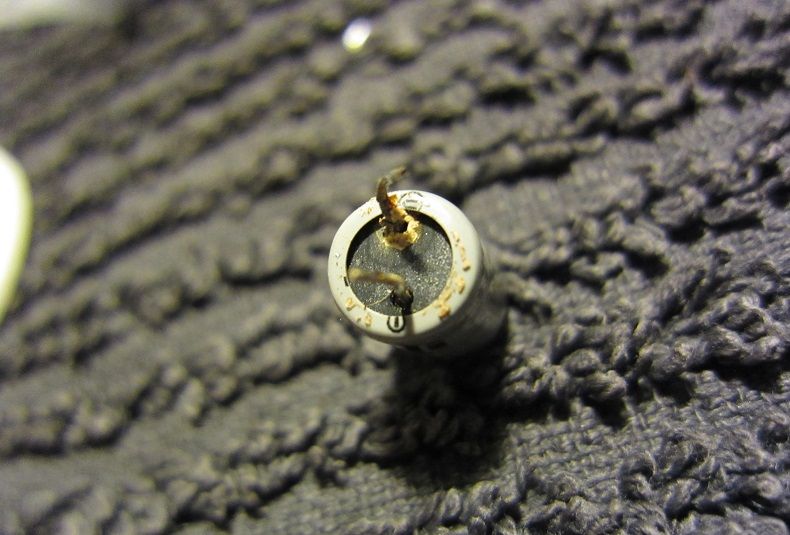
The caps on several boards looked fine when viewed from above, but when removed from the PCB, there are clear signs of leakage. Three capacitors were found in this condition, and many had seals which had not yet leaked but were in poor condition. This is the reason why you simply cannot judge the condition of vintage gear based upon a cursory glance, as everything looked fine from above. Put simply, any 30+ year old capacitor is simply well past its used by date!
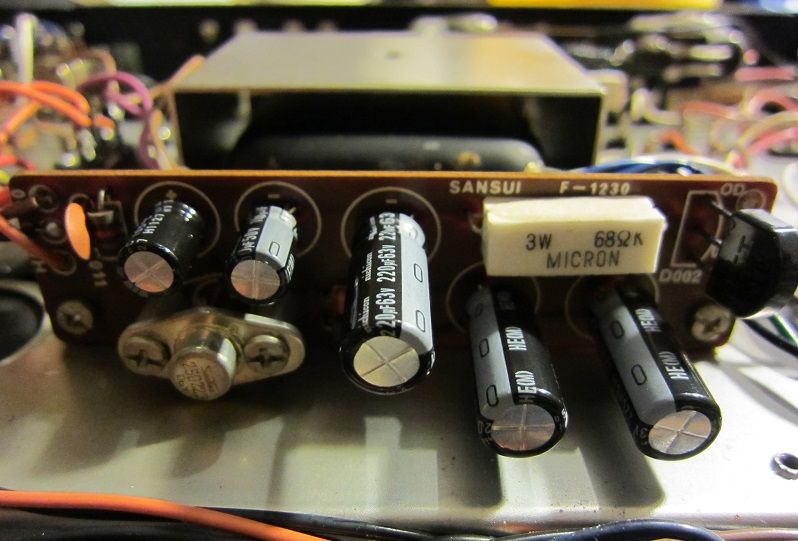
Nichicon HE caps fitted in power supply locations:
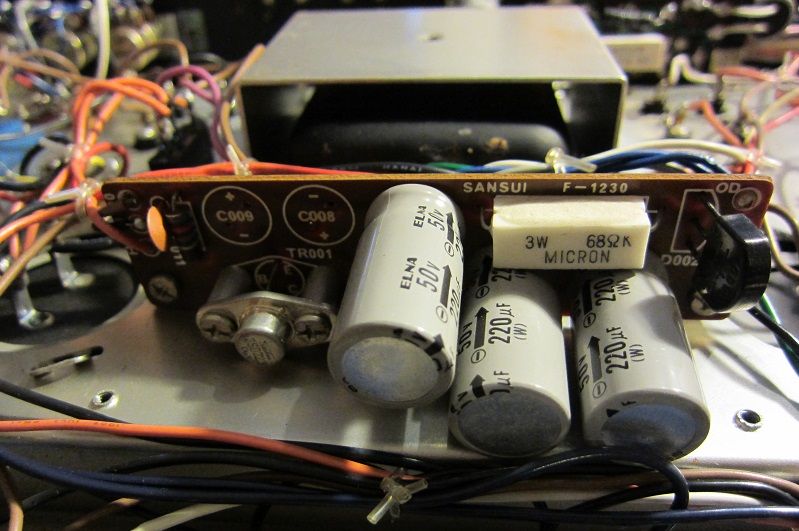
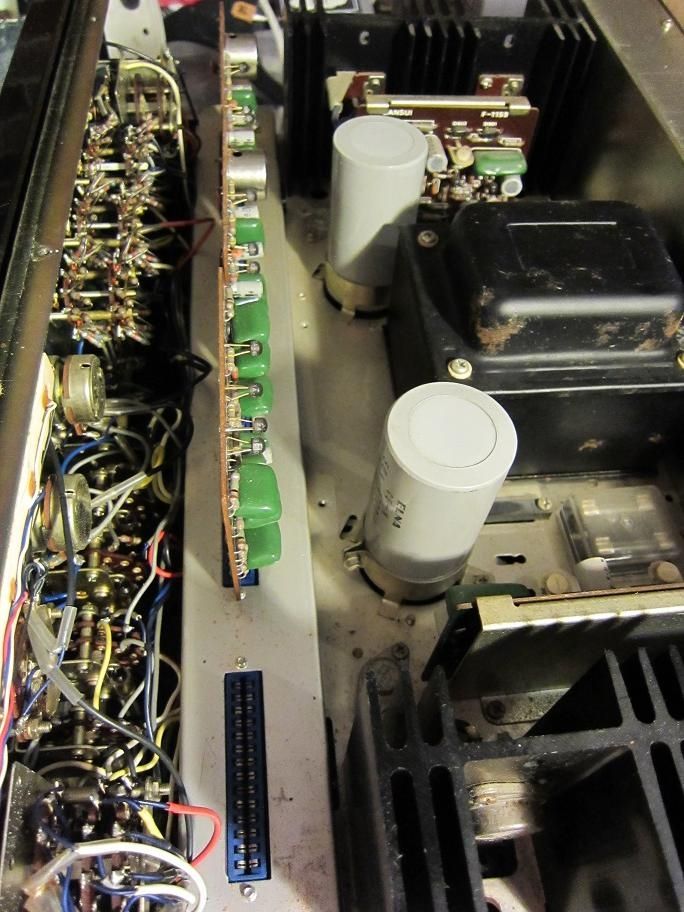
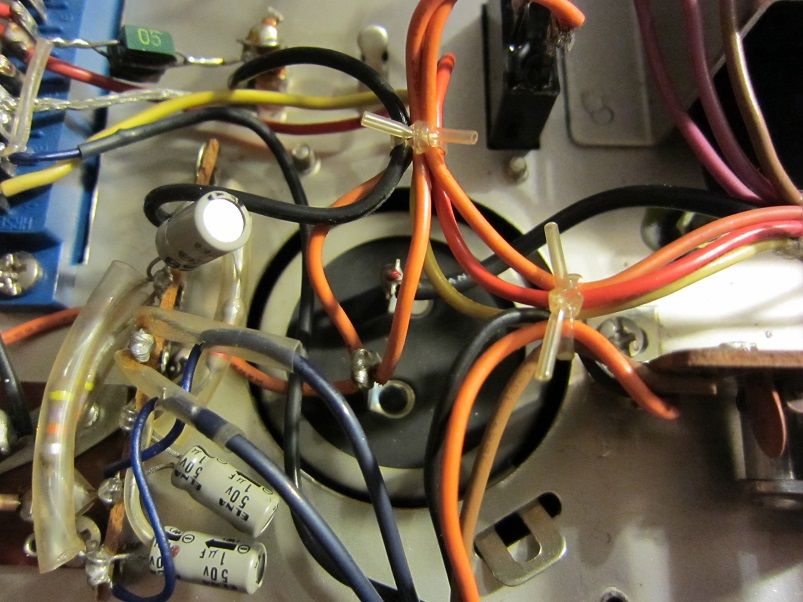
One of the original filter caps in-situ:
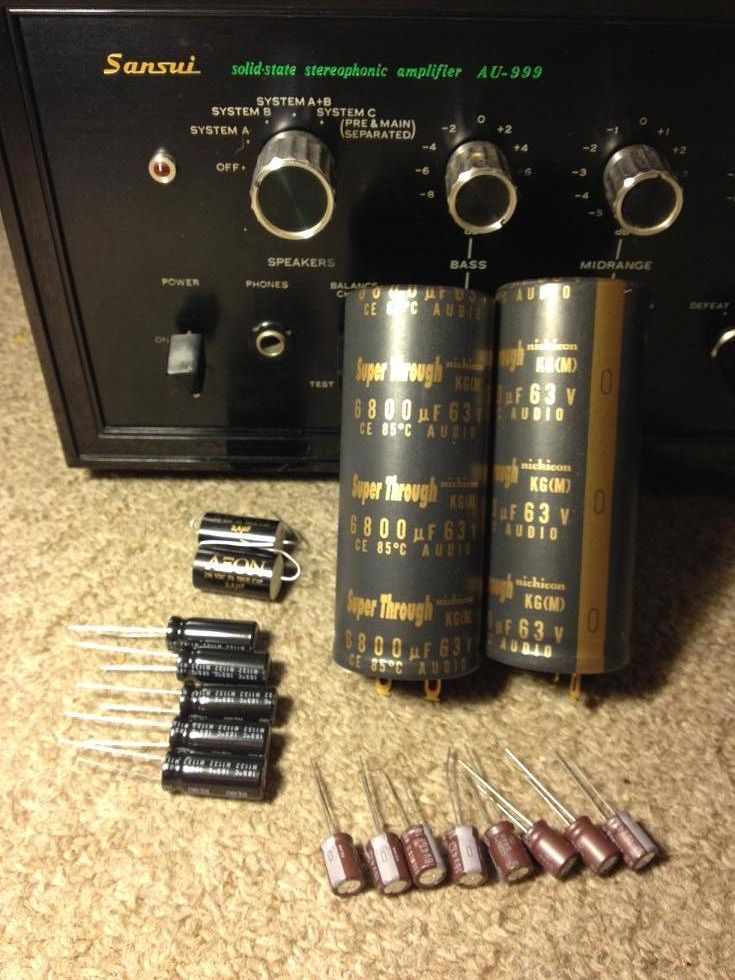
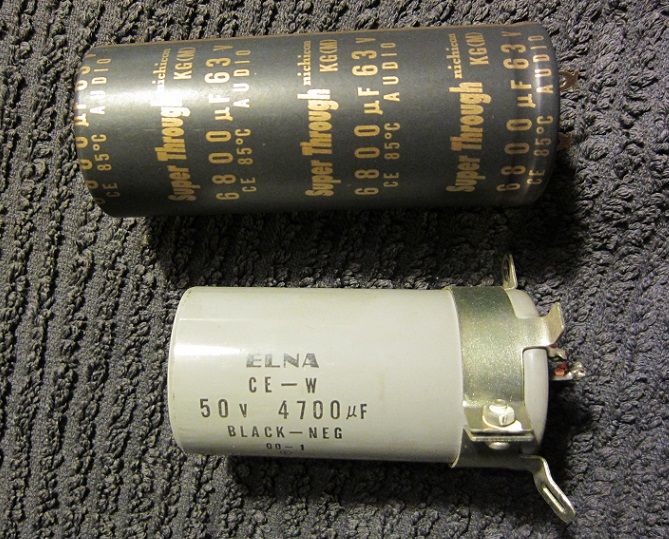
A comparison of the original Elna cap with the new Nichicon Super Through cap. These are one step up in both voltage and capacitance, and are a direct fit for the original 40mm diameter clamp:
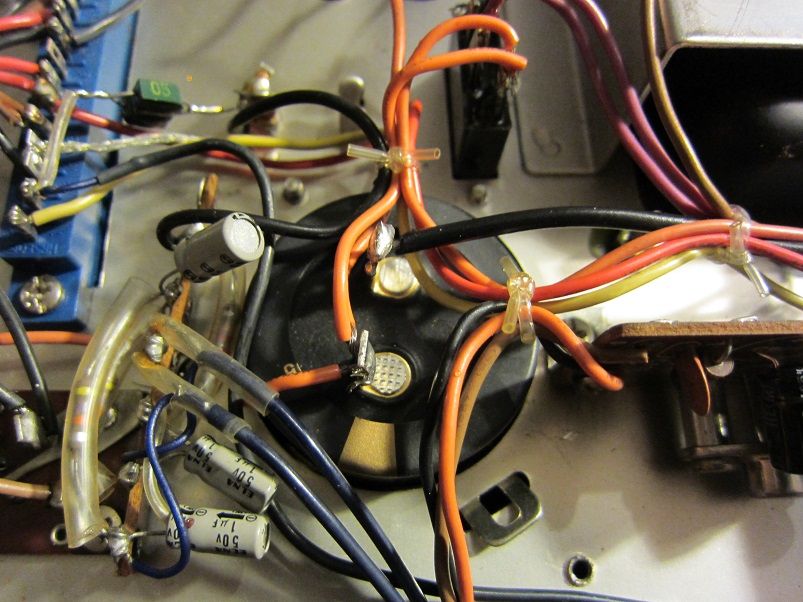
Nichicon cap installed:
Next up are further capacitor replacements, wholesale transistor replacement on several boards to remove all germanium transistors, resistor changes to fix gain issues in the preamp stage, disabling the 'crowbar' protection circuit, modifying the subsonic filter circuit which affects bass response, and the installation of binding posts in place of the original spring-style speaker wire connectors.
In other words... plenty of stuff to be done, but we're getting there!
Watch this space!
I'm embarking upon a full restoration of a clean AU-999 on behalf of a stereo.net.au member.
I'll be throwing some nice components into this amp, along with the various preamp and EQ mods and enhancements as outlined in various threads on audiokarma.
Top cover removed:
The resistor ladder networks for various controls are very cool indeed!
I'm loving that many of the boards are mounted vertically and fit inside slots on the chassis, making this amp quite easy to work on.
Original grey Elna caps:
New Elna Silmic II caps:
The caps on several boards looked fine when viewed from above, but when removed from the PCB, there are clear signs of leakage. Three capacitors were found in this condition, and many had seals which had not yet leaked but were in poor condition. This is the reason why you simply cannot judge the condition of vintage gear based upon a cursory glance, as everything looked fine from above. Put simply, any 30+ year old capacitor is simply well past its used by date!
Nichicon HE caps fitted in power supply locations:
One of the original filter caps in-situ:
A comparison of the original Elna cap with the new Nichicon Super Through cap. These are one step up in both voltage and capacitance, and are a direct fit for the original 40mm diameter clamp:
Nichicon cap installed:
Next up are further capacitor replacements, wholesale transistor replacement on several boards to remove all germanium transistors, resistor changes to fix gain issues in the preamp stage, disabling the 'crowbar' protection circuit, modifying the subsonic filter circuit which affects bass response, and the installation of binding posts in place of the original spring-style speaker wire connectors.
In other words... plenty of stuff to be done, but we're getting there!
Watch this space!

")


