


bobaloniny
newt
Faced with my computer, the tv, their accessory gear, the stereo that supports them (or the other way around) all perched on about 4 or 5 odd pieces of furniture keeping them off the floor, I took matters into my own paws and decided to go flexi for the whole shooting match. One part adult move, one part knowing that one piece of furniture or even 2 matching couldnt accommodate it all and look like much given the situation at hand (picture window involved), so it had to be low and lean.
This project basically took about 200 dollars and 12-14 hours to build, so I was happy that there wasn't a terrible amount of nose skin lost for either total, and the results are working out very well.
Build basically went like this.
2 sheets of 3/4" exterior plywood which I ripped into 3 equal pieces of a hair under 16" wide x the 8' each. Knowing of course that some of this rack was to make a 90 degree turn I opted for a 45 then a 45 to make the turn, thus kind of softening the severity of the turn, while still not giving up much floor space in exchange. So 22 1/2 degree cuts were made. I lucked out and was just able to make the cuts on the radial arm saw, the 16 just fit under the blade at that angle. End result.. around 7' of shelf , turn, about 3 ' of shelf, turn, about 3' more , finishing the shelf x 3.
I didn't sand the plywood before staining, I filled using this stuff called Shure Stick (featherweight spackling) which filled the voids, knotholes, and divots very well. I wasnt looking to make glass, all i wanted was the bobo's fixed nicely. Then came a rolled on coat of Behr opaque fence and trim stain. Goes on easy, gives some color, and definitely isnt glossy, so it fills my bill just fine. One coat was enough, the spackle was applied over the whole shelf (squeezed in and run over with a wet trowel), and acted as a sealer.
Drilling time worked out alright, stacked the 3 pieces together aligned and clamped hard, screwed 2 little pieces of 2x3 together in a right angle (on edge) and used that as a guide after carefully marking the hole locations.
As far as the rod goes, I needed 14 at about 31", so I bought 7 6 footers of 1/2" and cut them here with the Milwaukee abrasive saw, then ground off the rough edges.
I had wondered about feet, I know the floor isnt perfectly level, and i didnt want to scratch things up..so on each rod went a 1/2" coupling nut, with a 1" bolt on the bottom, and finally a 7/8" plastic furniture tip which fit almost perfectly over the bolt head. Woila, adjustability and glidey good smoothness.
Set the first long end shelf up with its rods and foot assemblies in place, then assembled the ending up shelf the same.Set them more or less in place after using construction adhesive and screws to attach cleats to the underside of the shelf edges in preparation for the shelf in between, dropped that in between, got it all aligned, then just used screws to hold that in place (the removable link in case the things ever got to move out of its location or the house). Then proceeded the same for the remaining 2 levels.
I wondered about what to do as per the record storage part, as the bottom level was primarily for that...how to give them something nice to lean on. I thought about several methods, which all would have worked, but in the end I went for this method. I cut the scraps of ply to size for height and depth, stained, then raised the 2nd level up a little till I could slip the divider in place nice and square, then lowered the 2nd level pinning it in place, thats it. No nails, no screws.
Last little note..this required alot of spinning those nuts into place. Doing it by hand, got old about half way through the first one..and I just dont have a deep socket 3' long. So, I took a piece of 1/2" foam pipe insulation, jammed a 1/2x3/8 reducing coupling in the end with a 3/8 nipple threaded into it, and there was my deep socket. Fit very snugly over the nut (3/4 across the flats) and let the drill do the work.
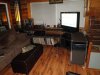
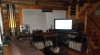
And this is to prove it really happened.
This project basically took about 200 dollars and 12-14 hours to build, so I was happy that there wasn't a terrible amount of nose skin lost for either total, and the results are working out very well.
Build basically went like this.
2 sheets of 3/4" exterior plywood which I ripped into 3 equal pieces of a hair under 16" wide x the 8' each. Knowing of course that some of this rack was to make a 90 degree turn I opted for a 45 then a 45 to make the turn, thus kind of softening the severity of the turn, while still not giving up much floor space in exchange. So 22 1/2 degree cuts were made. I lucked out and was just able to make the cuts on the radial arm saw, the 16 just fit under the blade at that angle. End result.. around 7' of shelf , turn, about 3 ' of shelf, turn, about 3' more , finishing the shelf x 3.
I didn't sand the plywood before staining, I filled using this stuff called Shure Stick (featherweight spackling) which filled the voids, knotholes, and divots very well. I wasnt looking to make glass, all i wanted was the bobo's fixed nicely. Then came a rolled on coat of Behr opaque fence and trim stain. Goes on easy, gives some color, and definitely isnt glossy, so it fills my bill just fine. One coat was enough, the spackle was applied over the whole shelf (squeezed in and run over with a wet trowel), and acted as a sealer.
Drilling time worked out alright, stacked the 3 pieces together aligned and clamped hard, screwed 2 little pieces of 2x3 together in a right angle (on edge) and used that as a guide after carefully marking the hole locations.
As far as the rod goes, I needed 14 at about 31", so I bought 7 6 footers of 1/2" and cut them here with the Milwaukee abrasive saw, then ground off the rough edges.
I had wondered about feet, I know the floor isnt perfectly level, and i didnt want to scratch things up..so on each rod went a 1/2" coupling nut, with a 1" bolt on the bottom, and finally a 7/8" plastic furniture tip which fit almost perfectly over the bolt head. Woila, adjustability and glidey good smoothness.
Set the first long end shelf up with its rods and foot assemblies in place, then assembled the ending up shelf the same.Set them more or less in place after using construction adhesive and screws to attach cleats to the underside of the shelf edges in preparation for the shelf in between, dropped that in between, got it all aligned, then just used screws to hold that in place (the removable link in case the things ever got to move out of its location or the house). Then proceeded the same for the remaining 2 levels.
I wondered about what to do as per the record storage part, as the bottom level was primarily for that...how to give them something nice to lean on. I thought about several methods, which all would have worked, but in the end I went for this method. I cut the scraps of ply to size for height and depth, stained, then raised the 2nd level up a little till I could slip the divider in place nice and square, then lowered the 2nd level pinning it in place, thats it. No nails, no screws.
Last little note..this required alot of spinning those nuts into place. Doing it by hand, got old about half way through the first one..and I just dont have a deep socket 3' long. So, I took a piece of 1/2" foam pipe insulation, jammed a 1/2x3/8 reducing coupling in the end with a 3/8 nipple threaded into it, and there was my deep socket. Fit very snugly over the nut (3/4 across the flats) and let the drill do the work.
And this is to prove it really happened.
Last edited:


