

boreas
"If it sounds good, it IS good." E.K.E.
Since coming up with this fix, I've received a lot of requests from AKers asking me to make a set of tabs for them. I guess I'm not much of businessman but I turned those requests down, mostly because the tabs required a fair amount of fiddly work. I couldn't see charging more than a few bucks for the tabs but I didn't think a few bucks was fair compensation fro the time it took to make the tabs.
So, I came up with a much simpler design that takes far less work and far less skill. Here's the thread describing therevised design.
http://audiokarma.org/forums/index.php?threads/technics-dustcover-fix-redux.656267/
I guess pretty much anyone who has ever owned a Technics turntable with those plastic "tongues" on the dustcover that insert into the hinges has had to confront the issue of the ends of the tongues snapping off. I just picked up an SL-D3 with a badly scratched dustcover on which both tongues were gone and I came up with a fix that I thought I'd share.
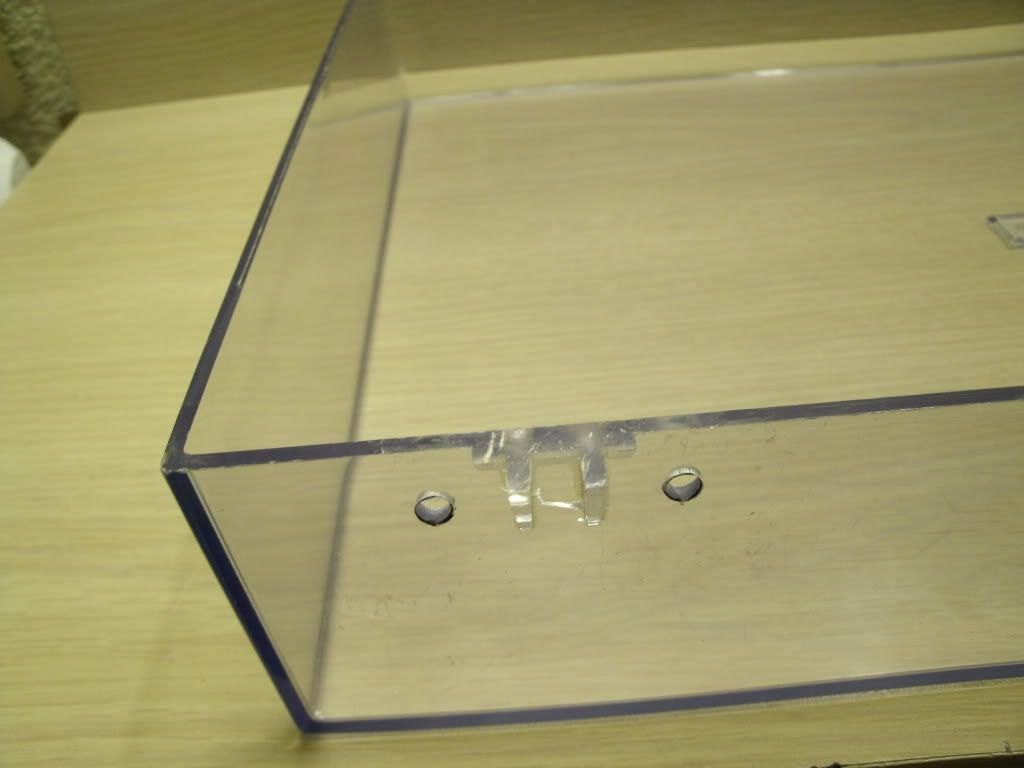
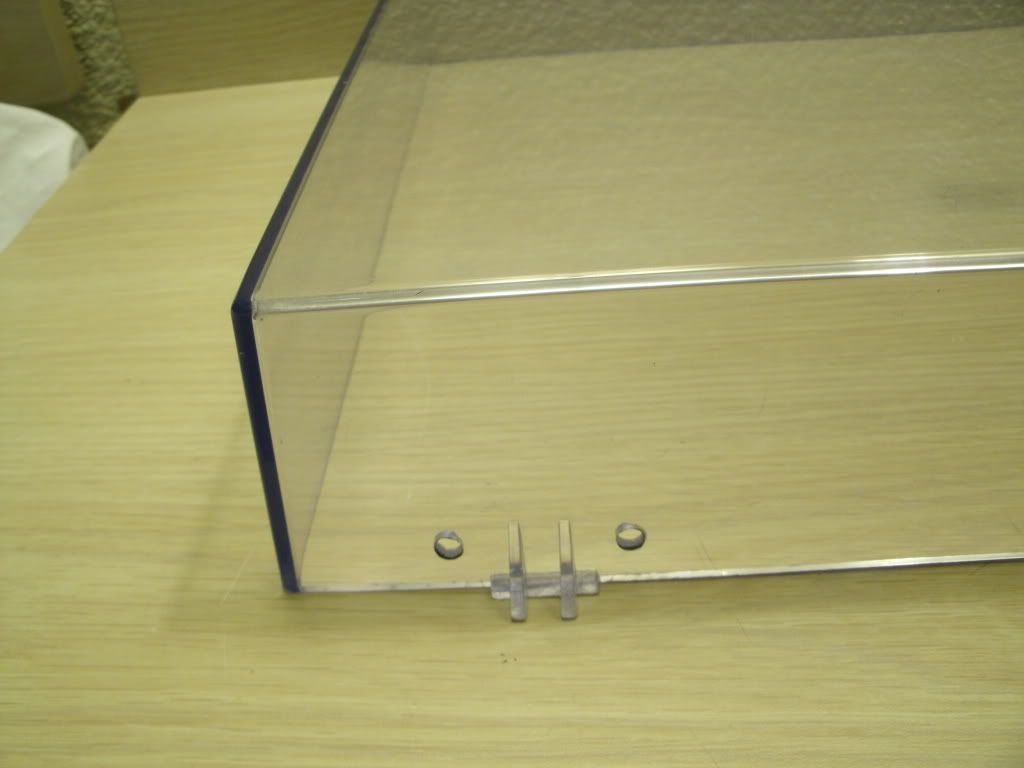
The first thing I did was to cut off all of what remained of the tongues. This required that I make a horizontal cut which removed all of the tongue but left the little "buttresses" that are supposed to strengthen the tongues. Then I drilled four holes to mount the parts I was about to make to replace the tongues. (I did these things first because if I managed to screw up the dustcover there would be no point in continuing.") ) Then I polished the dustcover.
) Then I polished the dustcover.
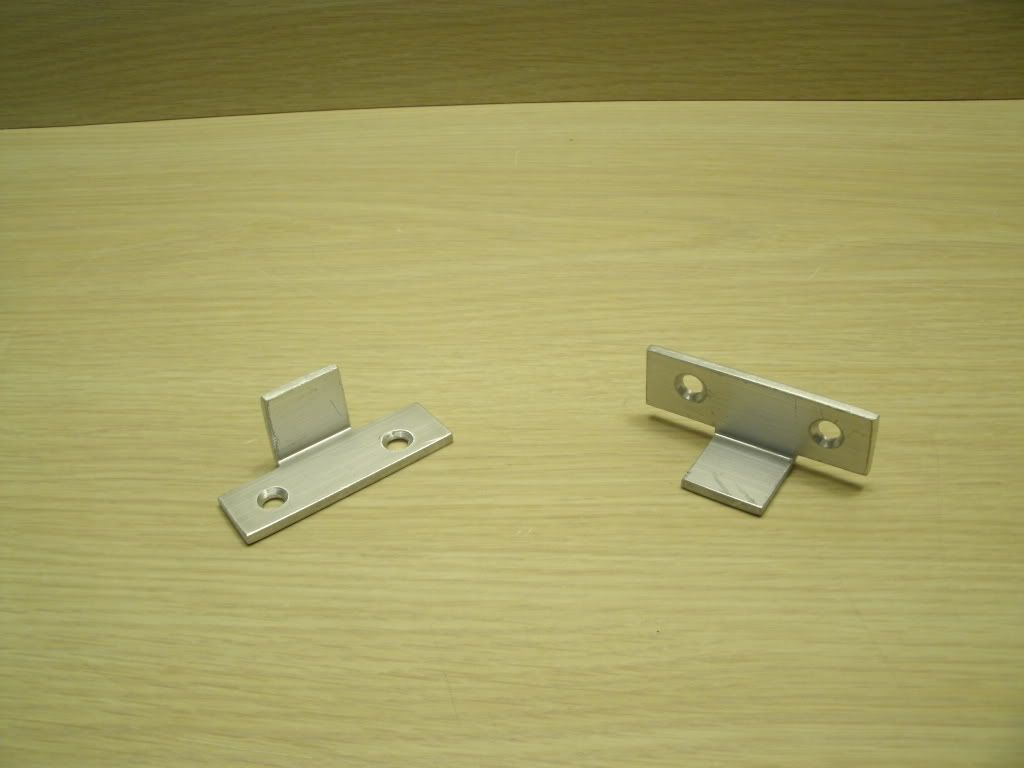
Then I got a piece of 1" x 1/8" aluminum angle and made up the replacement tongues. I made 2 pieces. The measurement of the tongue is 13/16" wide and 7/8" long as measured on the outside of the angle. The width of the part that bolts to the dustcover is 2 1/4" but that's not so critical.
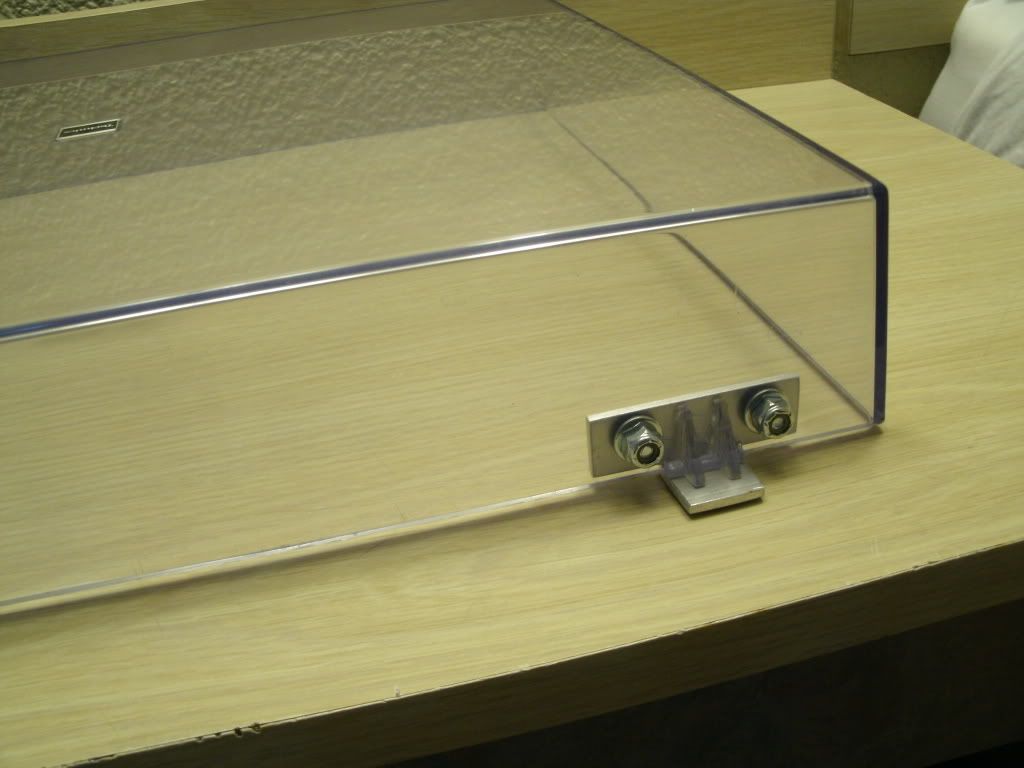
Then I attached them to the dustcover.....
.... and installed the dustcover on the turntable.

Overall, I'm quite pleased. The 1/8" tongues fit the hinges very well but they're slightly thicker than the originals. That means that the hinges have to be raised up out of the sockets they fit into very slightly in order for the cover to fully close. A small matter and a fair trade-off for repairing an otherwise unusable dustcover.
John
So, I came up with a much simpler design that takes far less work and far less skill. Here's the thread describing therevised design.
http://audiokarma.org/forums/index.php?threads/technics-dustcover-fix-redux.656267/
I guess pretty much anyone who has ever owned a Technics turntable with those plastic "tongues" on the dustcover that insert into the hinges has had to confront the issue of the ends of the tongues snapping off. I just picked up an SL-D3 with a badly scratched dustcover on which both tongues were gone and I came up with a fix that I thought I'd share.
The first thing I did was to cut off all of what remained of the tongues. This required that I make a horizontal cut which removed all of the tongue but left the little "buttresses" that are supposed to strengthen the tongues. Then I drilled four holes to mount the parts I was about to make to replace the tongues. (I did these things first because if I managed to screw up the dustcover there would be no point in continuing.
) Then I polished the dustcover.
Then I got a piece of 1" x 1/8" aluminum angle and made up the replacement tongues. I made 2 pieces. The measurement of the tongue is 13/16" wide and 7/8" long as measured on the outside of the angle. The width of the part that bolts to the dustcover is 2 1/4" but that's not so critical.
Then I attached them to the dustcover.....
.... and installed the dustcover on the turntable.
Overall, I'm quite pleased. The 1/8" tongues fit the hinges very well but they're slightly thicker than the originals. That means that the hinges have to be raised up out of the sockets they fit into very slightly in order for the cover to fully close. A small matter and a fair trade-off for repairing an otherwise unusable dustcover.
John
Last edited:


