

From car damping success wrt noise and resonance, I was curious to know what happens to this delicate piece of engineering marvel. After reading I cam to know this tonearm has resonance of below 13Hz. So damping will help for low frequency. Metal ringing was supposed to garble HF. So after carefully understanding Service Manual and various forums, I made my mind to go ahead with this project.
References:
http://www.audiokarma.org/forums/showthread.php?t=356870
http://www.audiokarma.org/forums/showthread.php?t=289553
http://www.audiokarma.org/forums/showthread.php?t=307870
My TT was already has gone upgrade of Stock RCA cable replaced with low capacitance component cable, thanks to forum member Sachin. Somehow during first attempt of damping I broke delicate stock tonearm wire. So it was high time to replace all tonearm wires. Thought of replacing headshell wire leads too.
This is step by step journey of my efforts.
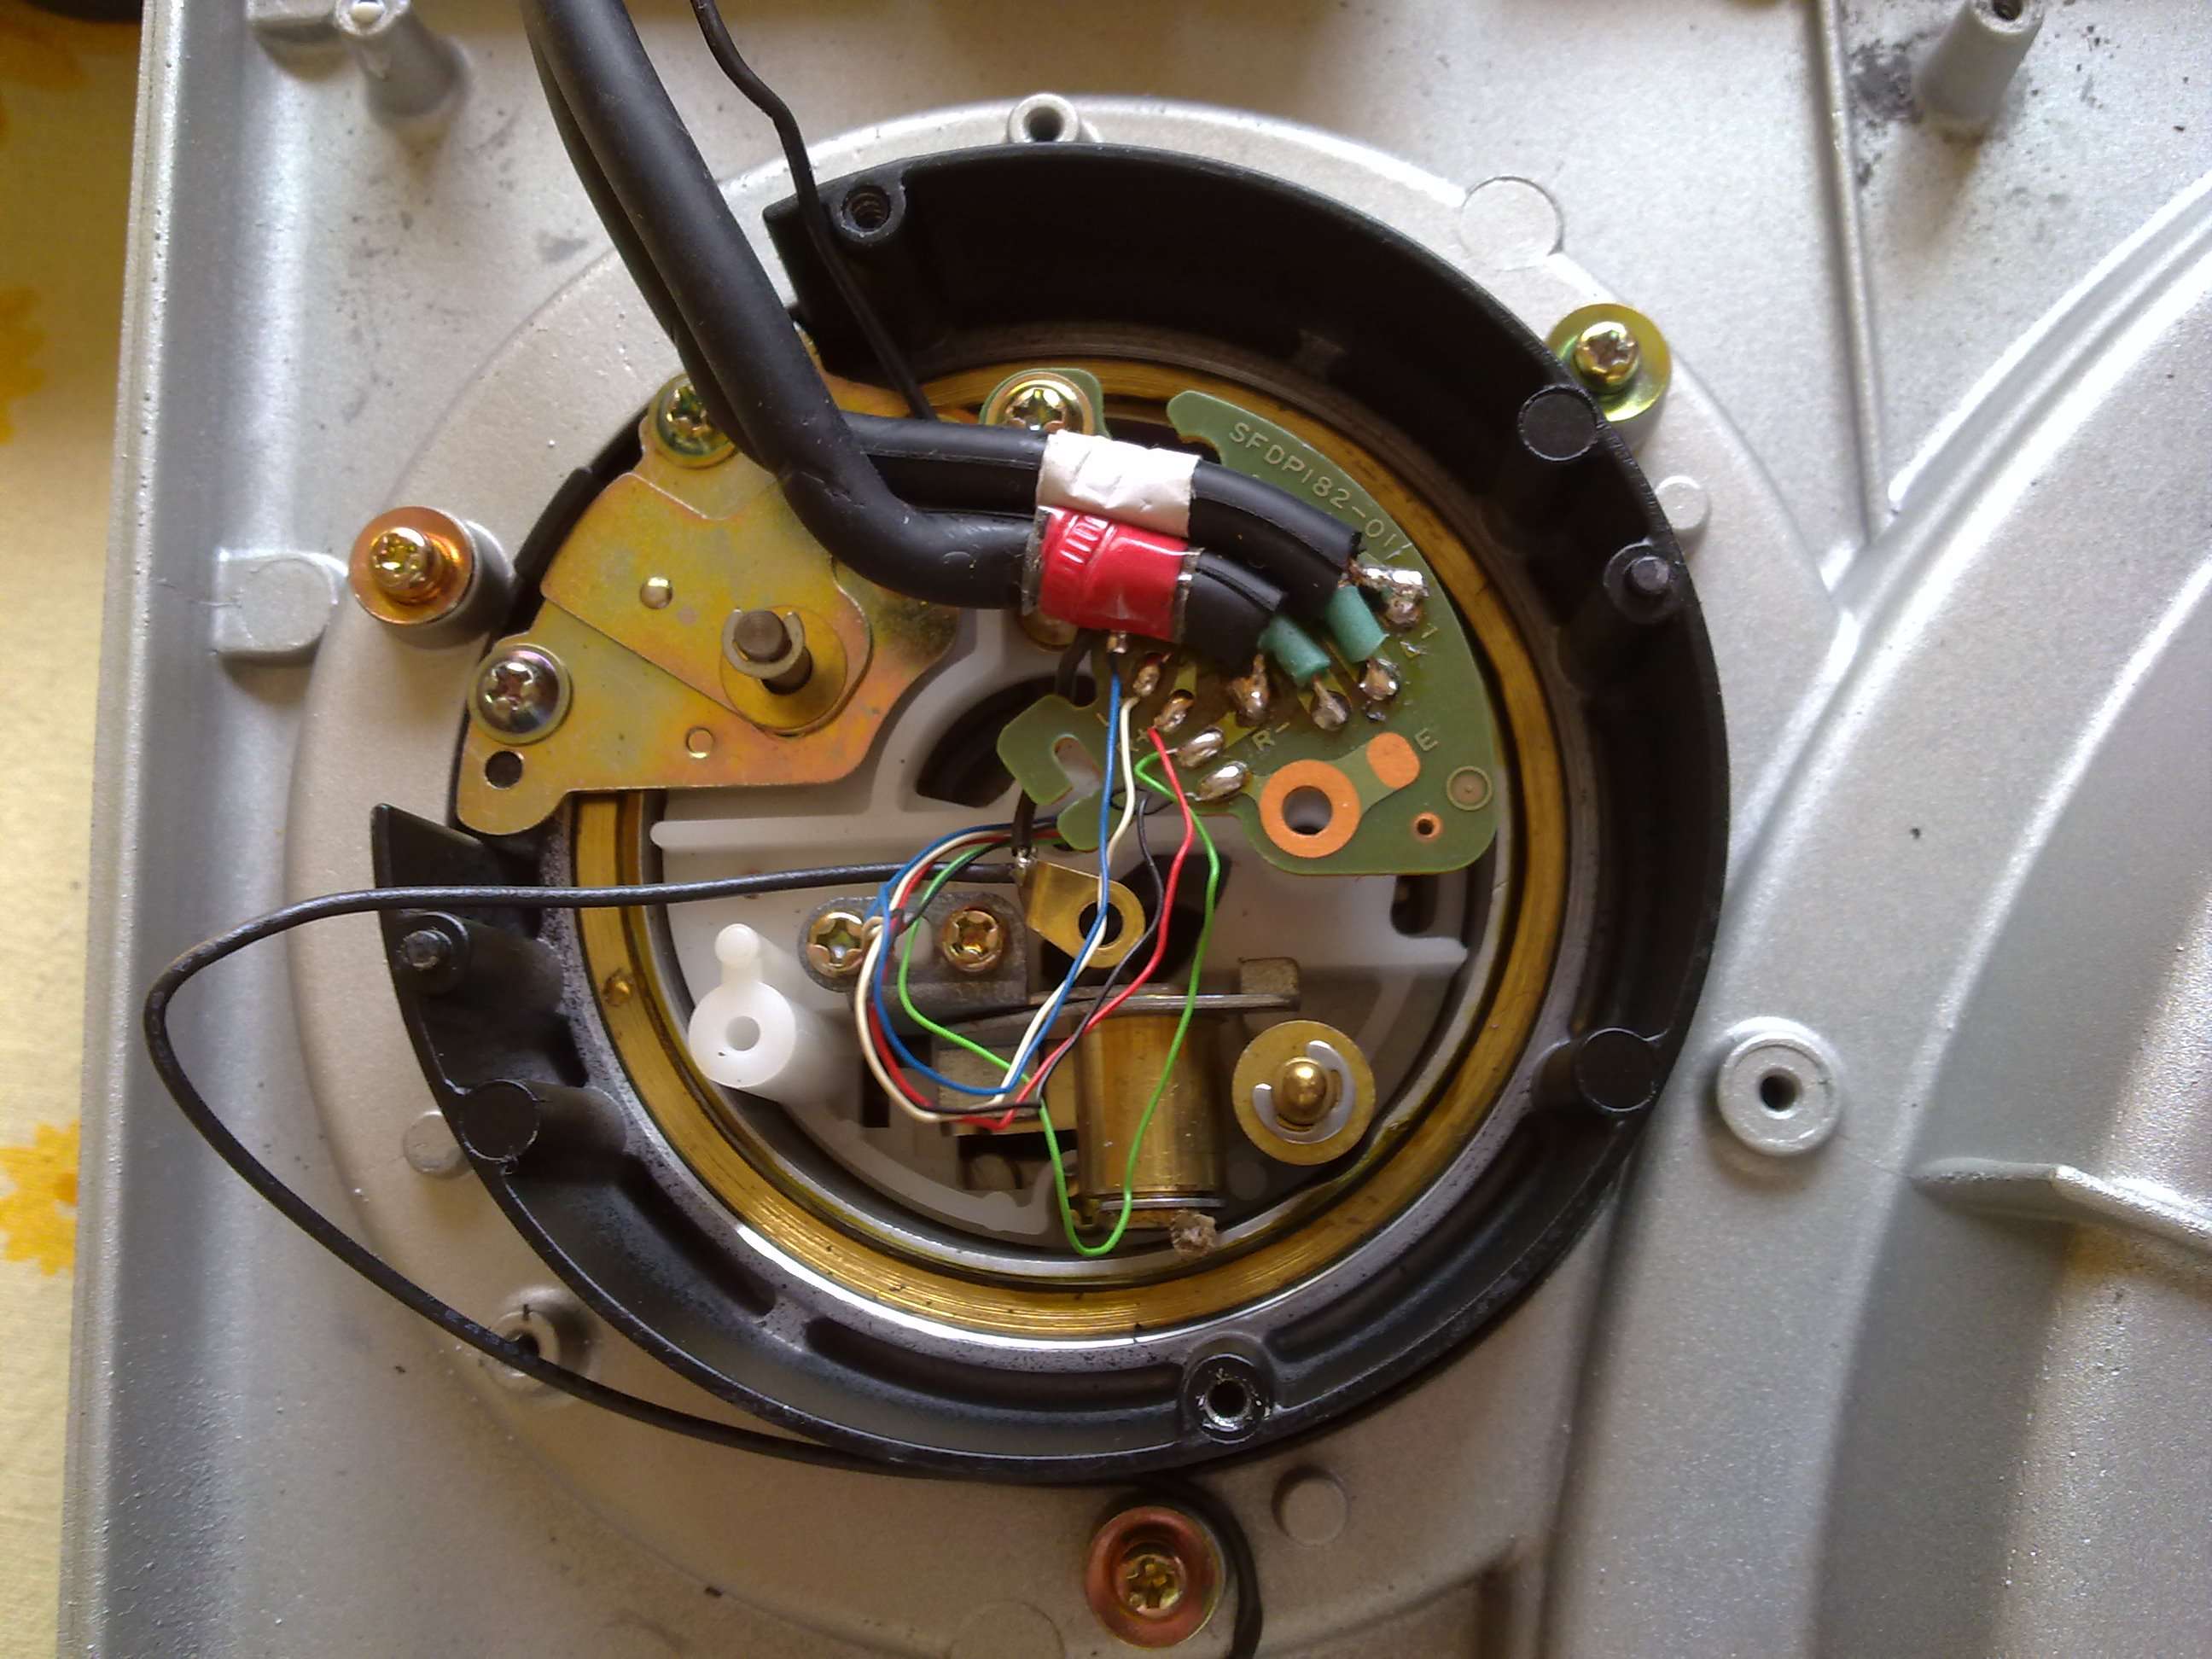
Original tonearm base from bottom side:
BOM:
Heat-shrink tubing and nylon clip for RCA wire is locally bought from market. You can find it locally at any electrical-cum-hardware store.
Other items sources are as follows, [no affiliation with anyone] -
Ear plugs from local tool/sports shop or here
Cardas wire - Parts ConneXion - The authority on hi-fi DIY parts and components search product codes for different colors
CARDAS-70871, CARDAS-70872, CARDAS-70873, CARDAS-70874, CARDAS-73813
or - KAB ELECTRO ACOUSTICS ->Sound Accessories -> INTER CONNECTS
Cotton Sleeve 1 ft X 7mm/5mm Cotton Tube - http://www.partsconnexion.com/product1179.html
Headshell Lead wires
1 set X Headshell Connector wire - AUDIO QUEST HL-5 Headshell Leads,
or here Garage 'A Records: Product Detail
New material will add extra weight of <1.0 grams


This is how I pulled those delicate wires. Look at the single strand of cat5 cable against tonearm wires. While handling, these are real pain in bottom side of human being.

Cotton sleeve is added, extra length will be cut.

Heatshrink tubing done over tonearm pipe. Gently heated by holding in hand, 12-15" above over flame of kitchen gas stove.

New wires are through.

This is how tonearm end looks

Now wires will be pulled from base of bearing area.

Tonearm tube finished with new wires in place. Here care must be taken to keep azimuthal setting perfect, no twist in tonearm pipe while fitting it back.
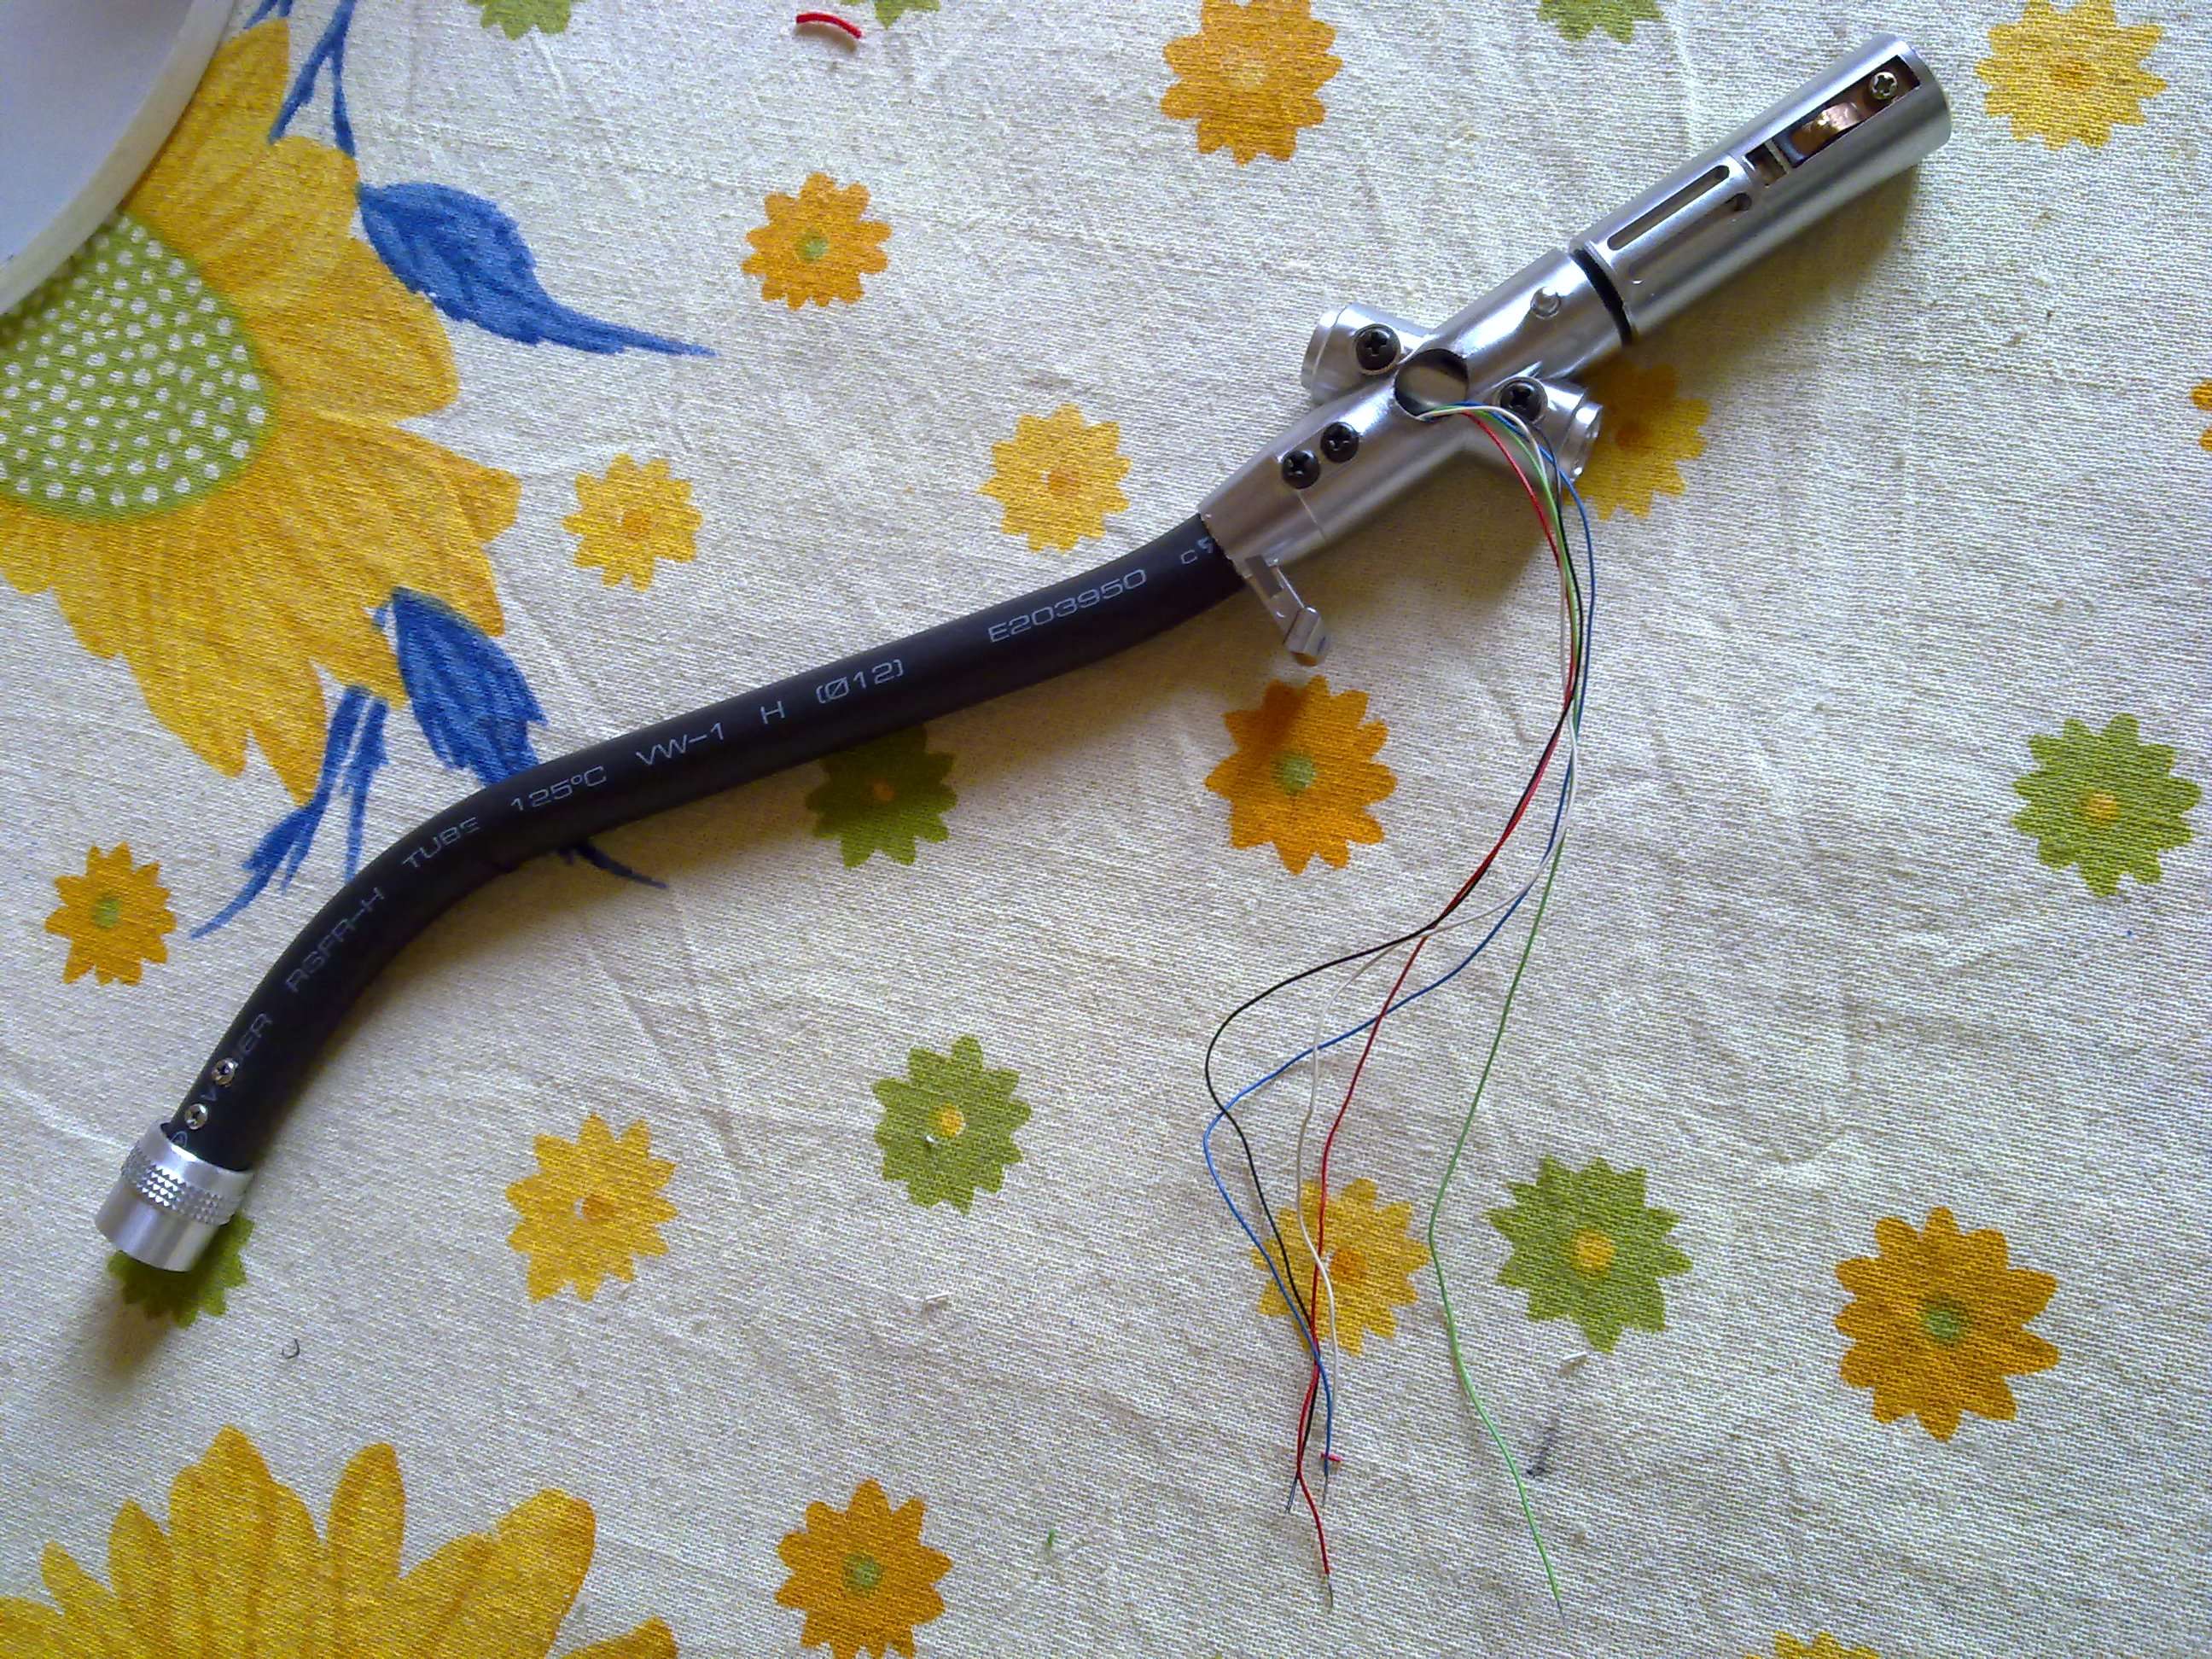
Tonearm base added to tube.
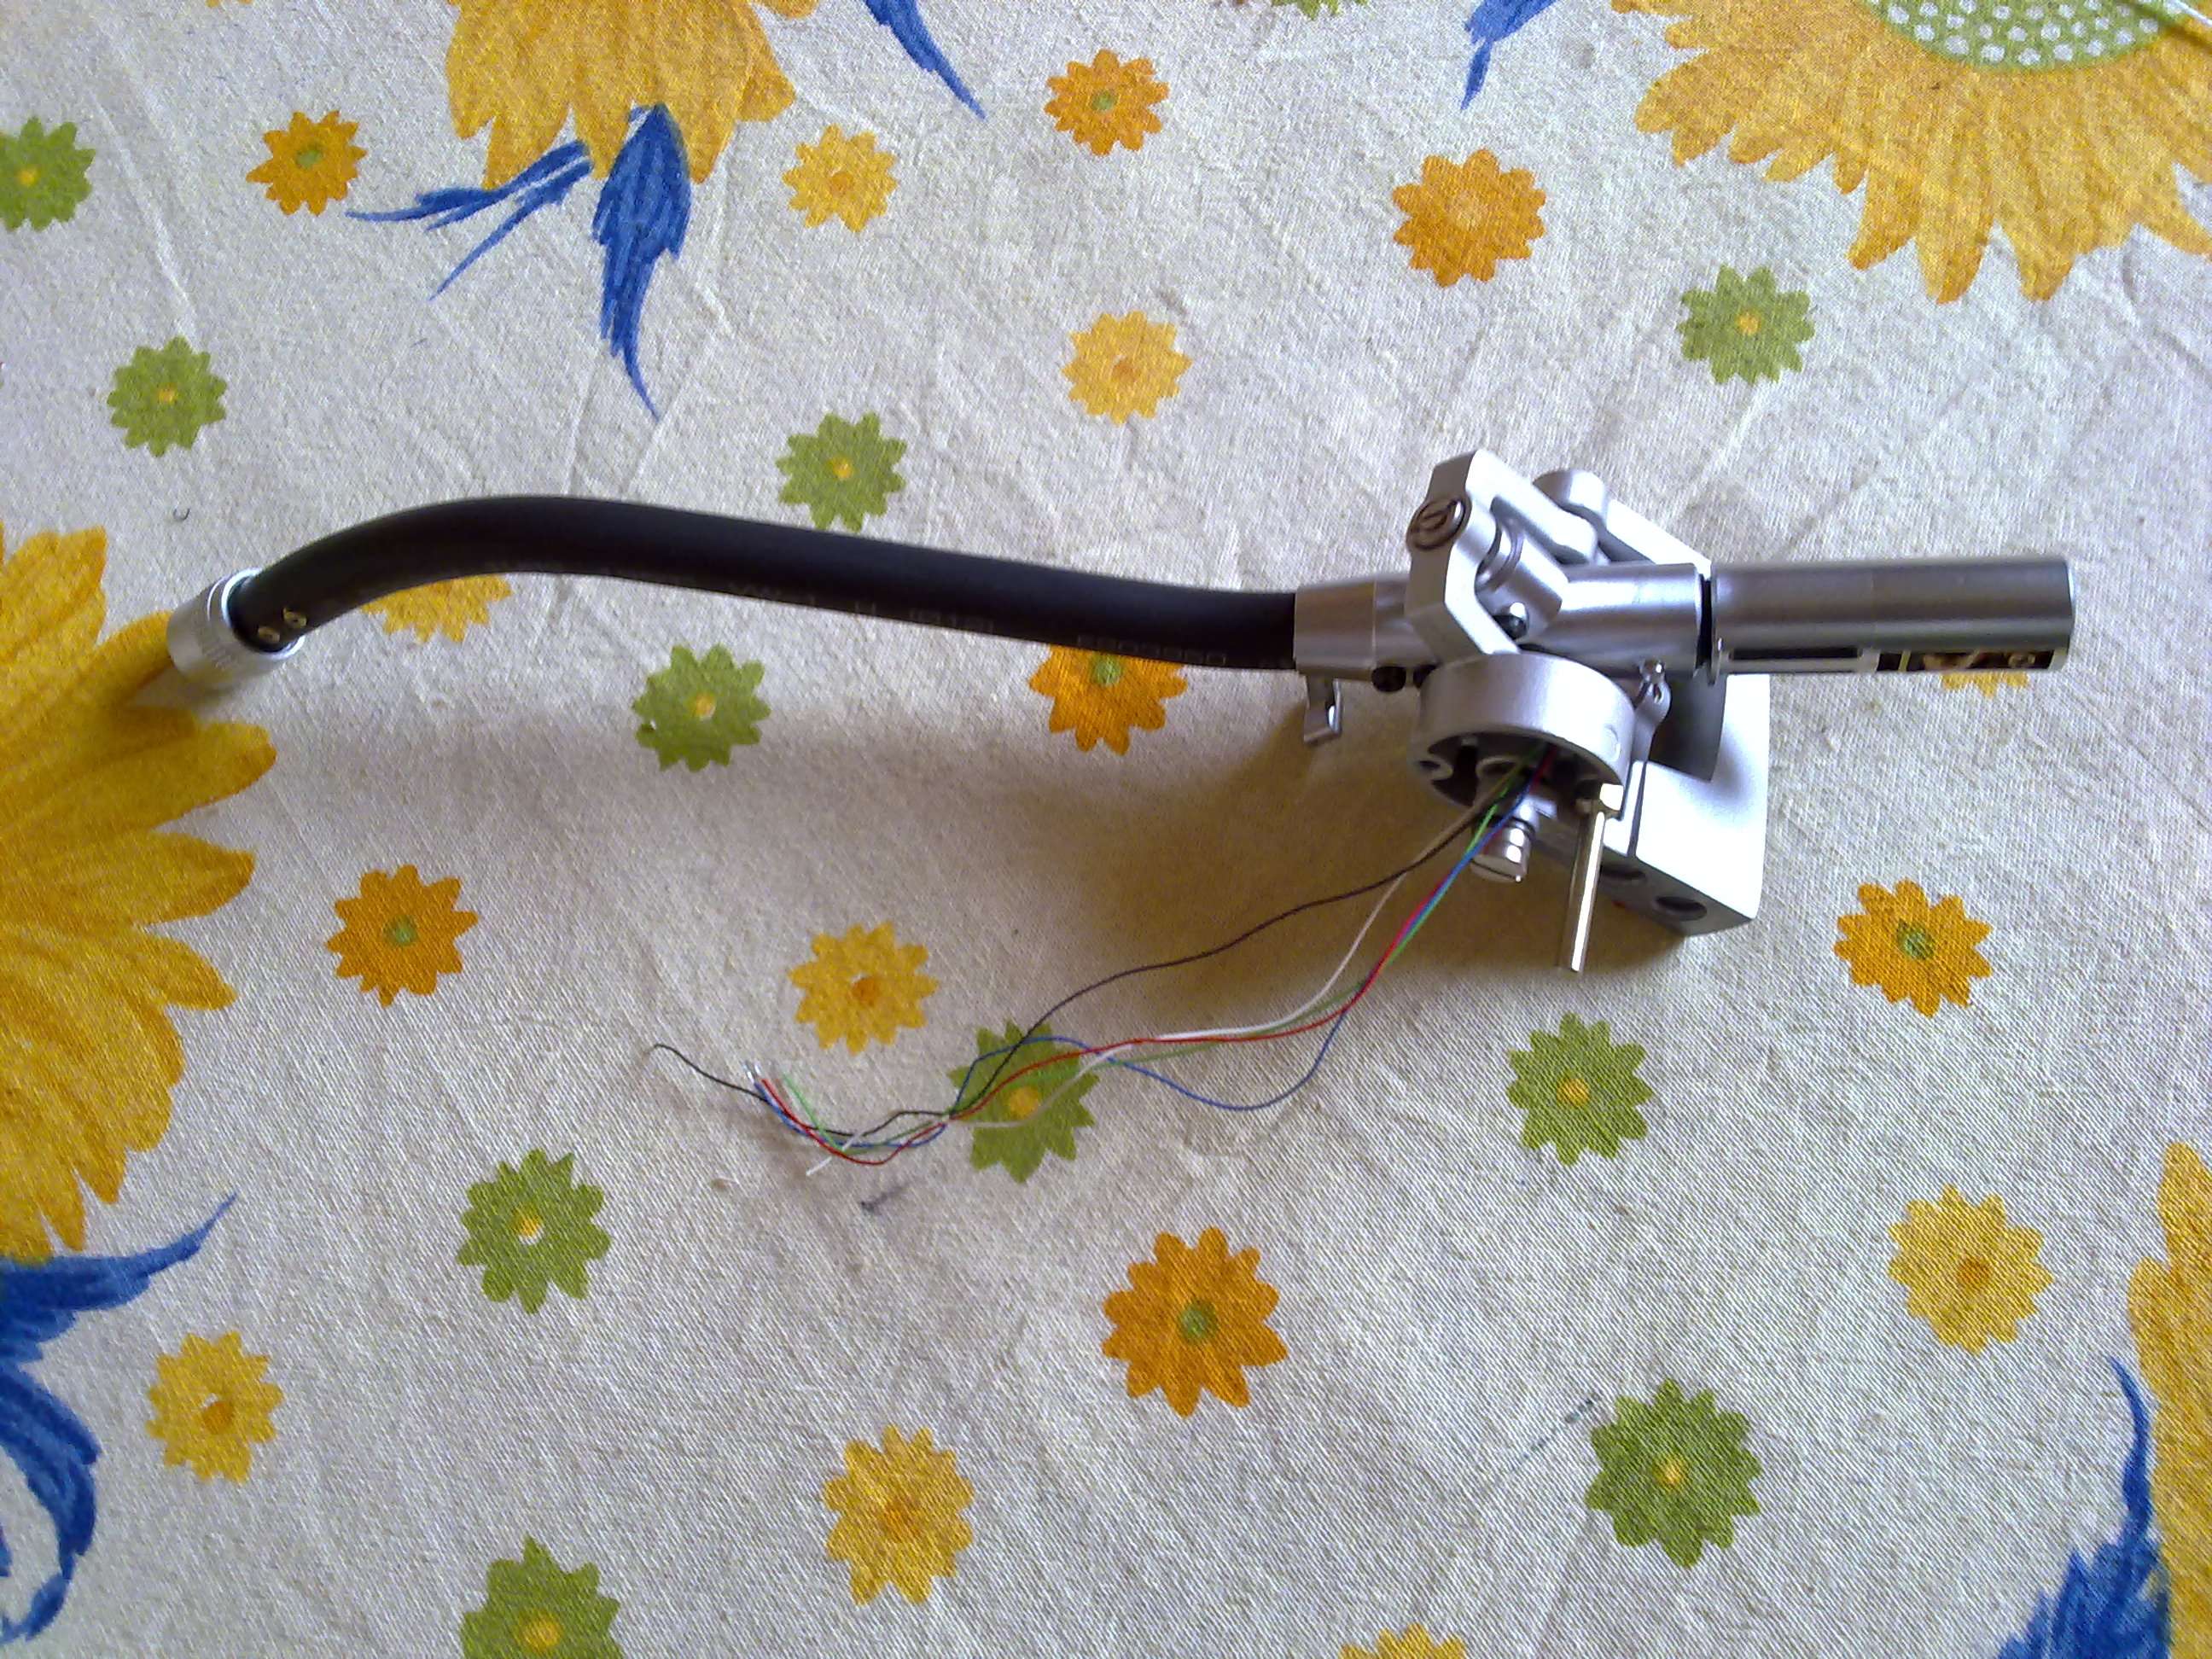
Complete assembly into Bottom plate. Here I have adjusted anti-skate which was off by -0.200 grams. VTA setting was off by 1mm. I followed steps mentioned in Service Manual. Anti-skate spring should contact resting tonearm handle at 0.5 setting. For VTA 0-6mm adjustment should be equal on both side of reading scale position '3'. Also with the help of toothpick, I put 1 drop of Sewing machine oil to each side of tonearm bearing

Bottom side wiring completed. Closeup of bottom side wiring. I kept solder material as little as possible. I did not exclude that PCB because it does not harm anyway. It provides better handling and mechanical strength, keeps area tidy and neat. I am not blessed to hear differences by excluding PCB and connecting directly to RCA wires.
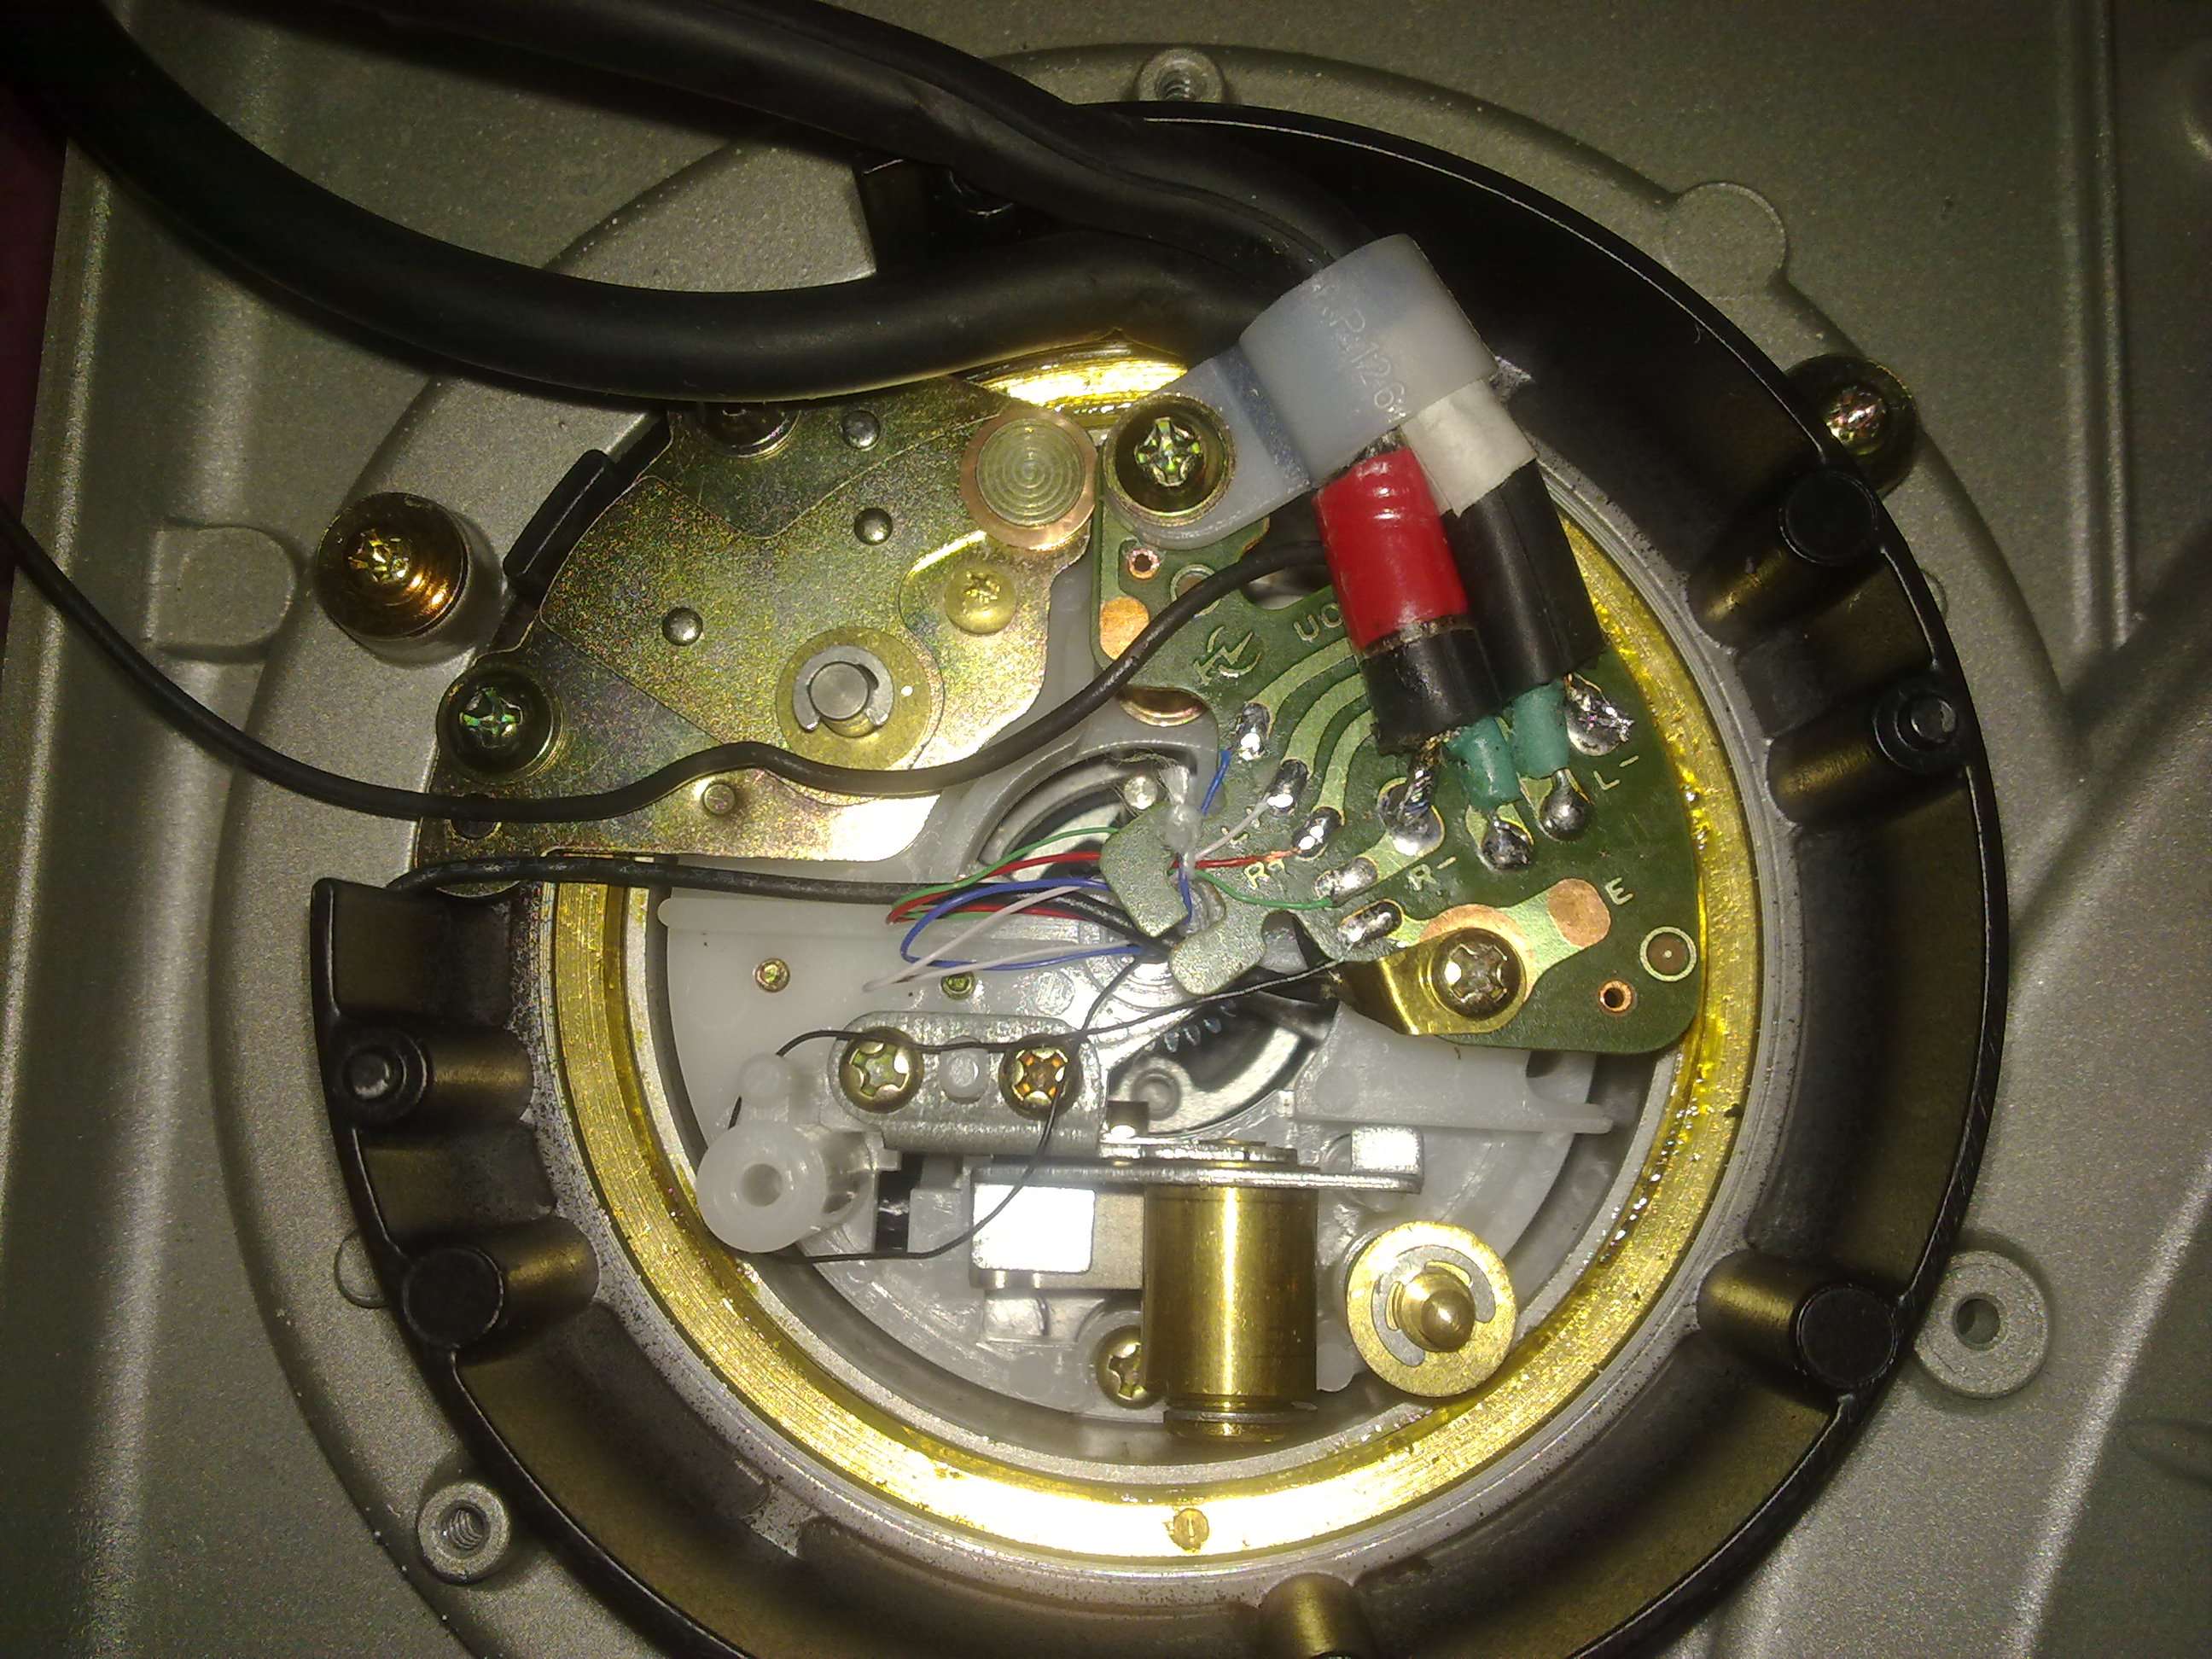
New headshell Litz wires are in place.

Happy singing

Some tips which helped me a lot:
Now the difference:
I can't describe unless you hear it.
In summary - Bass details are noticeable, HF is clearer than ever. Vocals are smooth. This system became more silent (I am getting this feeling as I can notice more details everywhere in song).
In one line - My turntable is turned into something new in better way, never heard it so clean, better sounding.
References:
http://www.audiokarma.org/forums/showthread.php?t=356870
http://www.audiokarma.org/forums/showthread.php?t=289553
http://www.audiokarma.org/forums/showthread.php?t=307870
My TT was already has gone upgrade of Stock RCA cable replaced with low capacitance component cable, thanks to forum member Sachin. Somehow during first attempt of damping I broke delicate stock tonearm wire. So it was high time to replace all tonearm wires. Thought of replacing headshell wire leads too.
This is step by step journey of my efforts.
Original tonearm base from bottom side:

BOM:
- Ear plugs (3M): It is used for damping hollow portion of tonearm which holds balance weight part. It will be used after removing chord, only plugs. I used this.
- Cotton Sleeves: This was supposed to used as stuffing inside tonearm. 6" leaving area of headshell DIN socket wires and ground lug connection. This is
loosely wound, light weight, soft and without any varnish or color. I used this. - Cardas wires: This is litz wire insulated with Teflon. Used 11" for exact wiring inclusive of 1" extra wire loose around.
- Heatshirnk tube (2:1) - 125C/10mm dia for damping outside of tonearm, used aprox 6". Better measured on the tonearm tube directly.
- New headshell wires.
- Wire holding nylon clip for RCA wires
Heat-shrink tubing and nylon clip for RCA wire is locally bought from market. You can find it locally at any electrical-cum-hardware store.
Other items sources are as follows, [no affiliation with anyone] -
Ear plugs from local tool/sports shop or here
Cardas wire - Parts ConneXion - The authority on hi-fi DIY parts and components search product codes for different colors
CARDAS-70871, CARDAS-70872, CARDAS-70873, CARDAS-70874, CARDAS-73813
or - KAB ELECTRO ACOUSTICS ->Sound Accessories -> INTER CONNECTS
Cotton Sleeve 1 ft X 7mm/5mm Cotton Tube - http://www.partsconnexion.com/product1179.html
Headshell Lead wires
1 set X Headshell Connector wire - AUDIO QUEST HL-5 Headshell Leads,
or here Garage 'A Records: Product Detail
New material will add extra weight of <1.0 grams

This is how I pulled those delicate wires. Look at the single strand of cat5 cable against tonearm wires. While handling, these are real pain in bottom side of human being.

Cotton sleeve is added, extra length will be cut.

Heatshrink tubing done over tonearm pipe. Gently heated by holding in hand, 12-15" above over flame of kitchen gas stove.

New wires are through.

This is how tonearm end looks

Now wires will be pulled from base of bearing area.

Tonearm tube finished with new wires in place. Here care must be taken to keep azimuthal setting perfect, no twist in tonearm pipe while fitting it back.

Tonearm base added to tube.

Complete assembly into Bottom plate. Here I have adjusted anti-skate which was off by -0.200 grams. VTA setting was off by 1mm. I followed steps mentioned in Service Manual. Anti-skate spring should contact resting tonearm handle at 0.5 setting. For VTA 0-6mm adjustment should be equal on both side of reading scale position '3'. Also with the help of toothpick, I put 1 drop of Sewing machine oil to each side of tonearm bearing

Bottom side wiring completed. Closeup of bottom side wiring. I kept solder material as little as possible. I did not exclude that PCB because it does not harm anyway. It provides better handling and mechanical strength, keeps area tidy and neat. I am not blessed to hear differences by excluding PCB and connecting directly to RCA wires.

New headshell Litz wires are in place.

Happy singing

Some tips which helped me a lot:
- Never pull wires, specially tonearm wires. Its outer jacket extends and you feel extra length of wire without any copper inside it. Handle it with extra care.
- Be extra careful while working around/with tonearm bearing. Here you can loose small metal balls from bearing. Refrain from applying force to bearing screws. just gentle tightening will do. Otherwise loose bearing will have play and tight runs risk of bearing damage along with adding distortion in sound.
- While soldering these wire, never strip using any other stripper tool or blade. I used molten solder blob to burn required coating. Just apply some wax over the wire and insert inside molten solder material. This will burn the cover and tin the strands. Clean solder tip for each wire end and use fresh solder material.
- Keep photo of each step before removing any screw. This will help if lost track of actions in between.
- Never be in hurry. Patience is good way to follow.
- Care must be taken to keep azimuthal setting perfect, no twist in tonearm pipe while fitting it back.
- Most important - before putting back assembly, wash you hands and clean every part of metal in contact using IPA or PCB cleaner solution. Clean contacts in grounding, headshell sockets, wires, clips will eliminate buzzing, hum and unwanted resonances.
- Complete VTA, VTF, anti-skate setting properly. Cartridge is well aligned. Otherwise all above effort is in vain.
Now the difference:
I can't describe unless you hear it.
In summary - Bass details are noticeable, HF is clearer than ever. Vocals are smooth. This system became more silent (I am getting this feeling as I can notice more details everywhere in song).
In one line - My turntable is turned into something new in better way, never heard it so clean, better sounding.
Last edited:


